10 Minute Smashed Chickpea Salad Sandwich
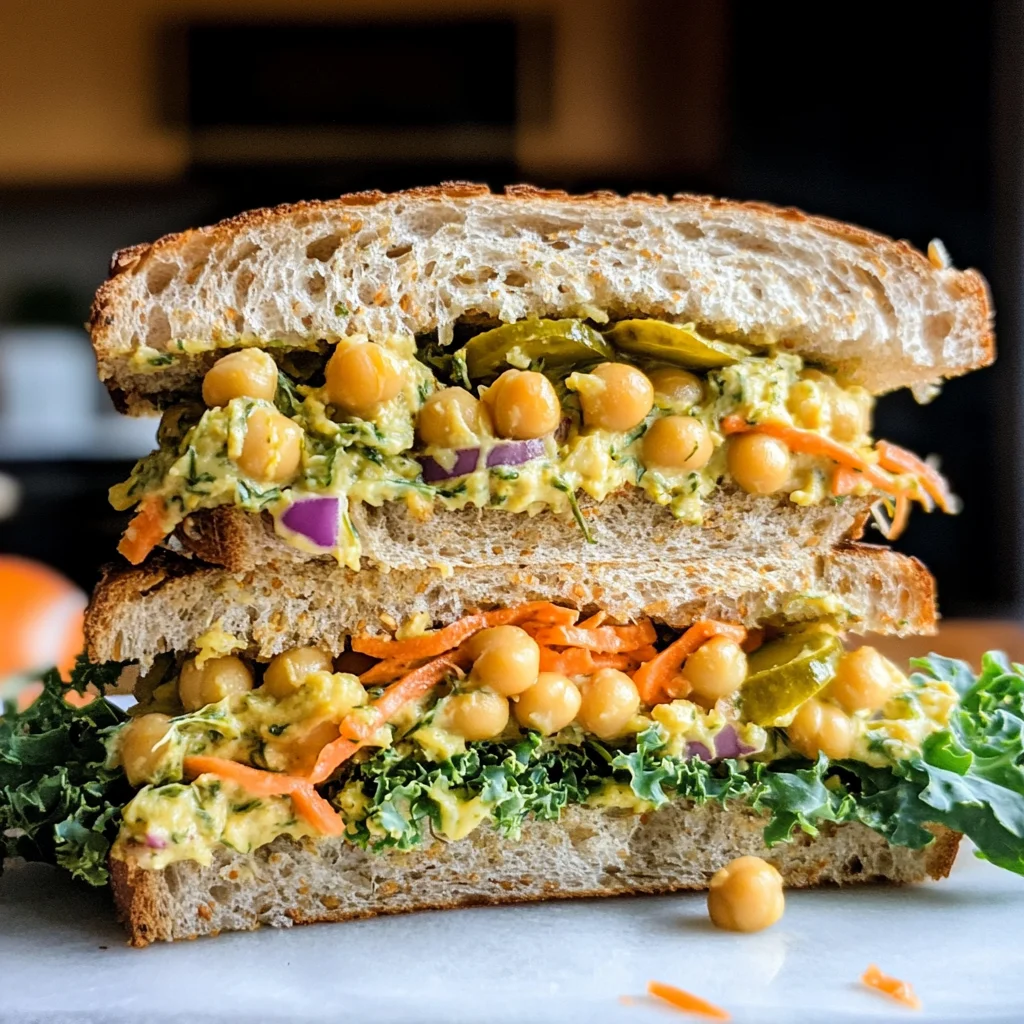
There’s something utterly captivating about a dish that not only satisfies the palate but also stirs the heart. The 10 Minute Smashed Chickpea Salad Sandwich is exactly that—a delightful fusion of flavors and textures that serves as both a nourishing meal and a nostalgic trip down memory lane. Imagine sinking your teeth into hearty, creamy chickpeas mingling with tangy dill pickles and vibrant purple onion, all nestled between slices of multigrain bread. It’s more than just food; it’s an experience that brings friends together around the table. Trust me, this recipe is a revelation—an effortless way to create something beautiful in your kitchen, even on the busiest of days. Plus, it’s vegetarian and vegan, making it accessible for anyone looking to enjoy a nutritious meal without compromising on flavor.
As I reminisce about my early cooking adventures, I remember how discovering plant-based alternatives opened up a world of culinary possibilities for me. This smashed chickpea salad sandwich is a perfect example of how we can take simple ingredients—like canned chickpeas—and transform them into something profoundly satisfying. It’s brightened up with fresh dill and tart pickles, offering a delightful contrast in flavors that makes every bite feel like a celebration! Whether you’re preparing it for lunch or serving it at dinner, this dish shines in its simplicity and versatility. Let’s dive into this culinary journey together!
10 Minute Smashed Chickpea Salad Sandwich: A Wholesome Delight
This recipe is not just quick; it’s also loaded with flavor and nutrition! The 10 Minute Smashed Chickpea Salad Sandwich will become your go-to option when you need something satisfying yet quick to prepare. With its creamy texture and zesty undertones, this sandwich can stand tall alongside any classic deli favorite while keeping things light and fresh. Best of all? You can whip it up in just ten minutes! Ready? Let’s gather our ingredients.
Ingredients:
Embarking on this culinary adventure means we need to gather some wonderful ingredients that not only taste great but also complement each other beautifully. Each element plays a vital role in creating the symphony of flavors that make our smashed chickpea salad sandwich truly outstanding.
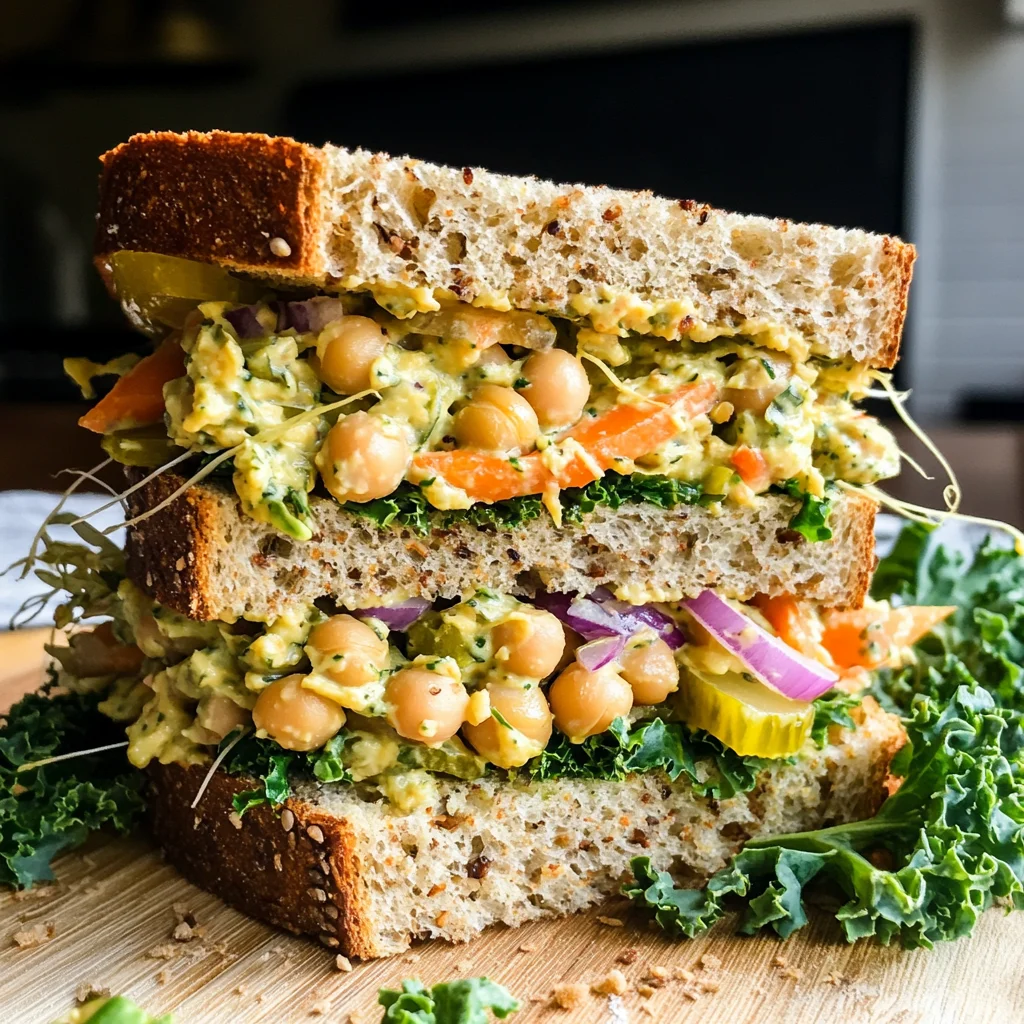
- 1 (425g) Can Chickpeas: These little gems are the star of our show! Chickpeas are packed with protein and fiber, making them an excellent base for our salad. When you mash them, they create a rich creaminess that forms the foundation of our sandwich while still providing some delightful texture from the whole beans left intact. Look for cans with no added salt or preservatives if possible; you want the purest form to work with.
- 1/4 C + 1 Tbs (55g) Dill Pickles (finely chopped): Ah, dill pickles—the secret weapon for adding that irresistible tang! Their crunchiness adds contrast to the soft chickpeas while their acidity cuts through the richness of the mayo. If you’re feeling adventurous or can’t find dill pickles, try using bread-and-butter pickles for a sweeter twist or even homemade pickle relish if that’s your jam!
- 1/4 C (35g) Purple Onion (finely chopped): The vibrant color and sharp flavor of purple onion bring brightness to our dish. This ingredient not only adds crunch but also a lovely zing that elevates the overall flavor profile. When chopping onions, be sure to rinse them under cold water afterward to mellow out their pungency if you prefer a milder taste.
- 2 Tbs (30g) Just Mayo or Vegenaise: This creamy element is essential for binding everything together while contributing to that luscious mouthfeel we crave in sandwiches. Just Mayo or Vegenaise provides the same richness as traditional mayo without any animal products, making it perfect for our vegan friends! If you want a lighter option, feel free to use unsweetened yogurt as an alternative.
- 2 1/2 tsp Stone Ground Mustard: The depth of flavor this mustard brings cannot be overstated! It adds an earthy spiciness that complements the creaminess perfectly while balancing out the sweetness from other ingredients. Stone ground mustard has more texture than regular mustard—this little difference elevates your sandwich from ordinary to extraordinary!
- 1 1/2 tsp Apple Cider Vinegar (or pickle juice): A splash of acidity is what brings everything together harmoniously! Apple cider vinegar brightens flavors and helps cut through richness; it’s essential for achieving balance in our salad dressing-like mixture. If you have leftover pickle juice handy from your pickles, feel free to substitute it here for an extra zing!
- 1/4 + 1/8 tsp Fine Sea Salt: Seasoning properly is absolutely paramount in any dish! Salt enhances natural flavors and brings everything to life; however, be cautious not to overdo it since both pickles and mustard contain sodium already.
- 2 tsp Fresh Dill (fresh-chopped): Fresh herbs are like nature’s confetti—adding vibrancy and brightness! Dill harmonizes beautifully with chickpeas by emphasizing their earthiness while providing another layer of freshness. If fresh isn’t available, dried dill will suffice as well; just use about one-third less since dried herbs are more concentrated.
- 1/8 tsp Ground Turmeric (optional for color): While this spice may seem optional, using turmeric not only gives your salad a gorgeous golden hue but also boasts anti-inflammatory properties—making your meal even healthier! Don’t worry if you don’t have it on hand; this step can easily be skipped without sacrificing flavor.
- 8-10 grinds of fresh Black Pepper: Freshly ground pepper lends warmth and subtle heat which enhances all these other incredible flavors beautifully! Using whole peppercorns ground right before cooking creates an aromatic experience; trust me—it makes all the difference!
- Multigrain Bread or Optional Gluten Free Bread: Choosing good-quality bread is crucial because it acts as the canvas for your masterpiece! Multigrain bread offers wholesome goodness while gluten-free options ensure everyone can enjoy this treat without worry about dietary restrictions.
- Sprouts: Tiny yet mighty sprouts add crunch along with nutritional benefits such as vitamins K & C—plus they give personality too!
- Kale: Packed full of nutrients like antioxidants and fiber, kale adds another layer of texture along with distinctive earthy notes when layered into your sandwich or salad.
- Shredded Carrots: Sweetness from shredded carrots enhances both presentation and taste; they provide color contrast while keeping things crunchy!
- Lettuce: A classic choice—the crispness balances out other textures beautifully while providing freshness throughout each bite!
- Tomatoes: Juicy slices bring moisture along with bursts of flavor; think about using heirloom varieties for their unique tastes or colors—even better if they’re homegrown!
Equipment You’ll Need:
Having the right tools makes cooking smoother and more enjoyable—it’s like having trusty companions by your side during this culinary adventure! While they may not be ingredients, these pieces are essential partners in creating something wonderful together.
- Potato Masher: This simple yet effective tool is key for achieving that perfect rough mash consistency with your chickpeas without turning them into mushy paste—a process known as “mashing.” If you don’t have one handy, fork mashing works too but requires more elbow grease!
- Mixing Bowl: A large mixing bowl allows ample space for combining all those delicious ingredients without fear of spills—it makes mixing easy breezy too! Go for glass or stainless steel options since they won’t retain odors from previous uses.
- Chopping Board & Knife: Sharp knives are non-negotiable when prepping vegetables like onions or carrots—safety first! Having good-quality cutting boards ensures ease during chopping sessions while protecting countertops as well.
Preparing the 10 Minute Smashed Chickpea Salad Sandwich
Step 1: Roughly Mash Those Chickpeas
First things first—let’s get those chickpeas ready! Open up your can of chickpeas (I recommend rinsing them thoroughly under cool water beforehand), then dump them into your mixing bowl. Grab your potato masher now—this tool will help us achieve that coveted creamy texture while still leaving some whole beans intact for character. Start mashing away until most are smashed but remember—you want some whole ones left behind too! This mix creates delightful textural contrast within every bite—a crucial part of what makes this sandwich so satisfying.
Step 2: Add Flavorful Friends
Once you’ve achieved that ideal consistency with your chickpeas, it’s time to bring everyone else into play—the pickles, purple onion, mayo (or alternative), stone-ground mustard…you get where I’m going here! Carefully fold each ingredient into those mashed chickpeas—this gentle mixing technique ensures nothing gets overworked or mushy which would ruin our beautiful creation’s integrity later on down-the-line when assembling sandwiches! Take note—don’t rush through adding these components because tasting along every step allows adjusting seasoning levels based upon personal preferences before finalizing flavors becomes paramount here!
Step 3: Season Like a Pro
Now let’s season our mixture beautifully by adding apple cider vinegar (or pickle juice), fine sea salt sprinkled evenly throughout plus freshly cracked black pepper enhancing aromas wafting through air suggesting something special awaits us ahead… Remember earlier when I mentioned adjusting seasoning? This step provides opportunity—you’ll want everything balanced perfectly according taste buds’ desires so take time sampling bites straight from bowl until satisfied by results achieved thus far before moving forward onto next phase assembly-wise!
Step 4: Build Your Masterpiece
Now comes one of my favorite parts—the assembly process where everything magically comes together creating visual feast worthy enough showcasing tasty talent inside kitchen today… Grab those slices of multigrain bread now spread generous dollops across surface area ensuring coverage maximized beautifully followed by layering additional veggies atop smashed chickpea spread bringing freshness enhancing overall satisfaction level soaring higher than ever imagined possible previously during prep stages leading us here today where ultimate joy lies ahead awaiting discovery through first bite taken soon thereafter…
I can’t wait to share how amazing this sandwich turns out once it’s all put together—and trust me—you’ll want seconds after experiencing first-hand delight bursting forth within every mouthful enjoyed wholeheartedly amongst family friends alike gathering ‘round table eager sharing stories laughter marking moments cherished forevermore… Stay tuned as we continue unraveling secrets behind creating perfect 10 Minute Smashed Chickpea Salad Sandwiches next time we meet again soon enough!
Step 5: The Art of Combining Flavors
Now that you have your chickpeas roughly mashed to a delightful consistency, it’s time to infuse this mix with a symphony of flavors. Add the finely chopped dill pickles and purple onion to the bowl first; these ingredients will add a tangy crunch that’s simply irresistible. The pickles bring that necessary acidity, while the onion contributes sweetness and depth. To amplify this medley, introduce the creamy Just Mayo or Vegenaise—you want just enough to bind everything together without overwhelming the chickpeas. This is where the magic happens! The mayo will lend a silky texture that coats each ingredient beautifully.
Next, it’s time to add in the stone-ground mustard and apple cider vinegar. I promise you, this combination is absolutely paramount! The mustard delivers a subtle heat and complexity, while the vinegar brightens up the entire dish, creating an utterly intoxicating balance of flavors. Sprinkle in the fine sea salt, fresh dill, and optional ground turmeric for color, and don’t forget those grinds of fresh black pepper! Each component plays a role in elevating your 10 Minute Smashed Chickpea Salad Sandwich into something truly extraordinary. Make sure to mix everything well—this is crucial for ensuring every bite bursts with flavor. Once combined, take a moment to taste your creation; feel free to adjust any seasoning according to your preference, as personalizing your food is one of the joys of cooking!
Step 6: The Essential Chill
Now, let’s talk about why chilling your salad is so important. After mixing all those delicious ingredients together, transferring them into a covered container and placing them in the refrigerator for at least 30 minutes (or longer if you can resist) allows the flavors to meld beautifully. Think of it like letting an orchestra practice before they perform; each section needs time to harmonize with one another! During this chilling period, the acid from the vinegar works its magic by penetrating deeper into the chickpeas and vegetables, making them even more flavorful than when you first mixed them.
Trust me on this—while you may be eager to dive right in after mixing, allowing your salad some quality time in the fridge transforms it from simply tasty to profoundly satisfying. If you can wait longer—up to two days—it will only get better! Just keep it sealed tight so that those vibrant flavors don’t dissipate. Use this time wisely; perhaps you could prep some fresh veggies or bread to accompany your sandwich! Feel free to check back after half an hour; you might find yourself irresistibly drawn to sneak a taste.
Step 7: Preparing Your Bread Base
While your chickpea salad chills and flavors deepen, let’s prepare our bread base for this mouthwatering sandwich! I highly recommend using multigrain bread for its hearty texture and nutty flavor that complements our creamy filling beautifully. If gluten-free bread works better for you, it serves as an equally delightful alternative. Toasting your bread can elevate this experience even further—I suggest lightly browning it until golden and crisp but not overly crunchy; we still want it soft enough to enjoy without crumbling under pressure.
To toast effectively, simply place slices on a baking sheet under the broiler for about 1-2 minutes per side or utilize a toaster if you prefer more control over doneness. Keep an eye on it during this short timeframe—bread can go from perfect to burnt in mere seconds! Once toasted, allow your slices to cool slightly before piling on that luscious chickpea salad mixture; this step is essential if you want perfectly balanced bites without sogginess setting in too soon. Remember: patience pays off here!
Step 8: Building Your Masterpiece
Now comes my favorite part—the assembly of your 10 Minute Smashed Chickpea Salad Sandwich! Grab those toasted slices of multigrain or gluten-free bread and lay them out on a clean surface like proud canvases waiting for their masterpiece creation! Start by spooning generous amounts of that chilled chickpea salad onto one slice—don’t skimp here because every bite deserves an explosion of flavor! As you’re spreading it out evenly across the bread, consider how each element interacts with one another.
To take things up another notch (as if they needed any help), pile on fresh toppings like crunchy sprouts or kale for added texture, shredded carrots for sweetness and color contrast, crisp lettuce leaves full of hydration, and juicy tomatoes bursting with flavor. These layers not only enhance visual appeal but also create layers of taste that dance on your palate when biting into this extraordinary sandwich. Now gently press down on top with another slice of bread—it’s all about building those layers while keeping everything intact!
Final Touches: Gourmet Presentation
As we reach the final phase of creating our scrumptious 10 Minute Smashed Chickpea Salad Sandwiches (can you feel that anticipation?), let’s polish off our presentation! Carefully slice each sandwich diagonally using a sharp knife for clean edges—this small detail elevates any meal instantly! You can arrange them beautifully on plates alongside extra veggies or chips if desired; visually appealing meals are not just more inviting but also heighten satisfaction during dining.
When serving these sandwiches at gatherings or simply enjoying lunch solo at home with friends or family members nearby—don’t forget about garnishing options like additional herbs sprinkled atop or even serving with pickles on the side for added zing! Whether enjoyed casually or plated up fancy style—your creation promises comfort food bliss packed full of nutrition without compromising flavor or excitement!
I hope you savor every moment as much as I do when sharing my love for cooking through recipes like these! Your kitchen adventure awaits; go ahead and relish in crafting something utterly delightful today!
Storage and Enjoyment Tips for Your 10 Minute Smashed Chickpea Salad Sandwich
Now that you’ve crafted your scrumptious 10 Minute Smashed Chickpea Salad Sandwich, it’s time to revel in the joy of enjoying it! Whether you’re savoring it fresh or preparing to tuck some away for later, this delightful dish is sure to bring smiles. I can already imagine the first bite—each mouthful bursting with flavor and texture, while the creamy chickpeas mingle harmoniously with the tangy pickles and zesty mustard, creating a culinary experience that’s simply unforgettable. If you happen to have any leftovers (which I doubt, because it’s so delicious!), here are some expert tips on how to store this marvelous creation.
Storing Leftover 10 Minute Smashed Chickpea Salad Sandwich
For those rare occasions when you have leftover 10 Minute Smashed Chickpea Salad Sandwich, storing it properly can help maintain its delightful flavors and textures. Simply transfer any remaining salad into an airtight container—this is crucial for keeping the freshness locked in! Place it in your refrigerator, where it will happily stay good for up to two days. However, if you’ve already assembled your sandwich with bread, I recommend separating the filling from the bread slices to keep everything crispy and delectable. Trust me, soggy bread is a culinary tragedy we want to avoid! When you’re ready to enjoy your leftovers again, give the salad a gentle stir; you might find that the flavors have intensified and melded beautifully during their time together in the fridge.
Freezing Your Chickpea Salad for Later
If you’re looking to extend the life of this wonderful salad even further, freezing it is a fantastic option! To freeze your 10 Minute Smashed Chickpea Salad, simply portion out the salad into freezer-safe bags or containers, ensuring you remove as much air as possible before sealing them tightly. This method can preserve your salad for about three months without compromising its flavor too much. When you’re ready to use it from frozen, just pop it in the fridge overnight to thaw or let it sit at room temperature for about an hour. This makes meal prep a breeze—imagine having a healthy, hearty option ready at a moment’s notice! The convenience of having this delicious chickpea salad waiting in your freezer will make weeknight dinners feel like a special treat rather than a chore.
10 Minute Smashed Chickpea Salad Sandwich
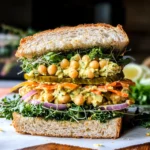
Experience the vibrant flavors of our 10 Minute Smashed Chickpea Salad Sandwich—quick, healthy perfection awaits! Try it today!
- Prep Time: 10 minutes
- Cook Time: None
- Total Time: 0 hours
- Yield: Serves about 2 sandwiches 1x
- Category: Sandwich
- Method: Mixing
- Cuisine: Plant-based
Ingredients
- 1 (425g) can chickpeas
- 1/4 cup + 1 tbsp dill pickles (finely chopped)
- 1/4 cup purple onion (finely chopped)
- 2 tbsp Just Mayo or Vegenaise
- 2 1/2 tsp stone ground mustard
- 1 1/2 tsp apple cider vinegar (or pickle juice)
- 2 tsp fresh dill (chopped)
- Multigrain or gluten-free bread
- Optional toppings: sprouts, kale, shredded carrots, lettuce, tomatoes
Instructions
- Rinse and drain the canned chickpeas, then place them in a mixing bowl. Use a potato masher to roughly mash the chickpeas until creamy but still chunky.
- Fold in the chopped dill pickles, purple onion, Just Mayo or Vegenaise, stone ground mustard, apple cider vinegar, fresh dill, salt, and black pepper until well combined.
- Chill the mixture in the refrigerator for at least 30 minutes to enhance flavors.
- Spread generous amounts of the chickpea salad onto slices of multigrain or gluten-free bread.
- Layer with any additional toppings such as sprouts, kale, shredded carrots, lettuce, or tomatoes.
- Close the sandwich with another slice of bread and slice diagonally for serving.
Nutrition
- Serving Size: 1 sandwich (approx. 200g)
- Calories: 380
- Sugar: 5g
- Sodium: 450mg
- Fat: 12g
- Saturated Fat: 1g
- Unsaturated Fat: 9g
- Trans Fat: 0g
- Carbohydrates: 53g
- Fiber: 12g
- Protein: 15g
- Cholesterol: 0mg