Jersey Mike’s Hot Chopped Pepper Relish Recipe
I can feel the warmth of summer evenings and the excitement of gathering with friends when I think about the Jersey Mike’s Hot Chopped Pepper Relish Recipe. This isn’t just a condiment; it’s a celebration in a jar, bursting with vibrant flavors that dance on your palate. Picture this: a symphony of spicy cherry and banana peppers mingling with the sweetness of onions and garlic, all enveloped in a tangy vinegar brine. It’s not just about what you put on your sandwich; it’s an experience that elevates every bite, igniting conversations and memories around the dinner table. Trust me; once you dive into making this relish, you’ll understand that it’s more than just food—it tells a story.
Every time I whip up this relish, I’m reminded of those cozy family barbecues where we’d gather around plates piled high with sandwiches, chips, and laughter. There’s something profoundly satisfying about balancing flavors—sweet, spicy, tangy—that makes this relish stand out among ordinary condiments. Why is it so special? Well, it’s not only about enhancing your meals but also about creating connections through shared experiences. Whether you’re slathering it over grilled veggies or brightening up your favorite sandwich, each dollop is like adding a splash of sunshine to your plate. And as you prepare it at home, you’ll find yourself infusing your kitchen with scents that beckon everyone to come closer.
Jersey Mike’s Hot Chopped Pepper Relish Recipe: A Flavor Explosion in Every Bite
This delightful relish is perfect for those who want to add a little kick to their meals without overwhelming heat. The combination of hot cherry peppers and banana peppers creates an ideal balance—enough spice to wake up your taste buds but not so much that it masks the other flavors. Grab your ingredients, and let’s embark on this culinary journey together!
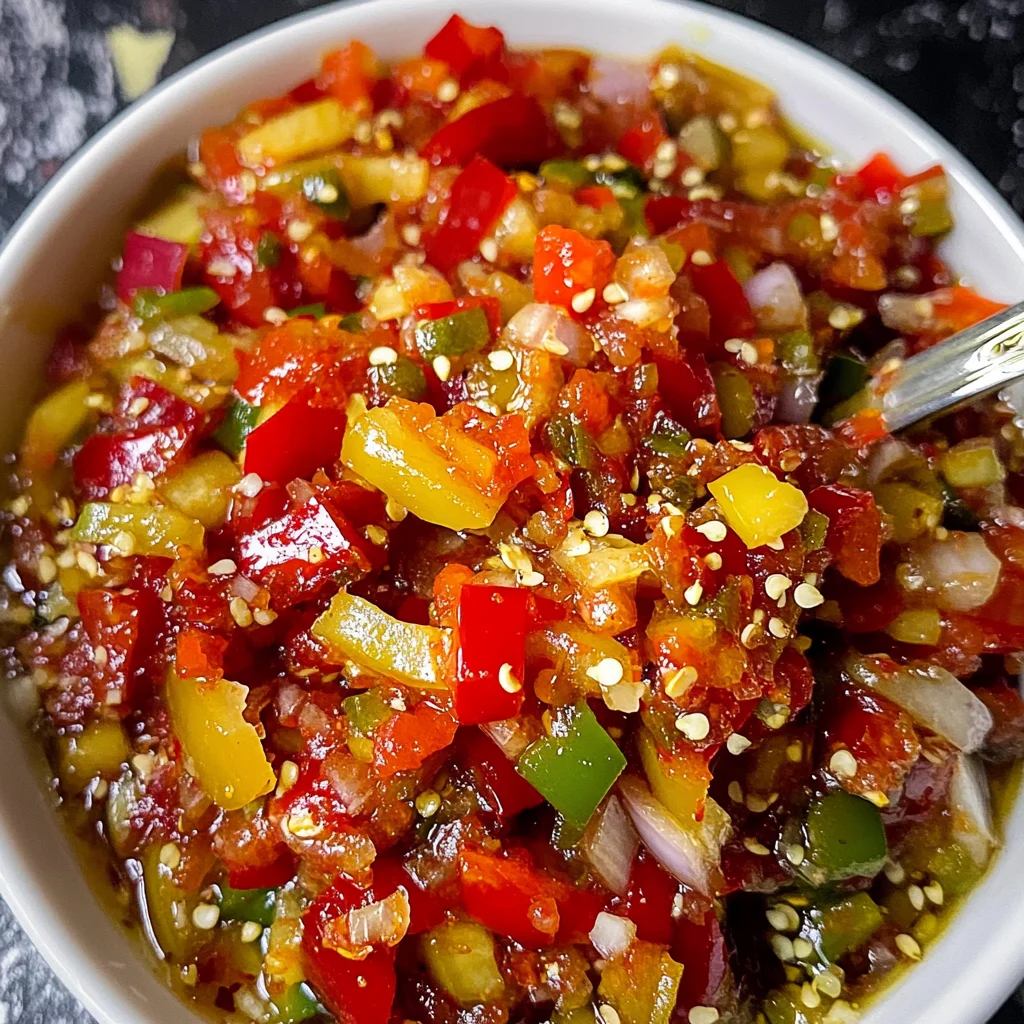
Ingredients:
As we dive into this recipe, each ingredient plays a pivotal role in crafting that unforgettable flavor profile! Let’s break down what we need and why they’re indispensable.
- 8 –10 hot cherry peppers (finely chopped). These little beauties are the stars of our show! With their vibrant red color and tantalizing heat, they bring a punchy flavor that will awaken your senses. When selecting hot cherry peppers, look for ones that are firm and shiny—this ensures they’re fresh and full of flavor. If you prefer less heat but still want that lovely color, feel free to adjust the quantity or even substitute with milder peppers.
- 2 –3 banana peppers (finely chopped). Sweet yet slightly tangy, banana peppers add a wonderful complexity to our relish. Their mildness perfectly complements the fiery cherry peppers while contributing their unique sweetness. Look for bright yellow or green-colored banana peppers for optimal freshness; they should be firm to the touch. If you can’t find them fresh, pickled banana peppers can work as an alternative!
- 1 small green bell pepper (finely chopped). This seemingly simple addition brings balance to our mix! The crispness of green bell pepper adds texture while its mild flavor helps ground the overall spiciness without overshadowing it. Choose one that feels heavy for its size—this indicates juiciness—and avoid any with blemishes or soft spots.
- 1 small white onion (very finely minced). Onions are essential for building depth in flavor! Their natural sweetness mellows as they cook down, providing richness alongside our spicy elements. When mincing them very finely, you’re ensuring they blend seamlessly into the relish without dominating any bites.
- 3 cloves garlic (minced). Ahh… garlic—the aromatic magic maker! Just a few cloves can transform any dish from mundane to extraordinary with its robust flavor and aroma when cooked gently until fragrant. Always opt for fresh garlic; avoid pre-minced versions when possible because nothing quite compares to peeling and chopping fresh cloves.
- ½ cup white vinegar. This is our acid component—it brightens everything! White vinegar offers sharpness while cutting through the richness of oil and sugars in this recipe. While we’re using white vinegar here for its neutral taste profile, apple cider vinegar can be a fantastic alternative if you’re looking for something with more character.
- ¼ cup olive oil. Think of olive oil as liquid gold in our relish-making process! It not only enhances flavors but also adds lusciousness to the overall texture while helping meld all those bold ingredients together harmoniously.
- 2 tablespoons sugar. Sugar might seem counterintuitive in a spicy relish; however, it plays an essential role by balancing out acidity and heat! It rounds out those sharp edges from vinegar and spices beautifully—don’t skip this step!
- 1 teaspoon salt (adjust to taste). Salt enhances every ingredient’s natural flavor—it’s absolutely paramount here! Start with one teaspoon but remember to adjust according to personal preference after tasting during cooking.
- ½ teaspoon dried oregano. Dried oregano adds an earthy herbal note that complements our fresh veggies beautifully! It contributes warmth without overpowering other flavors—a little goes a long way.
- ¼ teaspoon black pepper. Black pepper brings depth and slight heat; it’s often overlooked but makes such a difference! Freshly cracked black pepper always yields better results than pre-ground varieties because its essential oils are more potent right after grinding.
- ½ teaspoon crushed red pepper flakes (optional). For those who crave extra heat—these flakes can elevate your relish from delicious to dangerously addictive! Add them sparingly if you’re unsure how much spice suits your palate.
- 1 tablespoon pickled jalapeño brine (optional). If you have some pickled jalapeños on hand from another dish or meal prep session—don’t throw away that brine! It packs an additional punch of flavor while adding acidity; just remember it can make things spicier too!
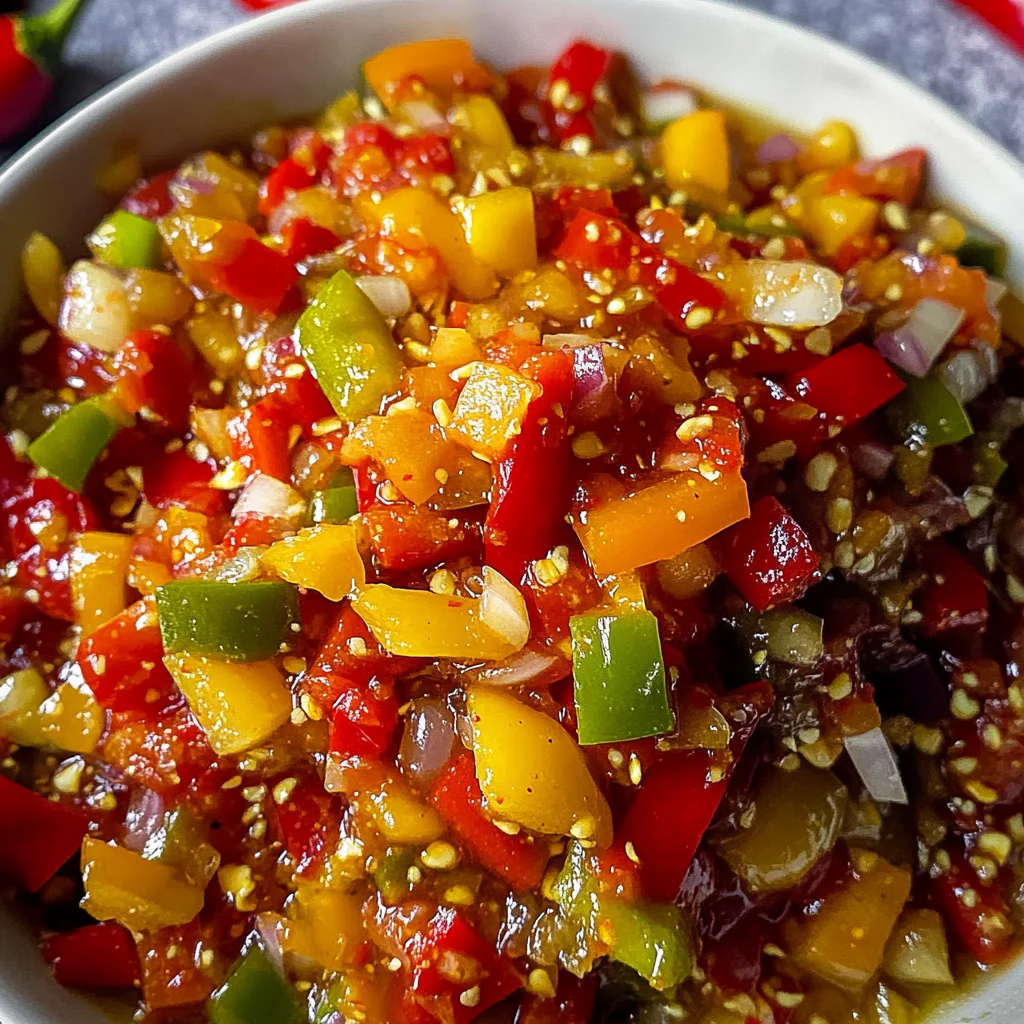
Equipment You’ll Need:
Having the right tools at hand makes cooking feel seamless and enjoyable—trust me on this one! While these aren’t ingredients per se, they are essential partners in bringing our Jersey Mike’s Hot Chopped Pepper Relish Recipe to life.
- Cutting board – A sturdy cutting board provides you with ample space for chopping all those vibrant vegetables safely without risking injury or messes on your countertops.
- Chef’s knife – A good quality chef’s knife is vital for smooth slicing through all components while maintaining control over size uniformity since we want everything finely chopped—not pureed!
- Saucepan – You’ll need a medium-sized saucepan for sautéing onions initially before adding other ingredients later on—the gentle heat here allows flavors to meld beautifully without burning anything!
- Wooden spoon or spatula – To stir everything together lovingly as they simmer away; choose one that’s sturdy enough not only for mixing but also scraping down sides if needed!
Incorporating flavorful touches like these will surely enhance your journey toward creating something truly extraordinary!
Preparing the Jersey Mike’s Hot Chopped Pepper Relish Recipe
Step 1: Chop Your Veggies with Love
The first step is crucial—finely chopping all those beautiful colorful veggies is where the magic begins! Take your time here; don’t rush this step because maintaining texture is paramount—it should be chunky yet harmonious when combined later on rather than turning mushy or pureed like baby food would do! Aim for pieces roughly similar in size so they cook evenly throughout our cooking process too; each bite needs contrasting textures bursting forth onto your palate when served!
Step 2: Sauté Onions Until Softened
Once everything is prepped beautifully, grab that trusty saucepan and place it over medium heat before adding olive oil until shimmering slightly—that’s how we know it’s ready for action! Toss in those finely minced onions gently now—this initial sautéing phase will coax out their sweetness while softening them significantly (about three minutes should do). Make sure not to rush—as tempting as it may be—let them become translucent instead before moving onto next steps where garlic joins this aromatic party shortly thereafter…
Step 3: Add Garlic & Aromatic Elements
After three minutes have passed tantalizingly waiting patiently by our stovetop—you’ll see how lovely those onions have transformed already into golden gems awaiting further development alongside minced garlic added next into hot pan carefully stirred around continuously until fragrant wafts fill kitchen air (roughly thirty seconds)! Be cautious though—garlic burns quickly if left unattended at high temperatures so keep stirring diligently during this important moment—it might seem simple but trust me when I say these aromas alone could lure anyone near enough…
Step 4: Introduce Those Peppers!
Now comes perhaps my favorite part—the moment where colorful chopped peppers join forces within saucepan alongside fragrant aromatics previously introduced (onion & garlic duo)! Stir them together gently allowing everything within pan mingle joyfully under low-medium heat allowing initial moisture released from veggies steam off while simultaneously drawing out even deeper flavors hidden beneath surface level—we want harmony achieved here before moving forward toward additional seasoning later down line…
Stay tuned as we continue exploring each step together toward crafting our delicious Jersey Mike’s Hot Chopped Pepper Relish Recipe made specifically tailored just for friends like YOU who love cooking as much as I do!
Step 5: The Colorful Medley of Flavors
Now that you’ve got your onions and garlic softened and fragrant, it’s time to add that vibrant array of chopped peppers to the pan. Picture this: as you scoop those beautifully chopped hot cherry, banana, and green bell peppers into the skillet, you’re creating a colorful medley that not only delights the eyes but also sets the stage for a symphony of flavors. Stir them gently into the sautéed onions and garlic, ensuring every piece is coated in that luscious olive oil. This step is crucial because it allows the peppers to mingle with the aromatics, releasing their natural sweetness while absorbing those savory notes.
As you stir, notice how the heat causes the peppers to soften slightly, making them easier to meld into the relish later. Trust me on this—don’t rush this step! You want to give them a moment to blend harmoniously before moving on. The goal here is not just to cook; it’s to bring out the best in each ingredient. Keep an eye on them for about two minutes; they should become tender yet still retain some crunch—this texture will add an exciting contrast in your final dish.
Step 6: A Tangy Transformation
Next up is where the magic truly begins—adding in your trusty white vinegar along with sugar, salt, oregano, black pepper, and those optional red pepper flakes for a little extra kick. Carefully pour in that tangy vinegar; it’s like adding a splash of sunshine to your pot! This acidity is absolutely paramount because it not only brightens up all those rich flavors but also acts as a preservative when stored, enhancing the relish’s shelf life significantly.
As you combine these ingredients, you may notice that everything seems a bit loose at first; don’t worry about that! The vinegar will interact with the sugars and spices, creating an utterly intoxicating aroma that will fill your kitchen with warmth and anticipation. Keep stirring until everything is well incorporated—you’re looking for a harmonious blend where every flavor has its voice without overpowering one another. Once everything is combined and bubbling gently away on medium heat, it’s time to let this delightful concoction simmer.
Step 7: Gentle Simmering Bliss
Now we enter the simmering phase—a critical moment in transforming these ingredients into something truly extraordinary. Lower your heat so that everything softly bubbles away; we’re aiming for a gentle simmer here rather than a vigorous boil. Why is this step so essential? Low and slow cooking allows flavors to deepen and develop complexity without losing their individuality. Think of it as letting all those ingredients have a heartfelt conversation where they share their unique qualities without drowning one another out.
Let this simmer for about 10–12 minutes while stirring occasionally—this part isn’t just about patience; it’s about giving time for those flavors to evolve together into something profoundly satisfying. As you watch, observe how the mixture thickens slightly; that’s when you know things are progressing beautifully! It should look glossy and fragrant with a tantalizingly aromatic steam wafting up around you—trust me when I say there’s nothing quite like it.
Step 8: Cooling Down Before Perfection
After your relish has been gently simmering away and has transformed into this gorgeous medley of colors and aromas, it’s crucial for us to let it cool completely before moving onto storage. I know waiting can be hard—especially when that aroma fills your kitchen—but trust me on this one! Allowing your relish to cool down ensures that all those vibrant flavors settle together beautifully without getting muddled by heat or condensation from covering it too soon.
This cooling process typically takes about 30 minutes or so at room temperature. While you’re waiting, take some time to appreciate what you’ve created so far—the colors alone are worth admiring! Once cooled completely (you’ll know it’s ready when there’s no warmth left), prepare yourself for the next step: transferring this deliciousness into a clean glass jar. This is more than just storage; it’s about keeping all that goodness sealed tight until you’re ready to dig in.
Next Major Phase – Storing Your Jersey Mike’s Hot Chopped Pepper Relish Recipe
Step 9: Sealing in Flavor
Once your relish has cooled entirely—a crucial milestone—you can now transfer it into a clean glass jar. But before we do that, let’s talk about why using glass is essential here: glass jars don’t impart any unwanted flavors or react with acidic foods like vinegar-based relishes do. Pour carefully—it might seem simple but take a moment here! We want every drop of flavor captured within these walls.
Seal your jar tightly after transferring all of your vibrant relish inside—this is where patience becomes even more vital! You’ll want to refrigerate your creation for at least 12 hours (and honestly, overnight is best) before diving into it. This resting period allows all those beautiful flavors to meld together fully—a magical transformation happens during this time as they marry with one another beautifully. When you finally taste it after this wait—and I promise you—it will be an explosion of flavor dancing on your palate!
Each spoonful will be packed with warmth from the hot cherry peppers balanced perfectly by sweetness from sugar and tanginess from vinegar—a true testament to why patience pays off in cooking! So embrace the waiting game because once those flavors have had their chance to mingle properly, you’ll be left with an unforgettable condiment that’s perfect for sandwiches, salads, or even as an exciting topping for grilled veggies.
Enjoy making this Jersey Mike’s Hot Chopped Pepper Relish Recipe as much as I do—it’s not just food; it’s love served on a plate!
Storage and Enjoyment Tips for Your Jersey Mike’s Hot Chopped Pepper Relish Recipe
Now that you have crafted this vibrant, zesty Jersey Mike’s Hot Chopped Pepper Relish Recipe, it’s time to revel in the joy of enjoying your creation! The mingling of those hot cherry peppers with the gentle sweetness of banana peppers and the aromatic embrace of garlic and onion creates a flavor explosion that is simply irresistible. But let’s be honest; sometimes we make more than we can eat in one sitting, and that’s perfectly okay! This relish is not just a fleeting delight but a treasure you can savor over several meals.
Storing Leftover Jersey Mike’s Hot Chopped Pepper Relish Recipe
When it comes to storing your precious pepper relish, you’ll want to choose a clean glass jar with an airtight lid, which helps keep the flavors locked in while preventing unwanted odors from invading your culinary masterpiece. Ideally, your relish can be stored in the refrigerator for up to two weeks—though I promise you, its utterly intoxicating taste will have you reaching for it long before then! For those who like little tips and tricks, consider adding a slice of bread on top before sealing the jar. This non-negotiable step helps absorb any excess moisture, ensuring that your relish retains its delightful crunch and flavors. After storage, you’ll find that the flavors deepen beautifully; it’s as if they’ve taken a little vacation together, becoming even more harmonious. When you’re ready to enjoy it again, simply give it a gentle stir and serve it cold right from the fridge or let it come to room temperature for a few minutes to enhance that symphony of flavors.
Freezing Jersey Mike’s Hot Chopped Pepper Relish Recipe for Later
If you’re looking to extend your enjoyment even further, freezing is a fantastic option! To freeze your chopped pepper relish properly, transfer it into freezer-safe containers or resealable bags after allowing it to cool completely. Be sure to leave some headspace at the top of the container because liquids expand when frozen—trust me; you don’t want an explosion in your freezer! Your relish will keep beautifully for up to three months when frozen. The best part? When you’re ready to use it again, simply take out what you need, let it thaw in the refrigerator overnight or at room temperature for a quicker option, and voilà! You’ve got yourself a flavorful condiment ready to elevate any meal with minimal effort on your part. Freezing not only preserves its delightful taste but also offers incredible convenience for those busy weeknights when all you need is a dash of excitement on your plate!
Jersey Mike’s Hot Chopped Pepper Relish Recipe

Elevate your meals with this vibrant Jersey Mike’s Hot Chopped Pepper Relish, a zesty condiment that adds a delightful kick to any dish. This homemade relish combines the fiery essence of hot cherry peppers and the sweet tang of banana peppers, balanced perfectly by aromatic garlic and onion. Whether you’re slathering it on sandwiches, grilling veggies, or enjoying it as a dip, each spoonful bursts with flavor and nostalgia. Perfect for summer barbecues or cozy dinners, this relish not only enhances your dishes but also creates lasting memories around the table. Dive into this easy-to-make recipe and bring a taste of joy to your kitchen!
- Prep Time: 15 minutes
- Cook Time: 15 minutes
- Total Time: 30 minutes
- Yield: Approximately 12 servings 1x
- Category: Condiment
- Method: Cooking
- Cuisine: American
Ingredients
- 8–10 hot cherry peppers (finely chopped)
- 2–3 banana peppers (finely chopped)
- 1 small green bell pepper (finely chopped)
- 1 small white onion (very finely minced)
- 3 cloves garlic (minced)
- ½ cup white vinegar
- ¼ cup olive oil
- 2 tablespoons sugar
- 1 teaspoon salt
- ½ teaspoon dried oregano
- ¼ teaspoon black pepper
- Optional: crushed red pepper flakes and pickled jalapeño brine
Instructions
- Finely chop all peppers, onion, and garlic.
- Heat olive oil in a saucepan over medium heat; add minced onions and sauté until translucent (about 3 minutes).
- Stir in minced garlic and cook until fragrant (about 30 seconds).
- Add chopped peppers to the pan; stir gently for about 2 minutes until softened.
- Pour in white vinegar, then add sugar, salt, oregano, black pepper, and optional ingredients. Stir well to combine.
- Lower the heat and let mixture simmer for 10–12 minutes until thickened slightly.
- Allow relish to cool completely before transferring to a clean glass jar. Refrigerate for at least 12 hours before using.
Nutrition
- Serving Size: 1 tablespoon
- Calories: 25
- Sugar: 3g
- Sodium: 100mg
- Fat: 2g
- Saturated Fat: 0g
- Unsaturated Fat: 2g
- Trans Fat: 0g
- Carbohydrates: 4g
- Fiber: 0g
- Protein: <1g
- Cholesterol: 0mg