Dr Pepper Cupcakes
There’s something utterly enchanting about the act of baking, isn’t there? It’s more than just mixing flour and sugar; it’s a way to weave memories, share love, and create something truly special that brings people together. Imagine the aroma of rich chocolate wafting through your kitchen, inviting everyone nearby to come and experience the warmth of freshly baked Dr Pepper Cupcakes. These delightful treats are not just desserts; they’re an experience—a fusion of nostalgia and innovation that transports you back to simpler times while introducing a fun twist that makes them utterly unique. The moment you take a bite, you’ll be greeted with a tender crumb and a whisper of fizzy sweetness that dances on your tongue. Trust me when I say, these cupcakes will leave you craving more.
What makes these Dr Pepper Cupcakes so extraordinary is how they blend the classic richness of chocolate with the unexpected effervescence of soda. It’s a delightful contrast that elevates them beyond your average dessert. Whether you’re celebrating a birthday, hosting a simple get-together, or simply indulging in some self-care after a long day, these cupcakes are perfect for any occasion. They carry with them a sense of joy and familiarity—like sharing secrets with an old friend over coffee. So, roll up your sleeves and let’s embark on this delicious journey together!
Dr Pepper Cupcakes: A Sweet Symphony of Flavor
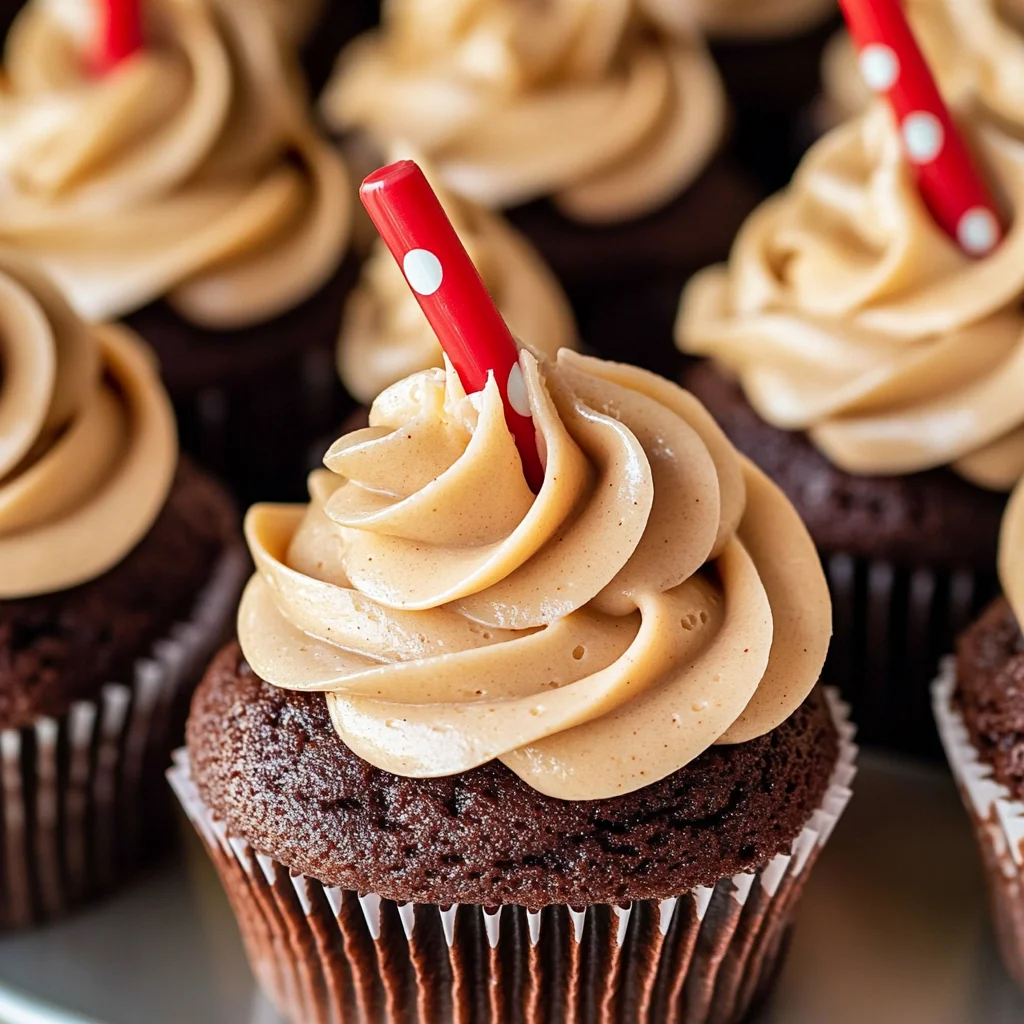
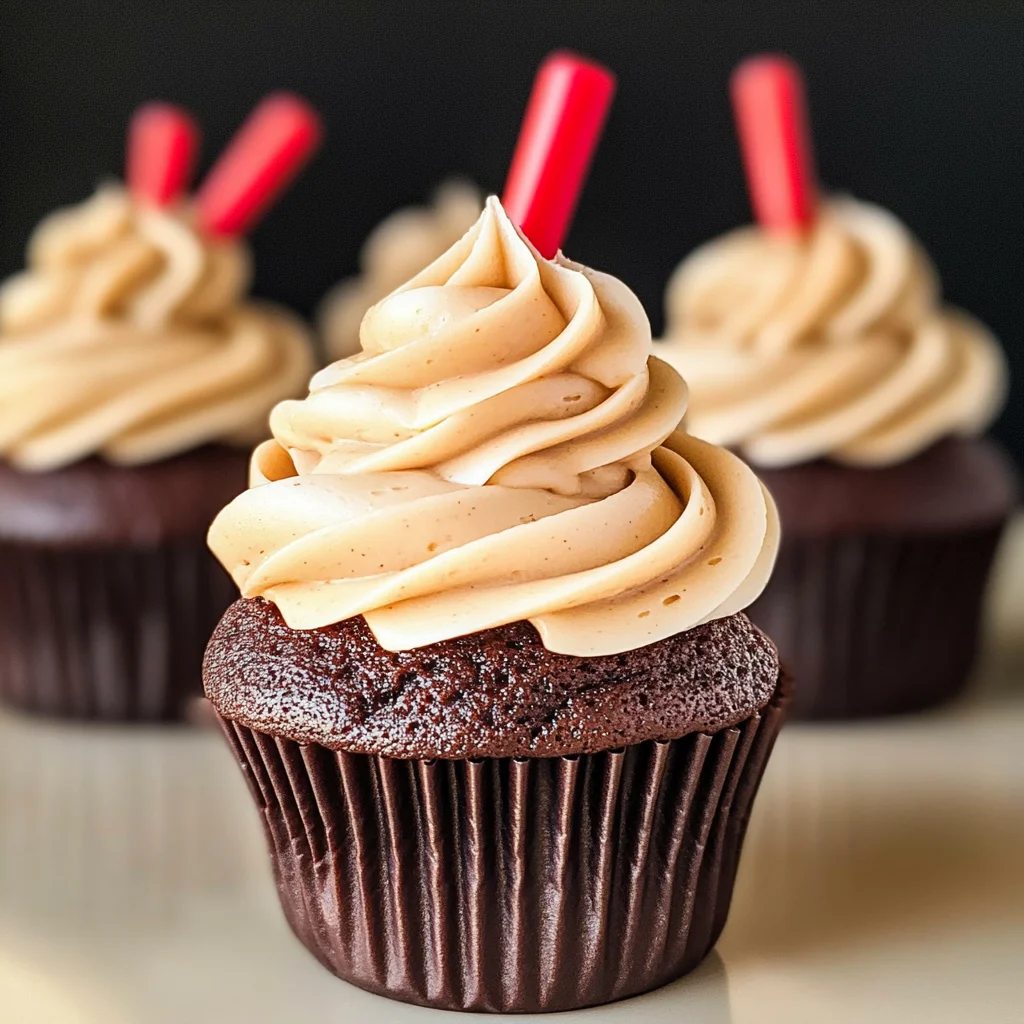
Have a Dr Pepper fan in your life? Then they’re going to love these! Rich and moist chocolate buttermilk cupcakes with a hint of their favorite fizzy soda await you. This recipe captures the essence of both indulgence and whimsy in every bite, making it not just dessert but an adventure for your taste buds.
Ingredients:
Embarking on this culinary journey begins with gathering our delightful ingredients! Each component plays its own unique role in ensuring that our cupcakes turn out perfectly moist and rich with flavor. Let’s explore what we need:
- 2 cups all-purpose flour. This is the backbone of our cupcake batter, providing structure and stability while allowing those light, fluffy textures to shine through. Opt for unbleached flour if possible; it has a more natural flavor and retains more nutrients than its bleached counterpart. When measuring flour, be sure to spoon it into your measuring cup rather than scooping directly from the bag—this prevents packing it down too tightly which can lead to dense cupcakes.
- 1/4 cup unsweetened cocoa powder. Here’s where we introduce that deep chocolate flavor that pairs beautifully with our fizzy friend! Cocoa powder adds richness without any added sweetness since it’s unsweetened—just pure chocolatey goodness lending its bold character to the cupcakes. Always sift your cocoa powder before adding it; this helps eliminate any lumps and ensures smooth incorporation into the batter.
- 1 teaspoon baking soda. This ingredient is absolutely paramount for achieving that lovely rise in our cupcakes! Baking soda reacts with acidic components (like buttermilk and Dr Pepper) to produce carbon dioxide bubbles during baking—those bubbles create lightness within our cakes. Make sure your baking soda is fresh; if it’s past its prime, it won’t provide enough lift.
- 1 cup unsalted butter (softened). The rich creaminess of butter is essential for creating depth in flavor and ensuring that moist texture we all crave in cupcakes. Softened butter blends seamlessly into the batter, creating a luscious base for our treats; however, if it’s too cold or melted, you’ll end up with an uneven mixture or overly greasy results. For an even richer outcome, consider using European-style butter which typically has higher fat content than standard options.
- 1 cup granulated sugar & 1/2 cup light brown sugar (packed). These two types of sugar bring balance to our recipe—the granulated sugar contributes sweetness while helping achieve that beautiful golden color as the cupcakes bake; meanwhile, brown sugar adds moisture thanks to its molasses content which keeps our cupcakes wonderfully soft long after they’ve cooled down. Don’t skip packing the brown sugar firmly into your measuring cup—it ensures you’re getting the right amount needed for absorbing moisture!
- 2 eggs. Eggs are another key player here; they act as binders while also providing richness thanks to their fats and proteins which help set the structure during baking. For best results, use room temperature eggs—they mix better within the batter compared to cold ones straight from the fridge.
- 2 teaspoons vanilla extract. Ahh… vanilla—the warm hug every dessert needs! This aromatic extract enhances all other flavors present in our cupcakes without overshadowing their uniqueness. Choose pure vanilla extract instead of imitation for genuine depth; trust me on this one!
- 1 cup Dr Pepper & 1/2 cup buttermilk. Here comes the magic! The Dr Pepper infuses each cupcake with its signature sweet and spicy notes while adding moisture; think about how carbonated beverages create lightness—this is crucial here! Meanwhile, buttermilk contributes acidity which interacts beautifully with baking soda to create those lovely air pockets throughout each cake bite.
- 1 1/2 cups unsalted butter (softened) for frosting—you can never have too much butter when it comes to frosting! We need this creamy delight as our canvas for capturing flavors wonderfully paired with sweet frosting atop each cupcake.
- 1/4 teaspoon salt balances out all those sweet notes beautifully by enhancing flavors throughout—not too much though; remember we’re aiming for harmony!
- 4 cups powdered sugar gives us that luscious sweet topping we crave on top of our decadent cakes—this works beautifully alongside our remaining ingredients especially when whipped together until creamy perfection emerges!
- 1/4 cup Dr Pepper, again! Just like before—this will work wonders by adding yet another layer of flavor complexity straight into frosting while keeping things wonderfully sweet without being overwhelming!
Equipment You’ll Need:
Having the right tools at hand makes all the difference in bringing your baking dreams to life! While these aren’t ingredients themselves, they’re essential partners in creating something wonderful together—a flawless batch of Dr Pepper Cupcakes awaits us!
- Mixing Bowls (various sizes) – You’ll want at least one large bowl for mixing dry ingredients and another medium-sized bowl for wet ingredients; having various sizes helps keep everything organized as well as minimizes messiness—an absolute must in any kitchen endeavor!
- Measuring Cups & Spoons – Precision is key in baking so don’t skimp here! Use dry measuring cups for flour and sugar whereas liquid measuring cups should be used solely for liquids like milk or water—we strive for accuracy because every bit counts towards cupcake success!
- Hand Mixer or Stand Mixer – Either option will work wonders when it comes time to cream butter with sugars into velvety perfection! A stand mixer allows hands-free operation if multitasking appeals more since you can focus elsewhere as it mixes away effortlessly…
- Rubber Spatula – An indispensable tool perfect for scraping down sides after mixing ensures no ingredients are left behind—all must unite harmoniously within batter bowl before heading toward oven bliss!
Preparing the Dr Pepper Cupcakes
Step 1: Prepping Your Baking Environment
Before we dive into mixing those delightful ingredients together, let’s set ourselves up for success by preheating our oven first! Set it at 350°F (175°C)—this ensures everything bakes evenly from start to finish once placed inside later on—and line two cupcake tins with paper liners so they’re ready when we need them most! Don’t rush this step—it may seem trivial now but preparing ahead saves those precious moments later where you’d otherwise fumble around looking for supplies amidst chaos instead…
Step 2: Mixing Dry Ingredients
Now let’s take care of those dry elements first because this process is known as “sifting” which creates aeration among powders allowing lighter textures upon baking time arrives! In one large mixing bowl combine together flour, cocoa powder along with baking soda until thoroughly mixed—remember no lumps allowed here folks!! Sifting also helps enhance taste by removing any potential bitterness present within cocoa powder itself thus giving us smoother chocolate flavors melded throughout each cake bite later on…
Step 3: Creaming Butter & Sugars
In another separate medium-sized bowl beat together softened unsalted butter along granulated plus packed brown sugars using either hand mixer or stand mixer until pale yellow color emerges alongside fluffy consistency achieved; this process takes roughly three minutes depending upon power setting chosen—but do keep close watch during mixing process…why? Because over-creaming leads us toward dryness instead instead achieving desired moisture level we aspire toward ultimately making perfect dr pepper cupcakes happen!!
Step 4: Incorporating Eggs & Vanilla
Next up we’ll add eggs one at time stirring gently after each addition followed by pouring in vanilla extract enhancing entire mixture yet further still!! Mixing until fully combined should take only about thirty seconds max—but trust me…you don’t want clumps forming either so keep stirring till smooth consistency appears once again…
As we continue forward through these steps together remember dear friend—I promise you each part builds upon previous ones leading us closer toward those dreamy bites awaiting us soon enough!! Stay tuned as next time we’ll dive right into incorporating beloved dr pepper itself alongside additional wet components…
Step 5: Mixing the Wet Ingredients – Creating a Flavorful Symphony
Now that your dry ingredients are perfectly blended, it’s time to bring the heart of the batter to life with our wet ingredients. Begin by placing your softened butter in a large mixing bowl. You’ll want it to be at room temperature for this step; think of it as liquid gold waiting to be transformed into something truly extraordinary! Use an electric mixer on medium speed to cream the butter until it becomes light and fluffy, which usually takes about 2-3 minutes. This step isn’t just about making things smooth; it’s crucial because incorporating air into the butter will ensure your cupcakes rise beautifully, creating that delightful, tender crumb we all crave.
Once your butter is fluffy, gradually add in your granulated sugar and brown sugar, continuing to mix until everything is well combined and even more airy—another 2 minutes should do the trick. The mixture should look pale and almost whipped; this signifies that you’re on the right path! Next, crack in those two eggs, one at a time, ensuring each egg is fully incorporated before adding the next. Eggs are not just binding agents; they also contribute moisture and richness to our cupcakes. Don’t forget to add in those two teaspoons of vanilla extract—the aromatic essence will elevate the flavor profile of these Dr Pepper cupcakes from good to utterly intoxicating!
Step 6: The Fizzy Addition – Welcoming Dr Pepper into the Mix
Now comes the fun part—adding our star ingredient, Dr Pepper! Pour in one cup of this fizzy delight directly into your beautifully creamed mixture. You might notice some bubbling or fizzing; this is completely normal and part of what makes these cupcakes so special! The carbonation in Dr Pepper not only adds moisture but also helps create a lighter texture by reacting with our baking soda—a key component in achieving that perfect rise. I promise you’ll feel a rush of excitement at this stage as you watch everything come together!
After adding the soda, pour in half a cup of buttermilk. Buttermilk provides acidity that balances out the sweetness while also contributing tenderness to our cupcakes. It’s essential for developing that soft texture we’re after! Mix everything together on low speed until just combined—this is crucial because overmixing at this stage can lead to dense cupcakes instead of the light and fluffy treats we’re aiming for. Your batter should have a silky consistency with a few small lumps; resist the urge to keep blending! Trust me on this: letting those small imperfections remain will result in superior cupcakes.
Step 7: Combining Dry and Wet Ingredients – A Harmonious Union
With both your wet and dry mixtures prepared, it’s time for them to meet! Gently pour your wet ingredients into the bowl containing your dry ingredients. Using a spatula or wooden spoon (I prefer using a spatula for its flexibility), fold them together with care. Folding is an important technique here—it helps maintain air bubbles created during mixing while ensuring everything gets evenly distributed without overworking that delicate batter.
As you fold, be sure to scrape down the sides of the bowl thoroughly—this ensures no dry flour remains hidden at the bottom, which could lead to unpleasant clumps once baked. You’re looking for a batter that’s smooth yet slightly thick, reminiscent of luscious cake batter—not too runny but definitely not overly stiff either. Just picture how soft these cupcakes will be when they come out of the oven! Don’t worry if there are still a few tiny lumps; remember, we’re keeping things gentle here.
Step 8: Filling Cupcake Liners – Preparing for Baking Bliss
With your batter lovingly prepared, let’s move on to filling those cupcake liners! Preheat your oven now if you haven’t already—set it to 350°F (175°C), which is essential for ensuring even baking across all those precious little cakes. While that happens, line your cupcake tin with paper liners; I like using colorful ones because who doesn’t love a pop of color? Using an ice cream scoop or measuring cup (around 1/4 cup works perfectly), fill each liner about two-thirds full with batter—this allows enough room for rising without overflowing.
It’s vital not to skip this step because under-filling can lead to dry tops while over-filling may yield cupcake overflow disasters—trust me; I’ve been there! As you fill, watch for any air pockets within each liner; gently tap them on the counter if necessary so any trapped air escapes—this will contribute further to their enchanting rise during baking. Once filled, slide that tin into your preheated oven and set your timer for about 18 minutes.
To check if they’re done baking without opening the oven door prematurely (which can hinder their rise), look for visual cues: they should spring back when lightly pressed on top and have slightly domed surfaces with edges that appear set rather than jiggly or wet. If you have a toothpick handy (oh yes!), insert it gently into one center cupcake—if it comes out clean or just with a few crumbs attached, they’re ready!
I hope you’ve enjoyed diving deep into this recipe as much as I’ve cherished sharing my passion for these delightful Dr Pepper Cupcakes with you. Remember, cooking isn’t merely about following steps—it’s about creating memories through food shared among loved ones! Happy baking!
Storage and Enjoyment Tips for Your Dr Pepper Cupcakes
Now that you’ve whipped up a batch of these delightful Dr Pepper Cupcakes, it’s time to dive into the joy of sharing and savoring them! But what if you find yourself with a few extras? Trust me, you’ll want to know how best to preserve their rich, moist goodness. The beauty of these cupcakes is that they’re not only delicious fresh out of the oven but also maintain their charm for days to come.
Storing Leftover Dr Pepper Cupcakes
To keep your leftover Dr Pepper Cupcakes as scrumptious as the moment they came out of the oven, I recommend storing them in an airtight container. This will lock in their moisture and flavor, ensuring every bite remains decadent. If you have the space, placing a slice of bread inside the container can work wonders; it absorbs excess moisture and helps keep the cupcakes tender. Ideally, your cupcakes will stay fresh for about three to four days at room temperature. After that, while they may still be enjoyable, they might lose some of their delightful texture. And let’s be real—nobody wants that! If you’re feeling adventurous, pop one in the microwave for a quick 10-15 seconds just before enjoying; it’ll warm up beautifully and bring back that melt-in-your-mouth experience!
Freezing Dr Pepper Cupcakes for Later
If you find yourself with more cupcakes than you can handle (or if you’re simply planning ahead for a future gathering), freezing these treats is an absolute game changer! To freeze them properly, let your cupcakes cool completely after baking and then wrap each one tightly in plastic wrap. Place them in a freezer-safe bag or container to ensure they’re protected from freezer burn. They’ll stay at their best quality for up to three months in the freezer. When you’re ready to indulge again, simply take a cupcake out and let it thaw at room temperature for about an hour—trust me, this little wait is worth every second! The convenience of having these delightful treats ready on hand makes life so much sweeter!
With all these tips in mind, I hope you’re just as excited about enjoying these Dr Pepper Cupcakes as I am! They are perfect for any occasion or even just because—it’s always a good time for dessert!
Dr Pepper Cupcakes
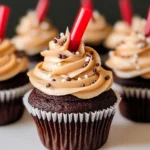
Indulge in the delightful fusion of flavors with these rich and moist Dr Pepper Cupcakes! Infused with the fizzy sweetness of soda, this unique dessert offers a nostalgic twist on classic chocolate cupcakes. Each bite delivers a tender crumb and a hint of carbonation that dances on your palate, making them perfect for birthdays, casual gatherings, or simply treating yourself to something special. Top them off with a creamy frosting for a truly indulgent experience. These cupcakes are not just desserts; they’re an adventure for your taste buds!
- Prep Time: 20 minutes
- Cook Time: 18 minutes
- Total Time: 38 minutes
- Yield: Approximately 12 servings 1x
- Category: Dessert
- Method: Baking
- Cuisine: American
Ingredients
- 2 cups all-purpose flour
- 1/4 cup unsweetened cocoa powder
- 1 teaspoon baking soda
- 1 cup unsalted butter (softened)
- 1 cup granulated sugar
- 1/2 cup light brown sugar (packed)
- 2 eggs
- 2 teaspoons vanilla extract
- 1 cup Dr Pepper
- 1/2 cup buttermilk
- 1 1/2 cups unsalted butter (softened) for frosting
- 1/4 teaspoon salt
- 4 cups powdered sugar
- 1/4 cup Dr Pepper for frosting
Instructions
- Preheat oven to 350°F (175°C) and line cupcake tins with paper liners.
- In a large bowl, sift together flour, cocoa powder, and baking soda.
- In another bowl, cream softened butter with granulated and brown sugars until fluffy.
- Add eggs one at a time, mixing well after each addition, then stir in vanilla.
- Gradually mix in the dry ingredients alternating with Dr Pepper and buttermilk until just combined.
- Fill cupcake liners two-thirds full and bake for about 18 minutes or until a toothpick comes out clean.
- Allow cupcakes to cool completely before frosting.
Nutrition
- Serving Size: 1 cupcake (70g)
- Calories: 320
- Sugar: 30g
- Sodium: 180mg
- Fat: 14g
- Saturated Fat: 8g
- Unsaturated Fat: 5g
- Trans Fat: 0g
- Carbohydrates: 47g
- Fiber: 1g
- Protein: 3g
- Cholesterol: 50mg