Lavender Biscuits
There’s something truly magical about the way scents can transport us to another time and place, isn’t there? As I gather my ingredients for these delightful Lavender Biscuits, I can almost hear the gentle hum of summer bees hovering around blooming lavender fields. With every whiff of dried lavender, I’m reminded of lazy afternoons spent sipping tea and enjoying warm, flaky biscuits straight from the oven. These biscuits are more than just a recipe; they embody a sense of comfort and nostalgia that wraps around you like your favorite blanket. Each bite is a journey—a harmonious blend of tender pastry and the subtle floral notes of lavender that dance on your palate, creating an experience that is at once familiar and exquisitely unique.
What makes these Lavender Biscuits so special is their ability to bridge the gap between traditional comfort food and innovative culinary exploration. It’s not just about baking; it’s about embracing creativity in the kitchen! Imagine serving these at brunch with friends, each biscuit adorned with a sprinkle of coarse sugar that glimmers like morning dew. The joy of watching their faces light up as they bite into something unexpected yet utterly delicious is what cooking is all about. So let’s embark on this culinary adventure together—trust me, your taste buds will thank you!
Lavender Biscuits: A Floral Twist on Classic Comfort
Welcome to a delightful baking experience where we take classic buttermilk biscuits and add a touch of floral elegance with dried lavender! These biscuits are soft, buttery, and just lightly sweetened—a perfect companion for your morning coffee or afternoon tea. The flavor profile is enchanting, making them an ideal treat for special occasions or simply when you want to indulge yourself.
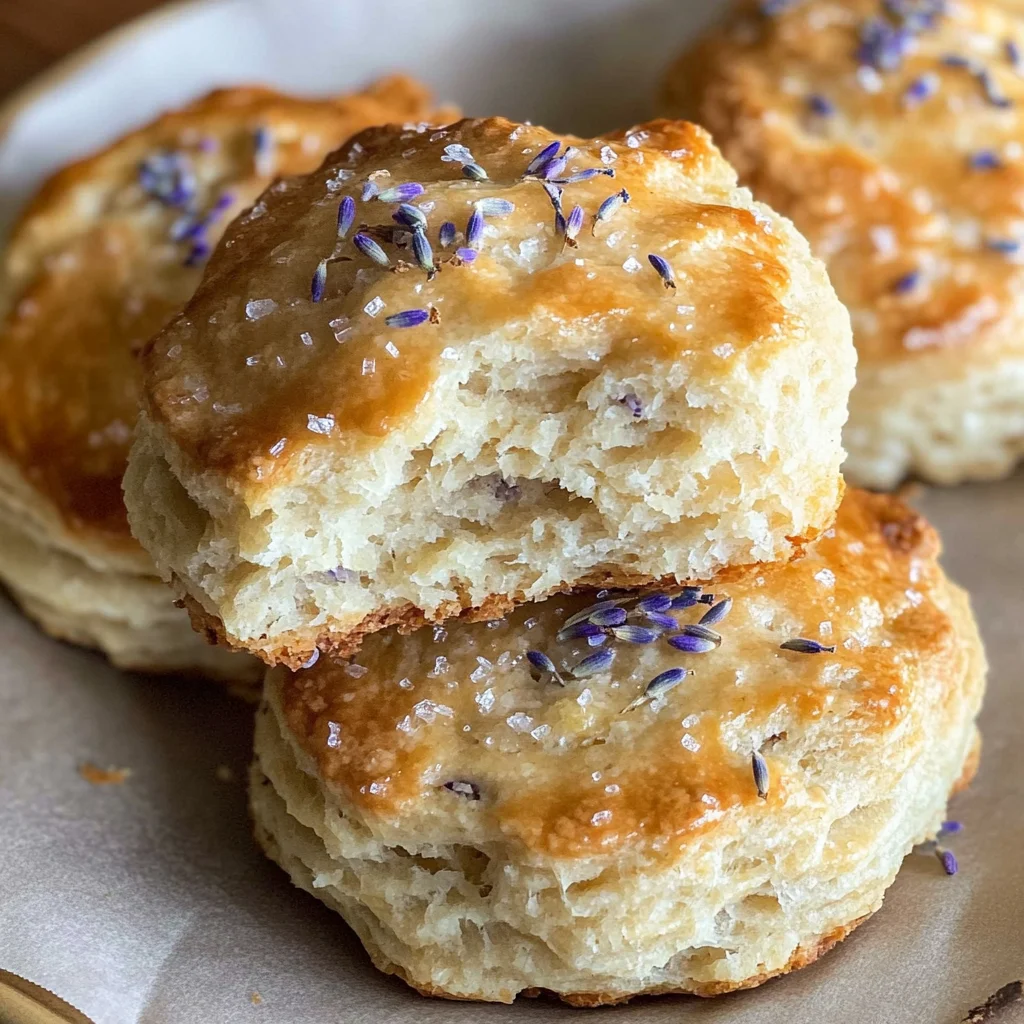
Ingredients:
As we prepare to dive into this lovely recipe, let’s take a moment to appreciate each ingredient’s role in crafting these beautiful Lavender Biscuits. Each component contributes not only to the flavor but also to the texture and overall success of our baking endeavor.
- ¼ cup sugar. This ingredient plays a pivotal role in balancing flavors while providing sweetness that complements the floral notes of lavender beautifully. When selecting sugar, opt for granulated sugar as it dissolves easily into the biscuit dough. You may also consider using organic cane sugar for a more natural flavor profile. Remember, sugar also helps with browning during baking—so don’t skip this step!
- 1 Tbsp dried lavender (see note). This enchanting herb infuses our biscuits with its aromatic essence, creating a calming and unique flavor profile. Look for culinary-grade dried lavender in specialty stores or online; it should be fragrant and vibrant in color. If you have fresh lavender on hand, feel free to use that instead—just double the amount since fresh herbs can be milder than their dried counterparts.
- 2 cups flour. This humble yet essential ingredient is the backbone of our biscuits, providing structure and stability to our dough. I recommend using all-purpose flour because it has the right balance of protein content needed for fluffiness without being too dense. Be sure to spoon it gently into your measuring cup rather than scooping directly from the bag—this prevents packing too much flour and compromising your biscuits’ texture.
- 1 Tbsp baking powder. This leavening agent works wonders by creating air pockets within our dough as it bakes—resulting in those tall, flaky layers we all crave in biscuits! Ensure your baking powder is fresh; you can test it by adding a teaspoon into warm water—if it bubbles vigorously, you’re good to go!
- ½ tsp salt. Salt enhances flavors remarkably—it’s often referred to as the seasoning that brings life to baked goods! While we don’t want our biscuits tasting salty, just a hint helps elevate all other flavors present within the dough.
- ¼ tsp baking soda. Just like baking powder, baking soda serves as another leavening agent but requires an acid (in this case, our buttermilk) to activate its rising power. This addition ensures our biscuits achieve optimal fluffiness while contributing slightly to their golden-brown color.
- 6 Tablespoons unsalted butter, cold. Butter adds richness and moisture while contributing to that coveted flaky texture we’re aiming for in our Lavender Biscuits! Using cold butter is non-negotiable here—as we cut it into our dry ingredients using a pastry blender or fork (more on this later), we create pockets of fat that help create steam during baking for those lovely layers.
- 1 cup buttermilk, cold (see note). Buttermilk lends acidity that activates both our baking soda and baking powder while keeping our biscuits tender and moist—a crucial aspect! If you can’t find buttermilk at the store or prefer homemade options, you can easily make your own by mixing regular milk with vinegar or lemon juice; just let it sit until thickened slightly before using.
- Coarse sugar, if desired. This optional finishing touch adds a delightful crunch on top of your baked biscuits while enhancing their visual appeal—like a little sprinkle of fairy dust! Use turbinado or demerara sugar for an extra sparkle and texture contrast against the soft biscuit body.
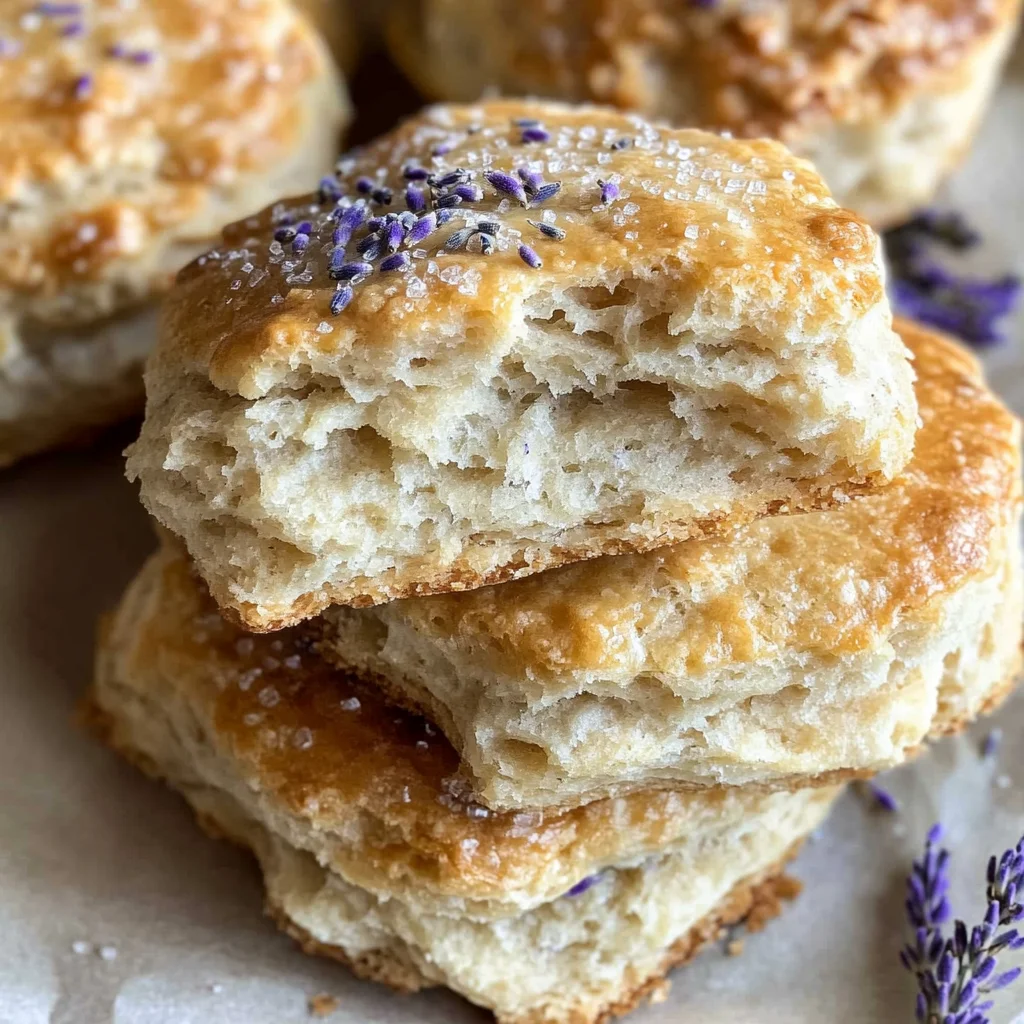
Equipment You’ll Need:
Before we dive into crafting these delicious Lavender Biscuits together, let’s ensure we have everything ready at hand! Having the right tools makes this experience smoother and far more enjoyable—it transforms cooking from a chore into an art form!
- Coffee grinder or food processor – Essential for finely grinding dried lavender into fragrant perfection! A coffee grinder typically yields better results due to its size; however, if you only have access to a food processor, don’t worry—you can still achieve great results by processing smaller batches along with some sugar.
- Large mixing bowl – A sturdy bowl allows easy mixing without fear of spills or messes—a must-have for any successful biscuit-making session!
- Pastry blender or fork – This tool is crucial when cutting cold butter into dry ingredients; it helps create those desirable pea-sized pieces essential for flakiness without melting the butter too soon!
- Bowl scraper – An underrated hero in any baker’s toolkit! This handy tool helps bring together sticky dough without warming up those precious cubes of butter—essentially ensuring optimal texture throughout.
- Floured surface – Whether it’s a clean countertop or cutting board lightly dusted with flour; having ample space allows us freedom when rolling out dough without sticking!
- Biscuit cutter – I love using a fluted cutter because it creates beautifully textured edges on each biscuit while helping them rise nicely during baking—just be sure not to twist as you cut!
Now that we’re fully equipped with knowledge about our ingredients and tools let’s roll up our sleeves and start preparing these delightful Lavender Biscuits together!
Step 1: Preheat Your Oven
First things first: preheating your oven is absolutely paramount! Set that beauty to 450℉ (about 232℃) so it reaches optimum temperature by the time we’re ready for baking—the higher heat helps create those lovely flaky layers that define great biscuits! While waiting patiently for warmth inside your kitchen (and maybe savoring some divine lavender scents wafting through), line your sheet pan with parchment paper—a simple yet effective step ensuring easy release post-baking.
Step 2: Grind Your Dried Lavender
Next up: let’s transform those delicate bits of dried lavender into aromatic magic! Pour some granulated sugar (a few tablespoons will do) along with all of your dried lavender into either your trusty coffee grinder or food processor—don’t worry if you need additional sugar; this simply assists in achieving even consistency during grinding. Process until finely ground—think powdered sugar consistency—which captures all those enchanting fragrances beautifully… Trust me on this: once released from its confinement within those little flowers, you’ll find yourself utterly intoxicated by their heady scent filling up your kitchen!
Step 3: Combine Dry Ingredients
Now onto one of my favorite moments in this entire process—the merging stage where simplicity meets potential goodness! In a large mixing bowl (the one we talked about earlier), combine two cups flour alongside one tablespoon each of baking powder plus sodium bicarbonate (our friendly neighborhood leavener!) plus half teaspoon salt—with gentle care stir together until evenly distributed throughout—all ingredients deserve love equally here! Giving these dry components some attention ensures they’ll mix harmoniously once combined later with wet ones—the goal being even rise throughout each biscuit as they bake alongside their irresistible fragrance wafting through every inch left unturned…
Step 4: Add Lavender Sugar & Cut Butter
Here comes another exciting part—we’ll introduce our finely ground lavender-sugar mixture into this already delightful mix along with remaining granulated sugar reserved previously! Stir gently yet thoroughly until everything feels oh-so-harmonized before proceeding further… Now grab those cold cubes of unsalted butter from earlier—we’re going old-school by cutting them directly into dry goodness using either pastry blender or fork depending upon what suits best personally—I promise you there’s nothing quite like feeling buttery flakes blend seamlessly amidst floury goodness—it’s such an intimate moment between creator & creation unfolding right before eyes… Keep going until only small pea-sized pieces remain visible amongst mixture—that’s precisely how we’ll ensure optimal flakiness without risking melting away vital textures essential during final bake-off phase!
With every step we’ve taken so far building towards something wonderful ahead—the anticipation feels almost tangible now… Are you excited? I hope so because that’s just part one completed—and trust me when I say things are about get even more deliciously rewarding shortly ahead… Stay tuned for next steps where we’ll unite wet ingredients beautifully bringing forth what promises become heavenly bites awaiting eagerly share among loved ones gathered round table together enjoying life’s simplest pleasures found hidden within freshly baked treats made lovingly at home…
Step 5: Embracing the Dry Ingredients
Now that we have our finely ground lavender sugar, let’s move on to combining our dry ingredients. In a large mixing bowl, add the flour, baking powder, baking soda, and salt. This is where the magic begins! Stir these ingredients together with a whisk or a fork until they’re well combined; you want to ensure that each component is evenly distributed. Why is this important? Each ingredient plays a crucial role in creating the perfect texture and flavor in your Lavender Biscuits. For instance, the baking powder and baking soda are your leavening agents, which means they help your biscuits rise beautifully when baked. If they’re not mixed uniformly, you could end up with some biscuits rising higher than others or having an uneven taste that detracts from the overall experience.
Once you’ve stirred everything together, it’s time to add the lavender sugar along with any remaining granulated sugar (the regular kind). Stir again until fully integrated. You’ll notice how the lavender adds a lovely hint of color to the dry mix—a delicate reminder of what’s to come! The floral notes will awaken your senses as you prepare to transform these simple ingredients into something truly extraordinary. This step is about creating a solid foundation for your biscuits; don’t rush it! Take your time to appreciate the fragrant aroma wafting up from the mixture!
Step 6: The Art of Cutting Butter
Next up, we’re diving into one of my favorite parts—adding the butter! Using six tablespoons of cold unsalted butter, cut it into small cubes before adding it directly to your flour mixture. Now comes the fun part: using a pastry blender or a fork, you’ll want to cut that cold butter into your dry ingredients until no large pieces remain. The goal here is to achieve a texture that resembles coarse crumbs or tiny peas—the size of those pea-like pieces is absolutely paramount because they create little pockets of air when baked. These pockets are what lead to that dreamy flakiness we all crave in biscuits.
Why cold butter? It’s crucial because it inhibits gluten formation in the dough. When gluten develops too much in biscuit dough, you end up with tough biscuits rather than flaky ones. By working quickly and keeping everything cold—yes, even your hands if possible—you ensure that those lovely layers form beautifully during baking. Trust me on this step: take care not to overmix; you want those buttery bits intact for maximum flakiness!
Step 7: Bringing It All Together
Now comes the moment we’ve been waiting for—adding the buttermilk! Pour one cup of cold buttermilk into your bowl with the dry ingredients and butter mixture. Use a bowl scraper if you have one; it’s incredibly helpful for gently folding everything together without warming up that precious butter. You’ll find yourself mixing until just combined; don’t be alarmed if it seems slightly shaggy or sticky—that’s perfectly normal! The goal here is not perfection but rather an invitingly soft dough that holds together without any dryness.
Why buttermilk? Ahh, it’s like liquid gold when it comes to baking! Its acidity reacts with the baking soda, providing an extra lift while infusing your biscuits with tenderness and flavor. This magical ingredient also contributes a slight tanginess that balances out the sweetness beautifully. Don’t be afraid if some flour remains stuck at the bottom of your bowl; just gently fold it in without overworking the dough—overhandling can lead to dense biscuits instead of airy delights.
Step 8: Shaping Your Biscuits with Love
After bringing your dough together, it’s time for one of my favorite tasks—shaping those beautiful biscuits! On a lightly floured surface, gently pat out your dough until it’s about an inch thick—no rolling pins here! Just use your hands for this part; we want to keep that wonderful texture intact. As you press down on the dough, take care not to overwork it; this will ensure each biscuit stays light and fluffy.
Using a fluted cutter (I love using a 2.5-inch one!), cut out rounds from your dough without twisting as you go—this might seem trivial, but trust me when I say twisting can prevent proper rising! Once you’ve cut out as many biscuits as possible from that first round of dough, gather any scraps and pat them back together gently so you can get every last bit out of this delightful concoction—you deserve every biscuit!
Set each biscuit on your prepared sheet pan lined with parchment paper as you go along. Remember: space them apart since they’ll rise beautifully while baking! And here’s where patience pays off—after cutting them out, pop those biscuits in the freezer for about ten minutes before baking them off. Why chill? This crucial step solidifies that cold butter once again and helps maintain their structure during baking so they emerge from the oven beautifully risen and golden brown.
And there you have it—your very own batch of Lavender Biscuits awaits! Once completely cool (if you can resist!), store any leftovers in an airtight container for up to three days—or freeze unbaked ones for later enjoyment! Just imagine pulling one from frozen and popping it straight into the oven whenever you’re craving something special—it’s like having a little culinary treasure waiting just for you!
Enjoy every bite of these tender flakes kissed by lavender essence; I promise they’ll bring joy not only to you but also everyone lucky enough to share in this delightful experience with you! Happy baking!
Storage and Enjoyment Tips for Your Lavender Biscuits
Now that you’ve baked up a batch of these delightful Lavender Biscuits, it’s time to savor every crumb! The enchanting aroma that fills your kitchen as they bake is just a hint of the deliciousness you’re about to experience. Each biscuit is tender and flaky, with that lovely hint of lavender making them uniquely comforting and utterly inviting. But what happens when there are leftovers? Don’t worry; I’ve got you covered with some fantastic storage tips that will help keep these biscuits fresh and flavorful!
Storing Leftover Lavender Biscuits
To preserve the magic of your Lavender Biscuits, be sure to store them in an airtight container at room temperature. This keeps them soft and prevents them from drying out, which is absolutely crucial for maintaining that melt-in-your-mouth texture we all adore. Ideally, they’ll stay fresh for up to three days on your counter, but trust me, they’ll likely disappear long before then! If you notice any slight staleness after a day or two, simply pop them in the microwave for about 10-15 seconds to revive their warmth and softness—it’s like magic! And while we’re talking about pro tips, if you ever find yourself with leftover biscuits—and I promise you’ll want to keep some around—they can be stored alongside a slice of bread in the container. This trick helps maintain moisture levels; it’s like giving your biscuits a cozy hug!
Freezing Lavender Biscuits for Later
If you want to enjoy these delightful treats at your leisure, freezing them is a wonderful option! Simply place your unbaked biscuits on a tray and freeze them until firm—about an hour should do the trick. Once they’re solid, transfer them into an airtight container or freezer bag. This way, they’ll keep beautifully for up to three months without losing their charm. When you’re ready to indulge again, there’s no need to thaw; just bake them straight from frozen! A few extra minutes in the oven will give you freshly baked biscuits that taste just as good as the first batch. Isn’t that such a convenient way to ensure you have something special on hand? Trust me on this one—it makes those unexpected cravings so much easier to satisfy!
Lavender Biscuits

Indulge in the enchanting experience of Lavender Biscuits—where classic comfort meets floral elegance. These soft, buttery biscuits are infused with aromatic dried lavender, creating a delightful treat perfect for breakfast or afternoon tea. Each bite offers a tender texture complemented by the subtle floral notes of lavender, making them a unique addition to any gathering. Imagine serving these beautiful biscuits adorned with a sprinkle of coarse sugar that glistens like morning dew, evoking a sense of nostalgia and warmth. Whether enjoyed with coffee or tea, these Lavender Biscuits are sure to impress and transport your taste buds on a delightful journey.
- Prep Time: 20 minutes
- Cook Time: 15 minutes
- Total Time: 35 minutes
- Yield: Approximately 12 biscuits 1x
- Category: Dessert
- Method: Baking
- Cuisine: American
Ingredients
- ¼ cup granulated sugar
- 1 Tbsp dried culinary lavender
- 2 cups all-purpose flour
- 1 Tbsp baking powder
- ½ tsp salt
- ¼ tsp baking soda
- 6 Tbsp cold unsalted butter, cubed
- 1 cup cold buttermilk
- Coarse sugar (optional, for topping)
Instructions
- Preheat your oven to 450°F (232°C) and line a baking sheet with parchment paper.
- In a coffee grinder or food processor, blend the dried lavender with some granulated sugar until finely ground.
- In a large bowl, whisk together flour, baking powder, baking soda, salt, and the lavender-sugar mixture.
- Cut in cold butter using a pastry blender or fork until pea-sized crumbs form.
- Stir in cold buttermilk until just combined; do not overmix.
- On a floured surface, gently pat the dough to about an inch thick and cut out biscuits using a fluted cutter.
- Place on the prepared baking sheet and freeze for 10 minutes.
- Optionally brush with milk and sprinkle coarse sugar on top before baking for 12-15 minutes until golden brown.
Nutrition
- Serving Size: 1 biscuit (50g)
- Calories: 190
- Sugar: 5g
- Sodium: 180mg
- Fat: 8g
- Saturated Fat: 5g
- Unsaturated Fat: 3g
- Trans Fat: 0g
- Carbohydrates: 25g
- Fiber: 1g
- Protein: 3g
- Cholesterol: 20mg