Traditional Strawberry Upside Down Cake
Growing up, my mom always made this classic cake whenever we had extra strawberries in the summer. There’s something profoundly satisfying about flipping over a warm cake and unveiling a stunning display of ruby-red strawberries glistening like jewels on top of a perfectly baked golden sponge. The aroma wafting through the kitchen is utterly intoxicating, transporting me back to sun-drenched afternoons spent with family, laughter echoing as we gathered around the table to enjoy this beloved dessert. The Traditional Strawberry Upside Down Cake isn’t just food; it’s an experience, a sweet celebration that bridges generations and ignites memories. Every bite is a symphony of flavors, a delightful balance between the sweetness of ripe strawberries and the buttery richness of the cake itself.
As I share this recipe with you, I want you to feel the warmth and love that goes into making it. Not only does this cake embody the essence of summer with its vibrant fruit topping, but it also serves as a reminder of how food can weave together the fabric of our lives. Whether it’s a casual weeknight dinner or a special gathering with friends and family, this cake has an uncanny ability to bring people together. Each slice tells a story—of moments shared, laughter exchanged, and joy celebrated. So roll up your sleeves, grab those fresh strawberries, and let’s embark on this culinary journey together!
Traditional Strawberry Upside Down Cake: A Summer Delight That Brings Joy
There’s something so heartfelt about baking this Traditional Strawberry Upside Down Cake. It feels like giving a warm hug through food—a gesture of love that transforms simple ingredients into something truly extraordinary. This cake is not only visually stunning but also remarkably easy to prepare, making it the perfect dessert for both novice bakers and seasoned pros alike. So let’s dive in and create something magical together!
Ingredients:
As we gather our ingredients for this delightful cake, let’s take a moment to appreciate each component that plays its part in crafting this masterpiece. Every ingredient brings its unique qualities and characteristics that contribute to the final result.
- 1/2 cup white sugar – Sugar is essential for balancing flavors; it sweetens our batter while contributing to that lovely golden crust as it caramelizes during baking. When selecting sugar, opt for granulated white sugar for consistent sweetness without any aftertaste. Remember that sugar also affects the texture—too little can make your cake dense, while too much can lead to an overly sweet result.
- 2 large eggs – Eggs are not just binders; they are integral in building structure within our cake through their proteins which coagulate during baking. They also add moisture and richness to our batter. Always use large eggs for best results—they are standard in recipes and ensure proper ratios in baking.
- 3 tbsp melted butter – Butter is liquid gold when it comes to flavor! Using melted butter enhances both taste and moisture within our cake while allowing for easier mixing with other ingredients. Ensure your butter isn’t too hot when adding it to avoid cooking the eggs prematurely; let it cool slightly before incorporation.
- 1 tsp vanilla extract – Vanilla extract elevates our Traditional Strawberry Upside Down Cake from simple to sublime! The aromatic compounds in vanilla provide warmth and depth of flavor that harmonizes beautifully with strawberries. Choose pure vanilla extract over imitation for authentic flavor—trust me on this!
- 3/4 cup buttermilk – Buttermilk offers tanginess that counters sweetness while keeping our cake moist due to its acidity reacting with baking soda or powder (though no leavening agents are directly required here). If you don’t have buttermilk on hand, you can easily make a substitute by mixing regular milk with lemon juice or vinegar—a non-negotiable step for achieving that tenderness!
- 1 1/2 cups self-rising flour – This flour is key as it contains both flour and leavening agents already mixed in; it simplifies things tremendously! The self-rising flour provides lift without needing additional baking powder or soda—just remember not to overmix your batter once combined; otherwise, we risk developing gluten which could lead to toughness.
- 4 cups sliced strawberries – Fresh strawberries are undoubtedly the stars of this dessert! Their natural sweetness paired with slight tartness creates an exquisite balance atop our cake. Opt for ripe berries for optimal flavor—look for those vibrant red hues without any soft spots.
- 4 tbsp melted butter – This second dose of melted butter is crucial as it forms the base layer upon which we arrange our sliced strawberries before pouring over the batter. It promotes caramelization during baking while ensuring those beautiful fruits don’t stick when flipped later.
- 1/3 cup granulated sugar – This sugar will be sprinkled over the arranged strawberries before adding the batter—a technique that helps create that coveted caramelized topping once baked! It enhances sweetness while contributing to a stunning presentation.
Let’s gather these ingredients with care because each one holds its magic!
Equipment You’ll Need:
Before we dive into creating our Traditional Strawberry Upside Down Cake, let’s ensure we have all our trusty kitchen companions at hand—after all, having the right tools makes our cooking experience smoother and more enjoyable!
- 9-inch round cake pan – A sturdy round cake pan is essential for achieving even baking results; its shape allows your cake to rise beautifully and flip out easily once done. If you don’t have one on hand, any similarly sized pan should suffice—but be mindful of cook times if using glass or dark-coated pans as they may bake differently.
- Mixing bowls – Having various sizes of mixing bowls is invaluable—in particular, a medium bowl for combining wet ingredients before introducing them into dry ones ensures thorough incorporation without lumps forming later on.
- Whisk or electric mixer – A whisk will help aerate your mixture by incorporating air into your batter effectively; however, if you have an electric mixer handy (which I wholeheartedly recommend), using that will save time while ensuring everything blends seamlessly!
- Spatula – A rubber spatula is perfect for folding in ingredients gently without deflating air bubbles formed during mixing; it’s essential when combining wet and dry components carefully.
- Cutting board & knife – To prepare those luscious strawberries efficiently! A sharp knife will make slicing easy while minimizing bruising—the goal here is beautiful slices ready to shine above your cake!
Now that we’re equipped with all necessary tools let’s dive into preparing this delightful dessert together!
Preparing the Traditional Strawberry Upside Down Cake
Step 1: Preheat Your Oven & Prepare Your Pan
Before anything else, preheating your oven is absolutely paramount—it ensures even cooking from start to finish so those flavors meld beautifully without any dryness setting in unexpectedly later on! Set your oven temperature at 350°F (175°C). While waiting patiently (and trust me—you’ll want those aromas wafting through soon!), grab your round 9-inch cake pan and coat it generously with melted butter followed by dusting some granulated sugar evenly across its surface—this will create that lovely caramel layer once flipped over post-baking! Don’t rush through these prep steps; they lay down the foundation for success ahead.
Step 2: Arrange Strawberries
Now comes one of my favorite parts: arranging those beautiful sliced strawberries at the bottom of our prepared pan! Take time arranging them artfully—overlapping slightly creates an enchanting visual once flipped upside down later on. Sprinkle about 4 tablespoons of melted butter over them followed by evenly distributing 1/3 cup granulated sugar atop—all these elements work together harmoniously when baked!
Step 3: Combine Wet Ingredients
In another mixing bowl (the medium one should do nicely), combine those two large eggs alongside half cup white sugar until fully blended—this process known as creaming incorporates air which helps achieve fluffiness within baked goods! Add three tablespoons melted butter along with one teaspoon vanilla extract—this step introduces complexity while enhancing flavor profiles further—and finally pour in three-fourths cup buttermilk stirring gently until smooth throughout—avoid vigorous mixing here; we want harmony rather than chaos!
Step 4: Mix Dry Ingredients Together
In a separate bowl (preferably larger), whisk together one-and-a-half cups self-rising flour ensuring no clumps remain before gently folding in previous wet mixture created earlier using spatula—it allows ingredients mingle without losing precious air bubbles built up previously during creaming phase earlier mentioned! Once combined thoroughly yet still slightly lumpy consistency achieved—that’s perfectly okay since overmixing leads us down tough-textured paths better avoided altogether so keep calm knowing success lies ahead!
I hope these first few steps inspire confidence as you embark on creating something deliciously nostalgic—the joy this Traditional Strawberry Upside Down Cake brings goes beyond taste alone—it rekindles cherished memories worth savoring time after time again! Stay tuned as we continue crafting this delightful treat together!
Step 5: Preparing the Strawberry Base – A Sweet Symphony
Now, let’s dive into what makes this cake truly exceptional – the glorious strawberry base. This is where the magic begins! Start by taking those luscious strawberries you’ve sliced up and placing them in a large mixing bowl. We’re going to transform these beautiful fruits into a syrupy delight that will caramelize as it bakes, creating an utterly intoxicating aroma that fills your kitchen. Add the 4 tablespoons of melted butter and 1/3 cup of granulated sugar to the bowl and gently toss everything together until each slice is beautifully coated. You want to ensure every strawberry gets its fair share of that buttery sweetness because trust me, this step is crucial! The sugar will draw out the natural juices from the strawberries, creating a vibrant sauce that will seep into the cake as it cooks, infusing it with flavor and moisture.
Once properly mixed, let this mixture sit for about 10-15 minutes. This waiting game allows the strawberries to macerate; they’ll release their juices while soaking up the butter and sugar—think of it as giving them a spa day! You’ll notice that the strawberries become even more fragrant and glossy during this time. What you’re looking for here is a lovely syrup forming at the bottom of the bowl, which will be divine when it melds with the cake batter. Make sure to keep an eye on them; if they seem too dry after 10 minutes, don’t hesitate to give them an extra stir or let them sit a few moments longer.
Step 6: Combining Wet Ingredients – Creating Liquid Gold
With your strawberry base coming together beautifully, it’s time to focus on our wet ingredients, which are equally significant in achieving that perfect texture and flavor profile in your Traditional Strawberry Upside Down Cake. In another mixing bowl, combine 2 large eggs, 3 tablespoons of melted butter, and 1 teaspoon of vanilla extract. I always find joy in adding vanilla—it injects such warmth and depth into any baked good! Whisk these ingredients together until they are well combined; you want them to blend seamlessly into what I like to call “liquid gold.” This step is essential because emulsifying these components ensures that your cake has an even texture throughout—no one enjoys a dense bite!
Next, we’ll add 3/4 cup of buttermilk into this mixture. If you don’t have buttermilk on hand (don’t worry; I’ve been there!), you can easily make a substitute by adding a tablespoon of vinegar or lemon juice into regular milk and letting it sit for about 5-10 minutes until it curdles slightly. Buttermilk serves two purposes here: it adds moisture and acidity which helps tenderize the gluten in your flour, leading to an incredibly light and fluffy cake texture. Whisk everything together again until it’s nice and smooth—don’t rush this step! You want all those flavors to intermingle before we bring in our dry ingredients.
Step 7: Mixing It All Together – The Heart of Your Cake
Now comes one of my favorite parts—the moment we bring all elements together! Gradually sift in 1 1/2 cups of self-rising flour into your wet ingredients while gently folding with a spatula or wooden spoon. It’s important not to over-mix at this stage because overworking your batter can lead to gluten development, resulting in a tough cake rather than the tender slice we all crave. Instead, fold until just combined; there may be some lumps—that’s perfectly okay! Remember, those little pockets of flour will disappear during baking, leaving you with a beautifully airy crumb.
Once fully combined, take a moment to appreciate how gorgeous your batter looks—smooth with hints of pink from those delightful strawberries peeking through! You should also consider taste-testing (I won’t tell anyone!). The batter should be sweet yet balanced with just enough tang from the buttermilk. Now, grab your prepared baking pan (I recommend using a round cake pan) where we’ll pour half of this luscious batter directly over our waiting strawberries. This layer acts as an anchor for our fruits while they bake together harmoniously.
Step 8: The Baking Magic – Patience Is Key
With everything layered perfectly in your pan—a rich strawberry base followed by a cloud-like batter—it’s time for baking magic to happen! Preheat your oven to 350°F (175°C) if you haven’t already; ensuring your oven is at the right temperature is absolutely paramount for even cooking. Carefully place your cake pan in the center rack of your preheated oven and set a timer for about 50 minutes.
As it bakes, take note of how wonderful your kitchen will smell—the aroma wafting through will be nothing short of heavenly! To check for doneness without disturbing too much heat inside, gently press down on the center of the cake after about 45 minutes; if it springs back lightly under your touch—a sure sign that it’s ready—you’re golden! Alternatively, insert a toothpick into the center; if it comes out clean or with just a few moist crumbs clinging on (but no wet batter), then rejoice! Your Traditional Strawberry Upside Down Cake is done!
Don’t rush this cooling phase either; patience pays off here too! Once removed from the oven, allow it to rest for about 10-15 minutes before flipping onto your serving platter. This resting period lets everything settle nicely while maintaining moisture within the cake itself—trust me when I say skipping this could result in broken pieces when flipping!
Final Touches – The Grand Reveal
Step 9: Flipping Time – A Beautiful Transformation
Now comes one of my favorite moments—flipping over our masterpiece! After letting it cool slightly (but not completely), take a serving plate larger than your baking pan and place it upside down on top of your cake. With one swift motion—this part can feel dramatic—invert both together so that your beautiful strawberries rest atop their fluffy layer instead. Give it a gentle tap if needed; sometimes cakes can be shy about coming out gracefully!
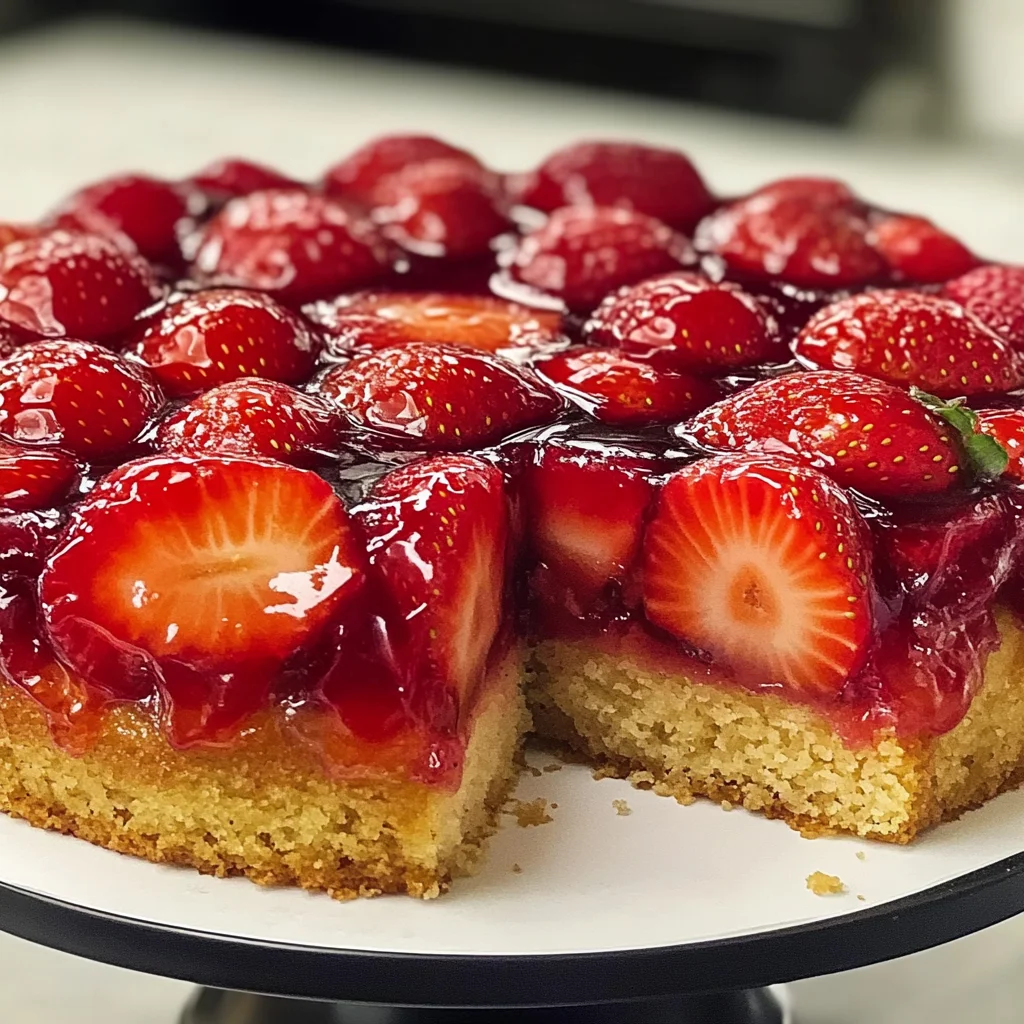
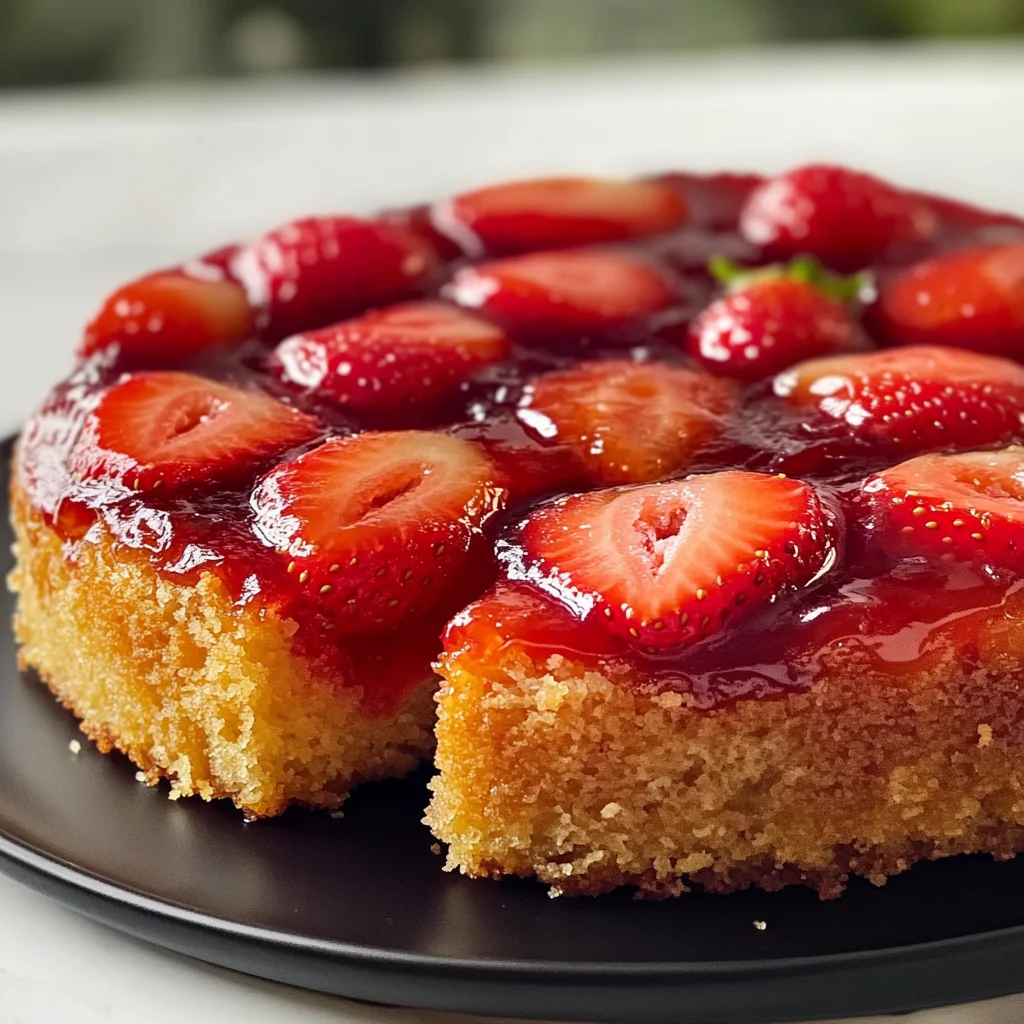
As you lift away the pan, prepare yourself for pure joy! The sight before you should be stunning—a bright red canvas adorned with glistening strawberries nestled in their sugary syrup surrounded by golden edges from baking bliss! Each slice reveals layers upon layers that promise sweetness balanced by rich buttery notes—a visual feast that beckons everyone closer.
This Traditional Strawberry Upside Down Cake isn’t just dessert; it’s an experience filled with memories and love—a true testament to how simple ingredients can create something profoundly satisfying when treated right. Serve warm or at room temperature with whipped coconut cream or simply enjoy as is. Every bite offers nostalgia wrapped in sunshine—perfect for summer gatherings or cozy evenings alike!
So gather around friends and family because sharing this delightful creation makes every moment sweeter! Enjoy every bite, knowing you’ve created something truly extraordinary right from scratch—it’s more than just food; it’s love on a plate!
Storage and Enjoyment Tips for Your Traditional Strawberry Upside Down Cake
Now that your Traditional Strawberry Upside Down Cake is perfectly baked and ready to dazzle, let’s talk about how to preserve this delightful creation so you can enjoy it longer. There’s something truly magical about savoring a slice of this cake even days after it’s made, as the flavors deepen and meld together. When you’re ready to store your cake, allow it to cool completely, then gently cover it with plastic wrap or place it in an airtight container. This is essential because we want to keep that luscious moisture locked in, ensuring each bite remains as enchanting as the first. If stored correctly at room temperature, your cake will stay fresh for about 2-3 days. However, if you find yourself with leftovers beyond that—though I doubt you will!—you can always pop it in the fridge for up to a week. Trust me on this: the taste remains wonderful even after a few days; just remember that bringing it back to room temperature before serving enhances its flavor profile tremendously!
Storing Leftover Traditional Strawberry Upside Down Cake
To maintain the quality of your leftover Traditional Strawberry Upside Down Cake, I recommend using an airtight container or wrapping it snugly in plastic wrap. This not only keeps out unwanted air but also prevents any fridge odors from sneaking into that beautiful strawberry aroma. If you’ve decided to refrigerate it, be sure to enjoy your cake within a week; however, if you’re leaving it at room temperature, aim for 2-3 days of delicious indulgence. Now here’s a little pro tip that I swear by: placing a slice of bread in the container can help keep your cake moist while absorbing any excess moisture! Isn’t that just brilliant? The flavor will evolve subtly over time—a little more mingling of sweet strawberries and buttery cake—creating a dessert experience that’s still profoundly satisfying even days later. When you’re ready for another slice, simply reheat it gently in the microwave for about 10-15 seconds; this will revive all those lovely flavors and aromas.
Freezing Traditional Strawberry Upside Down Cake for Later
If you anticipate needing some extra time before digging into this scrumptious delight—or if you want to prepare ahead—freezing is an excellent option! To freeze your Traditional Strawberry Upside Down Cake properly, first ensure it’s cooled completely; then wrap individual slices or the whole cake tightly in plastic wrap followed by aluminum foil or place them in a freezer-safe container. This double-layer protection is non-negotiable because we want to guard against freezer burn while preserving that exquisite flavor. Your cake can be frozen for up to three months without losing its charm! When you’re ready to indulge again, simply transfer the desired amount from the freezer to the refrigerator and let it thaw overnight; this gentle thawing process helps maintain its texture and taste remarkably well. Just think about how convenient it will be to have a slice of summer sweetness on hand whenever you fancy a treat!
Traditional Strawberry Upside Down Cake
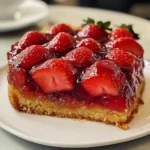
Indulge in the delightful nostalgia of our Traditional Strawberry Upside Down Cake, a classic summer dessert that brings warmth and joy to every gathering. This cake features a moist, buttery sponge topped with fresh, juicy strawberries that caramelize beautifully during baking, creating a sweet and fruity topping that shines like jewels. Perfect for family dinners, picnics, or simply as a treat for yourself, this easy recipe is sure to become a cherished favorite. Each slice offers a harmonious blend of flavors and memories, making it not just food but an experience to savor. Gather your ingredients and let’s create some magic together!
- Prep Time: 20 minutes
- Cook Time: 50 minutes
- Total Time: 1 hour 10 minutes
- Yield: Serves approximately 8 slices 1x
- Category: Dessert
- Method: Baking
- Cuisine: American
Ingredients
- 1/2 cup white sugar
- 2 large eggs
- 3 tbsp melted butter
- 4 tbsp melted butter (for strawberries)
- 1 tsp vanilla extract
- 3/4 cup buttermilk
- 1 1/2 cups self-rising flour
- 4 cups sliced fresh strawberries
- 1/3 cup granulated sugar (for strawberries)
Instructions
- Preheat your oven to 350°F (175°C) and prepare a 9-inch round cake pan by coating it with melted butter and dusting with sugar.
- Arrange sliced strawberries in the pan, then drizzle with melted butter and sprinkle with granulated sugar.
- In a mixing bowl, whisk together eggs and sugar until blended. Add melted butter, vanilla extract, and buttermilk; mix until smooth.
- Gradually fold in self-rising flour until just combined.
- Pour half of the batter over the strawberries in the pan, then bake for approximately 50 minutes or until a toothpick comes out clean.
- Allow the cake to cool for 10-15 minutes before flipping onto a serving plate.
Nutrition
- Serving Size: 1 slice (80g)
- Calories: 245
- Sugar: 21g
- Sodium: 150mg
- Fat: 8g
- Saturated Fat: 4g
- Unsaturated Fat: 4g
- Trans Fat: 0g
- Carbohydrates: 39g
- Fiber: 1g
- Protein: 4g
- Cholesterol: 70mg