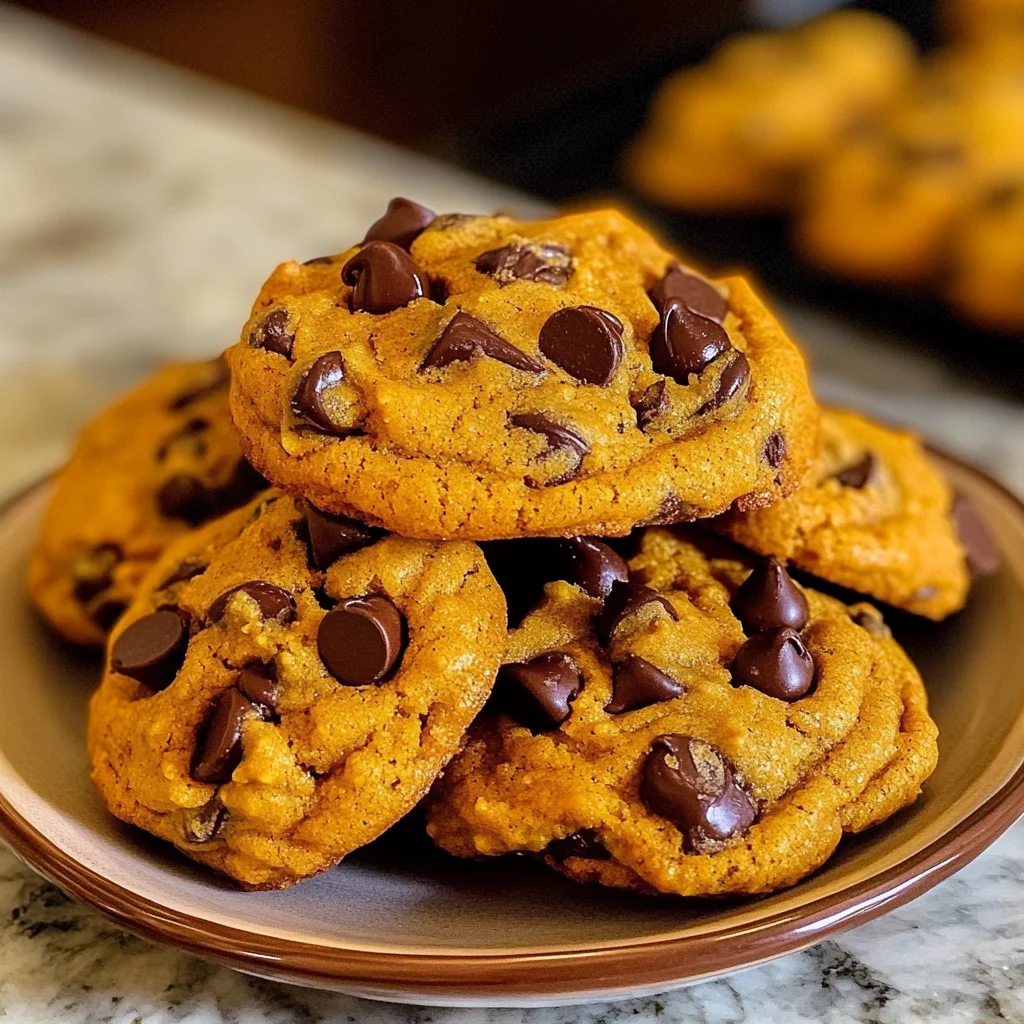
Pumpkin Chocolate Chip Cookies
There’s something truly magical about the scent of freshly baked cookies wafting through the house, isn’t there? It’s like an embrace from a dear friend, wrapping you in warmth and comfort. The moment you pull these Pumpkin Chocolate Chip Cookies out of the oven, you’ll be greeted with an intoxicating aroma that melds spices and sweetness in a way that evokes cozy autumn evenings and festive gatherings. Oh, trust me—this is not just a cookie; it’s an experience, one that carries the essence of fall right into your kitchen. With every bite, you’ll savor the soft, chewy texture and the delightful surprise of rich chocolate chips that perfectly complement the warm pumpkin flavor. These cookies are a testament to how simple ingredients can create something profoundly satisfying and utterly extraordinary.
What makes these Pumpkin Chocolate Chip Cookies so special is their ability to bridge tradition with innovation. There’s a rich history behind pumpkin desserts that celebrates the harvest season, but we’re giving it a twist by adding those delightful chocolate chips. It’s like blending old family recipes with new ideas, creating something that’s both nostalgic and refreshingly modern. Perfect for holiday gatherings or simply to enjoy on a quiet evening at home, these cookies are bound to become a cherished staple in your baking repertoire. So let’s dive into this delicious adventure together!
Pumpkin Chocolate Chip Cookies: A Cozy Autumn Delight
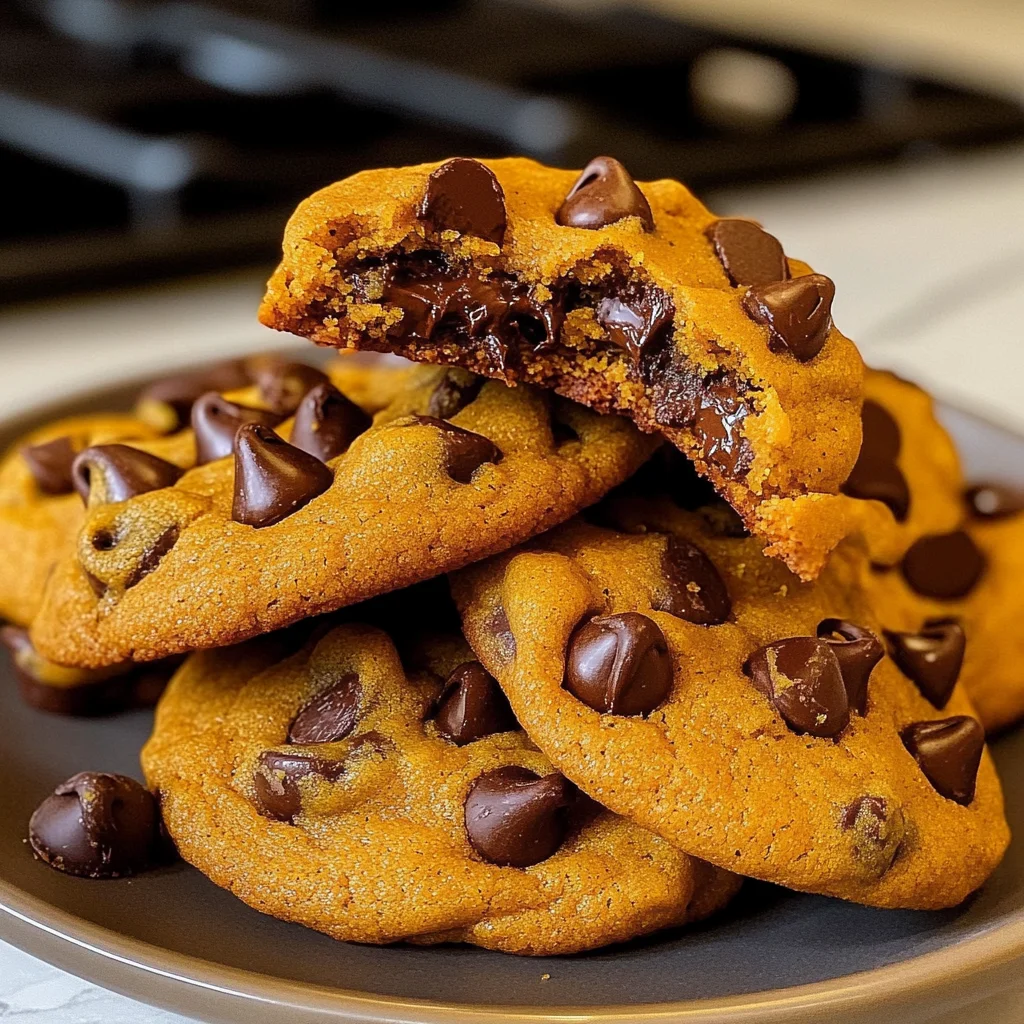
You’re about to embark on a culinary journey that will fill your home with sweet scents and your heart with joy! These Pumpkin Chocolate Chip Cookies are incredibly easy to make and yield a batch that will have everyone reaching for seconds (and thirds). Just imagine sinking your teeth into a warm cookie straight from the oven—the soft pumpkin base paired with gooey chocolate chips is nothing short of heavenly. So gather your ingredients and let’s bring this delightful recipe to life!
Ingredients:
As we prepare to create our lovely cookies, let’s take a moment to appreciate each ingredient’s role in crafting this delightful treat. Each component plays a vital part in building layers of flavor and texture.
- 1 cup (about 240g) pumpkin puree: This luscious ingredient is key—it brings moisture and depth of flavor to our cookies while also making them wonderfully soft and chewy. Look for pure pumpkin puree without added sugar or spices; it should have that beautiful deep orange hue. If you’re feeling adventurous, homemade puree adds an even richer taste! Cooking the puree down before adding it helps intensify its flavor—don’t skip this step!
- ¾ cup (1 ½ sticks or 170g) unsalted butter, softened to room temperature: Butter is essential for creating that classic cookie texture—soft on the inside with slightly crisp edges. By using unsalted butter, you maintain control over the saltiness of your cookies, allowing all other flavors to shine through beautifully. Make sure it’s at room temperature so it creams well with sugars; this process is crucial for achieving lightness in your final product.
- ½ cup (100g) brown sugar: Brown sugar contributes moisture and chewiness due to its molasses content. It also adds depth with its rich caramel notes that pair wonderfully with pumpkin spice flavors. If you want an extra kick of flavor, consider using dark brown sugar for more intensity!
- 1 cup (200g) granulated sugar: This adds sweetness and helps achieve that lightly crisp exterior we all love in cookies. Combining granulated sugar with brown sugar creates balance; one keeps things moist while the other lends structure.
- 1 tablespoon vanilla extract: Vanilla is like a secret ingredient that enhances all other flavors in baking. It adds warmth and richness that perfectly complements pumpkin and chocolate.
- 2 ½ cups (315g) all-purpose flour: This is our backbone—providing structure and stability to our cookies. When measuring flour, spoon it into your measuring cup instead of scooping directly from the bag; this prevents packing too much flour, which can lead to dry cookies.
- 1 tablespoon cornstarch: This little powerhouse works wonders in creating tenderness in baked goods by inhibiting gluten formation. It gives our cookies that soft texture we adore without making them cakey.
- 1 teaspoon baking soda: As our leavening agent, baking soda helps our cookies rise slightly during baking while providing a nice spread as they bake—a delicate balance between height and chewiness.
- ½ teaspoon salt: Salt enhances sweetness; it’s essential for balancing all flavors in desserts—even if it seems counterintuitive! The right amount makes every bite sing with harmony.
- 2 teaspoons pumpkin pie spice: This blend typically includes cinnamon, ginger, nutmeg, and cloves—each contributing its unique warmth and complexity to our cookies. The spice mix brings forth those quintessential fall flavors we adore.
- 1 ½ cups (about 250g) semi-sweet chocolate chips: These gems add luxurious pockets of melted chocolate goodness throughout each cookie! Choose high-quality chocolate chips for superior flavor—you might even want to reserve some extra chips for sprinkling on top right before baking!
Equipment You’ll Need:
Having the right tools at your fingertips can truly elevate your baking experience! Think of them as your trusted companions on this delicious journey—we want everything to go smoothly so we can focus on enjoying every moment spent creating these mouthwatering treats.
- Mixing bowls – A set of sturdy mixing bowls in various sizes will make it easy to combine ingredients without spills or messes. Opt for glass or stainless steel; they don’t retain odors like plastic can.
- Electric mixer or whisk – An electric mixer saves time when creaming butter and sugars together but if you don’t have one handy, I promise you can achieve great results manually with a good whisk! Just put some muscle into it! Creaming properly ensures air gets incorporated into the batter leading to light fluffy cookies.
- Measuring cups & spoons – Precision matters when baking—having reliable measuring tools ensures consistency across batches! Invest time here; it’ll pay off later when those perfect cookies come out of the oven!
- Cookie scoop – This handy tool creates uniform cookie balls so they bake evenly—a must-have if you’re aiming for perfection!
Step 1: Cooking Down the Pumpkin Puree
To start our cookie adventure, we need to bring out every ounce of flavor from our pumpkin puree by cooking it down gently over medium heat for about ten minutes. As it simmers away in a small saucepan, keep an eye on it—stir frequently as you do so because we want to prevent any sticking or burning at the bottom! The goal here is simple yet effective: reducing the moisture content intensifies its natural sweetness while ensuring our cookie dough isn’t too runny after mixing everything together later on. After cooking down until we achieve between two-thirds to three-fourths cup worth of concentrated puree—remove from heat and allow it cool completely before incorporating into our batter!
Step 2: Preparing Your Baking Sheet
While waiting for that aromatic magic happening on your stovetop, take out a small baking sheet lined with parchment paper—a total game changer when it comes time for transferring those dreamy dough balls onto their final resting place before heading into the oven! Parchment paper keeps things non-stick while providing even heat distribution during baking—trust me; you’ll be thanking yourself later when cleanup becomes effortless too!
Step 3: Creaming Butter & Sugars
Now comes one of my favorite parts—the creaming process! In large mixing bowl blissfully combine softened unsalted butter along with both brown sugar and granulated sugar until lightened in color&mdashthis usually takes around three minutes using an electric mixer set at medium speed helps achieve optimal volume here but remember patience pays off whether whisking by hand or using power tools! I promise you’ll notice how fluffy everything starts looking already—it’s absolutely crucial since this step introduces air bubbles into our mixture which contribute significantly towards getting those irresistible chewy textures once baked up nicely!
Step 4: Mixing In Cooled Pumpkin & Vanilla
Once you’ve achieved fluffiness galore from creaming butter/sugars together—it’s time for adding cooled pumpkin puree alongside fragrant vanilla extract! Don’t rush this step as ensuring thorough incorporation means no lumps remain behind…just think about what would happen if there were unblended chunks lurking about later on? Yikes! We want smoothness throughout because every single bite should convey harmony between flavors rather than leaving surprises behind…so mix carefully until fully combined—your kitchen will smell divine right about now!
I sense excitement bubbling up already as we’re just getting started here! Keep going strong because soon enough those glorious morsels will emerge from their transformative journey through heat—and trust me when I say they’re worth every minute spent preparing them!
Step 5: Mixing the Dry Ingredients – Creating the Perfect Blend
Now that we’ve creamed our buttery and sugary mixture with the delightful pumpkin puree, it’s time to bring together our dry ingredients. This step is crucial because the flour mixture will provide structure to your cookies, ensuring they don’t spread too much or become overly dense. In a small bowl, whisk together 2 ½ cups of all-purpose flour, 1 tablespoon of cornstarch, 1 teaspoon of baking soda, ½ teaspoon of salt, and 2 teaspoons of pumpkin pie spice. The cornstarch is a wonderful addition here; it helps create that soft and chewy texture we all adore in cookies. As you whisk, take a moment to inhale the warm, aromatic scents wafting from the spices—this is your first hint at the cozy flavors that will soon envelop your kitchen.
Mixing the dry ingredients separately before adding them to the wet helps ensure an even distribution of leavening agents and spices throughout your dough. If you were to add everything directly into the pumpkin mixture without this step, you might end up with pockets of flour or unevenly spiced cookies—and nobody wants that! Once everything is well combined and you can see no clumps, gradually fold this dry blend into your wet ingredients using a spatula. Don’t rush this step; we want to maintain some airiness in your dough for a perfectly tender cookie. Mix just until combined; overmixing will activate the gluten in the flour too much and could lead to tough cookies instead of the soft and chewy delights we’re after.
Step 6: Folding in Chocolate Chips – The Sweet Surprise
Ah, now comes one of my favorite parts! Once your dry ingredients are just mixed in—no need for perfection; a few lumps are completely okay—it’s time to fold in 1 ½ cups of semi-sweet chocolate chips. This is where magic happens; as these little morsels melt during baking, they create decadent pockets of gooey chocolate that contrast beautifully with the spiced pumpkin flavor. Using a spatula or wooden spoon, gently fold in those chocolate chips until they are evenly distributed throughout the dough. Be careful not to overmix at this point; we want every bite bursting with both pumpkin goodness and chocolatey sweetness.
Take a moment here to reflect on how this dough looks and feels between your fingers—it should be thick yet pliable, almost like a soft blanket ready to envelop all those lovely flavors. If you notice any chocolate chips sticking out more than others or if some are being left behind in the bowl, gently coax them into the mix! Remember, these little gems are vital for balancing out the spices and providing that rich sweetness that makes every bite truly extraordinary.
Step 7: Chilling Your Dough – The Essential Rest
Before we dive headfirst into baking these delightful cookies, let’s talk about chilling our dough—a non-negotiable step that truly elevates these Pumpkin Chocolate Chip Cookies. Scoop about 2 tablespoons of cookie dough and roll them into balls—using a cookie scoop helps maintain uniform size for even baking. Place them on a lined baking sheet without overcrowding; we’ll need room for them to spread just enough while baking but not so much that they merge into one giant cookie! After you’ve shaped all your dough into lovely little rounds, cover them with plastic wrap and pop them in the freezer for at least 30 minutes, though I often recommend letting them sit overnight if time allows.
Now you might be wondering why chilling is so important? Well, first off—patience pays off here! This process solidifies the fats within your cookies (the butter), leading to less spreading during baking which results in thicker and chewier cookies rather than flat pancakes. Furthermore, chilling allows all those flavors to meld together harmoniously; trust me when I say that your future self will thank you for waiting just a bit longer before baking! When you’re ready to bake after chilling overnight, let those little dough balls sit at room temperature for about 10 minutes before placing them into the oven—this way they won’t go straight from icy cold to hot oven too quickly!
Step 8: Baking Your Perfect Cookies – A Symphony of Flavors
As you preheat your oven to 350°F, anticipation builds—you’re mere moments away from indulging in those glorious Pumpkin Chocolate Chip Cookies! Place your chilled cookie dough balls on a parchment-lined baking sheet with enough space between each ball (about 2 inches apart) for them to expand as they bake into soft clouds of deliciousness. Here’s where you can exercise some creativity: if you prefer flatter cookies (who could blame you?), simply press down on each dough ball gently before sliding them into that heavenly heat.
Now comes my favorite part—the actual baking! Slide that tray into your preheated oven and set a timer for about 10-12 minutes. Keep an eye on them during this time; you’ll know they’re ready when they look slightly under-baked but still hold their shape beautifully—this visual cue is absolutely paramount! You’ll notice their edges turning golden brown while their centers remain soft, invitingly puffed up like little edible pillows waiting for you. If you’re feeling indulgent (and who wouldn’t?), you can press additional chocolate chips onto the tops right before taking them out—that extra touch makes for an irresistible finish!
Once baked, allow those warm cookies to cool on their sheet for several minutes—they will continue cooking ever so slightly from residual heat as they rest. This patience ensures they’re perfectly chewy without falling apart when transferring them onto a cooling rack! Trust me on this: letting them rest is essential because it allows those flavors to settle further while maintaining their incredible texture.
Final Touches – Storing Your Treasures
Once cooled completely on a wire rack—if you’ve managed not to devour every single one immediately—the last step involves storing these beauties properly so they retain their moistness and flavor over time. Place your Pumpkin Chocolate Chip Cookies in an airtight container at room temperature where they’ll stay fresh for up to a week (if they last that long!). You can also freeze any leftovers by layering parchment paper between cookies within an airtight bag—just thaw at room temperature when you’re ready for another sweet treat.
And there you have it—the complete journey through creating utterly intoxicating Pumpkin Chocolate Chip Cookies! Each bite brings warmth reminiscent of cozy autumn days spent snuggled under blankets with loved ones nearby. So gather around friends or family—or maybe just indulge solo (I won’t tell!)—and enjoy sharing these delightful treats filled with love and laughter! Happy baking!
Storage and Enjoyment Tips for Your Pumpkin Chocolate Chip Cookies
Now that you’ve crafted these delightful Pumpkin Chocolate Chip Cookies, the real fun begins! The aroma wafting through your kitchen and the anticipation of that first bite is simply intoxicating. But what happens when you have a few (or many) cookies left over? Don’t worry; I’ve got you covered with some fabulous storage tips to ensure your cookies stay fresh and delicious!
Storing Leftover Pumpkin Chocolate Chip Cookies
To keep your Pumpkin Chocolate Chip Cookies at their soft and chewy best, store them in an airtight container. This will help maintain their moisture and prevent them from drying out. Ideally, you want to keep them at room temperature, away from direct sunlight, where they can last up to a week. Now, if you want to take it a step further, consider placing a slice of bread inside the container with your cookies; this little trick is absolutely paramount! The bread will help absorb any excess moisture while keeping your cookies delightfully soft and tender. Trust me on this—after a few days, these cookies still retain their utterly scrumptious flavor and texture. If you’re looking for a warm treat later on, just pop them in the microwave for about 10 seconds to revive that gooey chocolate goodness.
Freezing Cookie Dough for Later
Freezing cookie dough is an absolute game-changer for busy bakers like us! To freeze your Pumpkin Chocolate Chip Cookie dough balls properly, simply scoop them out onto a parchment-lined baking sheet, just as you would for baking. Place the sheet in the freezer until the dough balls are solid, which typically takes about an hour. Once they’re firm, transfer them to a resealable plastic bag or an airtight container marked with the date. This way, they can stay frozen for up to three months! When you’re ready to bake these treats, there’s no need to thaw them; just pop them directly into the preheated oven and add a couple of extra minutes to the baking time. The convenience of having homemade cookies ready at a moment’s notice is truly extraordinary—imagine surprising friends or family with warm cookies fresh from the oven on a whim!
Pumpkin Chocolate Chip Cookies

Enjoy irresistibly soft Pumpkin Chocolate Chip Cookies bursting with flavor! Try this easy recipe today and indulge in deliciousness.
- Prep Time: 20 minutes
- Cook Time: 12 minutes
- Total Time: 32 minutes
- Yield: Approximately 24 cookies 1x
- Category: Dessert
- Method: Baking
- Cuisine: American
Ingredients
- 1 cup pumpkin puree
- ¾ cup unsalted butter, softened
- ½ cup brown sugar
- 1 cup granulated sugar
- 1 tablespoon vanilla extract
- 2 ½ cups all-purpose flour
- 1 tablespoon cornstarch
- 1 teaspoon baking soda
- ½ teaspoon salt
- 2 teaspoons pumpkin pie spice
- 1 ½ cups semi-sweet chocolate chips
Instructions
- Cook down the pumpkin puree in a saucepan over medium heat for about 10 minutes until thickened. Allow it to cool.
- Preheat your oven to 350°F (175°C). Line a baking sheet with parchment paper.
- In a large mixing bowl, cream together the softened butter, brown sugar, and granulated sugar until light and fluffy.
- Mix in the cooled pumpkin puree and vanilla extract until well combined.
- In a separate bowl, whisk together the flour, cornstarch, baking soda, salt, and pumpkin pie spice.
- Gradually fold the dry ingredients into the wet mixture until just combined. Avoid overmixing.
- Gently fold in the chocolate chips.
- Scoop dough balls onto the prepared baking sheet, spacing them about 2 inches apart.
- Chill the dough in the freezer for at least 30 minutes before baking.
- Bake for 10-12 minutes or until edges are golden but centers remain soft.
Nutrition
- Serving Size: 1 cookie
- Calories: 150
- Sugar: 10g
- Sodium: 85mg
- Fat: 7g
- Saturated Fat: 4g
- Unsaturated Fat: 2g
- Trans Fat: 0g
- Carbohydrates: 21g
- Fiber: <1g
- Protein: <1g
- Cholesterol: 15mg