The Best Fried Apple Pies Recipe (Homemade)
There’s something profoundly magical about the aroma of fried apple pies wafting through the kitchen, isn’t there? It evokes memories of crisp autumn days, where the golden leaves dance in the wind and the air is filled with a sweet, spicy warmth. When I think about my childhood, I can almost hear my grandmother’s laughter as she expertly crafted these delectable treats, her apron dusted with flour and her hands deftly working the dough. This recipe isn’t just about making food; it’s about capturing those moments and sharing them with you. With every bite of these Best Fried Apple Pies, you’ll find a delightful balance of tender apples and warm spices enveloped in a flaky crust that has been lovingly made from scratch. Trust me when I say that this experience will be nothing short of extraordinary.
As you embark on this culinary adventure, let’s take a moment to appreciate the beauty of homemade desserts. These fried apple pies are not only a treat for your taste buds but also serve as a wonderful way to connect with family and friends. Imagine gathering around the table, sharing stories while savoring these crispy delights that are lovingly glazed and still warm from the fryer. The contrast between the soft apple filling and the delicate crunch of the crust is simply heavenly. This is why I can confidently share my Best Fried Apple Pies Recipe (Homemade) with you—it’s a recipe steeped in warmth, nostalgia, and joy.
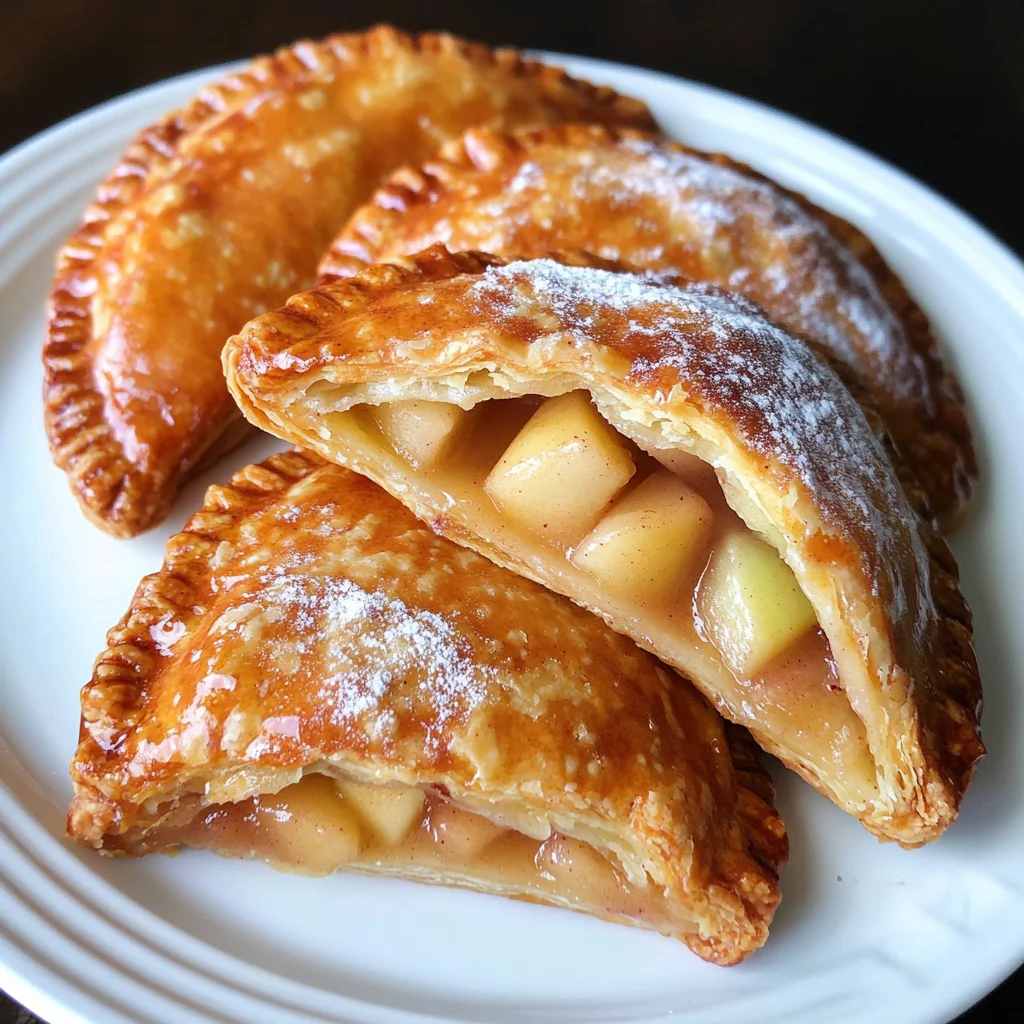
The Best Fried Apple Pies Recipe (Homemade): A Crunchy Delight Filled with Warmth
Gather ’round, dear friend! Today, we’re diving into an old-fashioned recipe that will bring smiles to your loved ones’ faces—my homemade fried apple pies! This recipe combines nostalgic flavors with a touch of modern cooking techniques to create something that’s not only delicious but also deeply satisfying. With tender apples spiced just right and wrapped in a buttery crust, this dessert is perfect for any occasion or just because it’s Tuesday!
Ingredients:
As we step into this culinary journey together, let’s talk about each ingredient that makes these fried apple pies so special. Each component plays an essential role in crafting flavors that harmoniously blend together.
- 2 large apples, peeled, cored, and diced – For this recipe, I recommend using one Granny Smith and one Honeycrisp apple. The tartness of the Granny Smith beautifully balances out the sweetness of the Honeycrisp. Choosing fresh apples is crucial; look for ones that are firm and free from blemishes to ensure your filling is bursting with flavor.
- 1/4 cup brown sugar – Brown sugar adds depth to our pie filling with its rich molasses undertones. It helps caramelize the apples as they cook down on the stove, creating that incredible syrupy goodness we all crave in dessert fillings. If you’re out of brown sugar, you can easily substitute it with white sugar mixed with a bit of molasses for similar results.
- 1/2 teaspoon cinnamon – Ahh, cinnamon—the warm hug we didn’t know we needed! It brings warmth and earthiness to our filling while enhancing the natural sweetness of the apples. Always opt for fresh ground cinnamon if possible; its aromatic qualities make all the difference.
- 1 teaspoon vanilla – Vanilla extract elevates our filling by adding complexity to its flavor profile. It’s like a secret ingredient that works behind the scenes to enhance everything else! Make sure you’re using pure vanilla extract for optimal flavor; imitation vanilla just can’t compare.
- 2 teaspoons apple cider (or apple juice) – This addition not only intensifies our apple flavor but also helps thicken our filling thanks to its natural sugars. If you have fresh-pressed cider available during fall harvests—use it! Otherwise, store-bought apple juice works just fine.
- 1 teaspoon cornstarch – Cornstarch acts as a thickening agent for our pie filling. As it cooks down with the apples and sugars over heat, it creates that luscious texture we’re aiming for—allowing us to enjoy every bit without any runny mess!
- 2 cups self-rising flour, sifted – Self-rising flour contains baking powder and salt already mixed in; it’s perfect for achieving a light and flaky crust without extra steps! Sifting it ensures even distribution of ingredients while aerating it—a crucial step for texture.
- 4 Tablespoons unsalted butter, cubed – Butter contributes richness to our crust while ensuring it bakes up flaky rather than dense. Make sure your butter is cold when cutting it into flour—this will help create those delightful pockets of steam within your pastry!
- 2 egg yolks – Egg yolks provide moisture while enriching our dough’s flavor profile. They also help bind everything together—ensuring our crust holds up beautifully during frying!
- 1/3 cup HOT milk – Using hot milk helps dissolve any fat from our butter evenly throughout our dough mixture—a vital element in achieving that tender mouthfeel we want in each bite!
- 1/4 teaspoon salt – Salt is non-negotiable when baking because it enhances flavors across all ingredients involved! Just a pinch goes a long way toward balancing sweetness.
- 1/2 teaspoon vanilla extract – Similar to what we’ve added previously; this is for glazing those lovely pies after frying! It adds an extra dimension of flavor that pairs perfectly with warm apples.
- 1 Tablespoon milk – We’ll use this little splash along with powdered sugar for glazing later—bringing everything together into one sweet finish!
- 1/2 cup powdered sugar – Powdered sugar dissolves quickly into glaze form—creating an irresistible topping that hardens slightly as it cools down post-frying!
- Vegetable or canola oil, for frying – Choosing oils with high smoke points makes frying safer while providing optimal crispiness without compromising flavor! Keep an eye on temperatures here; too hot will burn while too cool results in soggy pies!
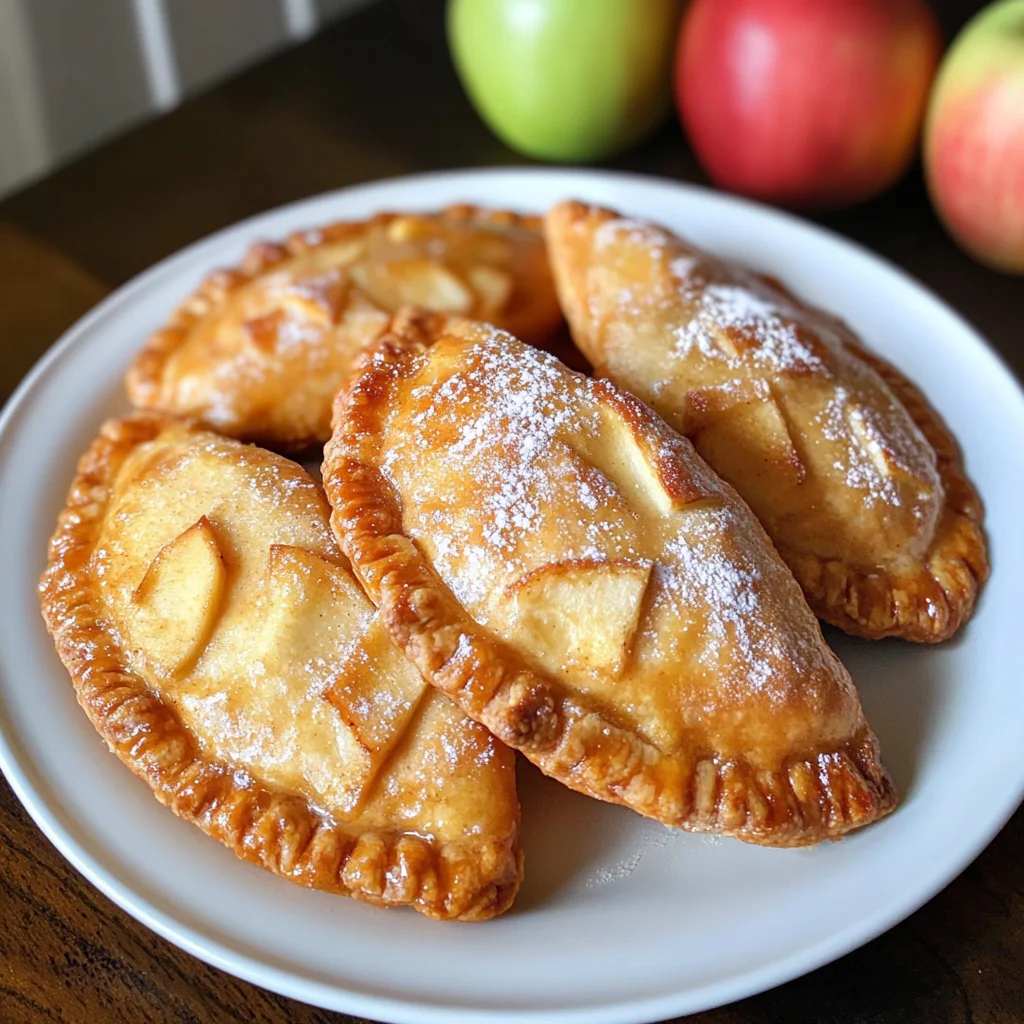
Equipment You’ll Need:
Now that we’ve gathered our ingredients let’s chat about some essential tools you’ll need on this delightful adventure! Having the right equipment can make your cooking experience smoother and more enjoyable—you’ll see how each tool plays its part in creating something wonderful.
- Large mixing bowl – A sturdy bowl allows ample space for mixing dry ingredients before incorporating wet ones without making too much mess! It’s perfect when kneading dough too—you’ll appreciate having room to work comfortably.
- Pastry cutter or fork – This handy tool helps cut cold butter into flour efficiently until small clumps form—creating beautiful layers essential for flaky pastry crusts! If you don’t have one handy, using two forks works surprisingly well too!
- Rolling pin – A rolling pin is paramount when rolling out dough evenly into circles or rectangles; consistency matters here so every bite tastes divine! If you don’t have one at home yet—they aren’t expensive investments worth making!
- Deep fryer or heavy-bottomed saucepan – A deep fryer provides even heating throughout oil during frying sessions—a must-have if you’re serious about achieving perfectly crispy fried foods at home! Alternatively—a heavy saucepan does just fine as long as you’re mindful about temperature control.
- Thermometer (optional) – While not strictly necessary—it’s helpful when trying to achieve precise frying temperatures (around 350°F). Don’t worry if you don’t own one; there are ways around measuring heat without fancy gadgets!
Now equipped both mentally & physically—we’re ready to dive deeper into preparing The Best Fried Apple Pies Recipe (Homemade)! Let’s turn those vibrant ingredients into something truly memorable together…
Step 1: Crafting Your Delicious Apple Filling
To embark on creating these delights you’ll first need to prepare your tantalizing apple filling which serves as heart & soul behind each pie pocket! Begin by peeling—and then coring—two large apples carefully before dicing them finely into small cubes (about half-inch pieces). I’m particularly fond of combining Granny Smith’s tartness alongside Honeycrisp’s sweetness—it strikes such an exquisite balance between flavors that’ll leave everyone reaching back for seconds…and thirds!
In a medium saucepan over medium heat combine diced apples along with brown sugar & cinnamon until juices begin bubbling away after roughly three minutes’ time passes—you’ll love how fragrant everything becomes at this point! Once softened adequately stir together your cornstarch mixed earlier along side either apple cider or juice until blended thoroughly before pouring directly onto cooked fruit mixture next stirring constantly until thickened up nicely over high heat which should take no longer than three additional minutes tops…you’ll know it’s done once mixture coats back side spoon nicely meaning deliciousness awaits ahead!
Step 2: Making Your Flaky Pie Dough
Next comes perhaps one of my favorite steps—the creation process behind crafting perfect pie dough from scratch…it might sound intimidating but trust me—it’s simpler than you’d think once you get started right away taking care not skimp on quality ingredients used here either especially sifting flour beforehand makes world difference yielding lighter texture overall later down line too while working cubed cold butter gently incorporated until resembling tiny lumps throughout dry mix itself using pastry cutter/fork method mentioned earlier till fully incorporated before moving forward towards remaining components next ensuring smooth blend overall altogether afterwards please note amount seems daunting initially however patience pays off big dividends trust me wholeheartedly regarding importance behind giving each phase proper attention & time invested wisely here!
Once prepared place egg yolks along salted area separate bowl whisking vigorously before slowly adding hot milk gradually continuing whisking continuously until all combined nicely followed shortly thereafter pouring egg-milk mixture directly over flour-butter blend gently folding until cohesive ball forms ensuring not over-knead which could lead tough result instead allowing resting period needed later additionally recommended best practices ensure success regardless…So remember: less really is more sometimes especially baking wise friends!
Step 3: Rolling Out Your Dough
With dough now formed let’s divide into six equal segments shaping each portion neatly into balls ready roll-out stage ahead using either rolling pin/glass surface area lightly dusted flour preventing stickage easily manageable task keeping thickness consistent throughout guarantees uniformity among final product appearance ultimately resulting end game gorgeous pies awaiting soon enough following few simple actions taken today alongside diligence shown thus far keeps excitement brewing steadily building anticipation further onwards now friends join me next step please pay close attention since every detail matters immensely here…
Step 4: Shaping Your Pies
With rolled-out circles laid flat before us lined parchment paper underneath let’s fill those beauties shall we? Start by placing approximately two tablespoons worth cooled apple pie filling center portion circle carefully ensuring edges left clear enough seal tight later on sealing tightly together folding each half closed pinch edges firmly crimping down securely further enhancing structural integrity keeping delicious contents intact during hot oil bath ahead shortly afterward—I promise it’ll pay off big dividends visually pleasing aspects alone entice everyone nearby wanting taste irresistible creations awaiting them shortly thereafter once finished completing entire batch complete process repeat until desired amount achieved feel free customize accordingly based preferences available amounts yield enough servings share generously amongst friends/family alike enjoying lovely moments unfolding naturally together always remember: good food shared equals best memories made ever lasting impressions linger long time beyond initial bites savored thoroughly enjoyed endlessly indeed…
Stay tuned as we’ll move onto frying stages & final touches soon bringing everyone closer towards enjoying joyous occasion together celebrating win-win scenario unfolding gracefully ahead…
Step 5: Rolling Out Your Dough – The Heart of Your Pies
Now that we have our beautiful dough resting, it’s time to transform these little balls of potential into the flaky, tender crusts that will cradle our luscious apple filling. Take each of those six pieces and gently flatten them into discs with your fingertips first; this helps prevent the dough from cracking later on. Then, using a rolling pin or even a sturdy glass if you don’t have one handy, roll each disc out into circles approximately 6 inches in diameter. And trust me, don’t stress about achieving a perfect circle! This is homemade cooking, after all—it’s about love and heart, not perfection.
As you roll out the dough, let your senses guide you. You’ll want it to be thin enough to allow for that delightful crunch when fried but thick enough to hold the filling without tearing. A good rule of thumb is about 1/8 inch thick; you can always check by holding it up to the light—if you can see through it just slightly, you’re golden! Remember, this step is crucial because the thickness will determine how crispy and satisfying your crust is once it’s fried. So take your time rolling; this texture is what will elevate your pies from ordinary to extraordinary!
Step 6: Adding the Filling – The Sweet Symphony
With our beautifully rolled-out dough ready, it’s time to introduce our star ingredient—the apple filling! Place about 2 tablespoons of that heavenly apple mixture in the center of each circle. Make sure not to overfill; while I know it’s tempting to heap on more gooey goodness (believe me, I’ve been there), too much filling can lead to messy pies that burst open during frying. We want them sealed tight like little treasure chests of flavor!
Once you’ve added the filling, fold the dough over itself and pinch the edges together firmly. Here’s where you get to channel your inner artist! Press down along the edges with your fingers or use a fork for a decorative touch while ensuring that those apples stay snugly inside during their hot oil bath. Crimping isn’t just for looks; it creates a seal that keeps all those delicious juices contained while frying. If any juice escapes during cooking, trust me—you’ll be missing out on some of that rich flavor infusion!
Step 7: Heating Up – Getting Ready for Frying
Now we’re moving into one of the most exciting parts—frying! Before we dive in, let’s talk about oil temperatures because they are absolutely paramount here. Pour vegetable or canola oil into a deep fryer or a deep saucepan until it reaches about two inches high—this gives your pies room to float around and cook evenly without sticking to the bottom. Heat it up over medium-high heat until it reaches around 350 degrees Fahrenheit; this is where the magic happens!
If you don’t have a thermometer (which I totally understand), there’s an age-old trick: dip a wooden spoon handle into the oil. If small bubbles form around it, congratulations—you’re ready to fry! Trust me on this one; hitting that perfect temperature means getting that gorgeous golden crispiness without absorbing too much oil. What you want to avoid here is letting your oil get too hot because burnt pies are simply heartbreaking—and not in a good way! Fry each pie one at a time so they don’t overcrowd and steam rather than fry.
Step 8: Frying Your Pies – The Golden Moment
It’s showtime! Gently slide each pie into the hot oil and allow them to fry for about 2 minutes on one side before flipping them over with care using tongs or a slotted spoon. Keep an eye on their transformation as they bubble away—their color will shift from pale doughy hues to an enticing golden brown that signals they are almost ready for their grand debut! As they fry, resist the urge to walk away; this is where attention brings reward.
When flipping them over at that two-minute mark, take note of how they feel—and I promise you’ll know when they’re done by sight alone. Look for an even golden color across both sides; if they’re browning unevenly, turn down your heat just slightly. Once both sides achieve that perfect hue, remove them carefully with tongs and place them on paper towels set over a plate—this allows excess oil to drain away while keeping them warm and inviting.
Final Touches: Glazing Your Fried Apple Pies
Step 9: Whipping Up That Irresistible Glaze
What better way to finish off these delightful little pockets of joy than with a sweet glaze? In a small bowl, whisk together powdered sugar with vanilla extract and just enough milk until you achieve a smooth drizzling consistency—think liquid gold pouring onto your warm pies! This step not only adds sweetness but also enhances visual appeal with its glossy sheen.
I recommend glazing these beauties while they’re still warm—they absorb flavors better at this stage, making every bite utterly intoxicating! Use a pastry brush for an even coat or simply dip each pie directly into the bowl if you’re feeling adventurous—the choice is yours! Just remember—the glaze should complement but not overpower those fabulous apples inside.
After glazing, allow them to set for just a few minutes before indulging in this profoundly satisfying treat. Each bite delivers that blissful crunch followed by soft cinnamon-kissed apples—a truly extraordinary experience you’ll cherish as fall rolls in.
So there you have it—the journey from humble ingredients to The Best Fried Apple Pies Recipe (Homemade) has come full circle! These delightful treats are not just food; they are memories waiting to happen—enjoy every moment as you share them with loved ones or keep them all for yourself (no judgment here!). Happy frying!
Storage and Enjoyment Tips for Your The Best Fried Apple Pies Recipe (Homemade)
Now that you’ve crafted these delightful fried apple pies, the real joy begins! Picture yourself gathering your loved ones around a cozy table, the sweet aroma wafting through the air, as everyone dives into these golden treasures. The best part? You can savor these pies later too! Let’s explore how to keep that homemade magic alive.
Storing Leftover The Best Fried Apple Pies Recipe (Homemade)
To store any leftover fried apple pies, I recommend using an airtight container; this is key to maintaining their delightful texture. Place parchment paper between layers if you need to stack them—this little trick prevents sticking and keeps them looking as divine as they did fresh out of the fryer. Stored in your fridge, they’ll stay good for about 3 to 4 days, but trust me on this: they taste best when enjoyed right away! If you find yourself with leftovers, don’t fret; simply reheat them in the oven at a low temperature until warmed through. The crispy crust will regain its fabulous crunch, making each bite just as satisfying as the first. And here’s a pro tip: if you’re worried about them drying out in storage, toss a slice of bread into the container with your pies; it helps keep everything nice and moist!
Freezing Fried Apple Pies for Later
If you want to enjoy these gems at a later date without sacrificing flavor or texture, freezing them is absolutely a fantastic option! To freeze your fried apple pies properly, allow them to cool completely before placing them in a single layer on a baking sheet lined with parchment paper. This way, they won’t stick together. Once they’re frozen solid (about 2-3 hours), transfer them into a freezer-safe bag or container. They can be kept frozen for up to 3 months—how convenient is that? When you’re ready for a sweet treat, simply pop them straight from the freezer into a preheated oven at 350°F until heated through and crispy again—about 20 minutes should do the trick! This method not only saves time but also allows you to have your homemade fried apple pies ready whenever those cravings hit!
The Best Fried Apple Pies Recipe (Homemade)
Experience the warmth of homemade nostalgia with The Best Fried Apple Pies Recipe (Homemade). These delightful treats feature a flaky, buttery crust that envelopes a spiced apple filling, capturing the essence of autumn in every bite. Perfect for family gatherings or cozy evenings at home, these fried pies are not just desserts but memories waiting to be shared. With a golden crunch on the outside and a tender, sweet filling inside, they are sure to bring smiles to your loved ones’ faces. Dive into this simple yet satisfying recipe that transforms everyday moments into cherished memories.
- Prep Time: 30 minutes
- Cook Time: 15 minutes
- Total Time: 45 minutes
- Yield: 6 servings 1x
- Category: Dessert
- Method: Frying
- Cuisine: American
Ingredients
- 2 large apples (Granny Smith and Honeycrisp)
- 1/4 cup brown sugar
- 1/2 teaspoon cinnamon
- 1 teaspoon vanilla extract
- 2 teaspoons apple cider or apple juice
- 1 teaspoon cornstarch
- 2 cups self-rising flour
- 4 tablespoons unsalted butter
- 2 egg yolks
- 1/3 cup hot milk
- Vegetable oil (for frying)
Instructions
- Prepare the apple filling by combining diced apples, brown sugar, cinnamon, cornstarch, and apple cider in a saucepan over medium heat. Cook until juices start to bubble; then stir until thickened.
- For the dough, sift self-rising flour and cut in cold butter until crumbly. Mix in egg yolks and hot milk until a cohesive ball forms. Allow resting.
- Roll out dough into circles and fill each with apple mixture. Seal edges by pinching or crimping with a fork.
- Heat oil in a deep fryer or heavy saucepan to 350°F. Fry pies one at a time until golden brown on both sides.
- Drain on paper towels and glaze with powdered sugar mixed with vanilla and milk.
Nutrition
- Serving Size: 1 pie (100g)
- Calories: 240
- Sugar: 12g
- Sodium: 150mg
- Fat: 10g
- Saturated Fat: 3g
- Unsaturated Fat: 6g
- Trans Fat: 0g
- Carbohydrates: 35g
- Fiber: 2g
- Protein: 2g
- Cholesterol: 60mg