Decadent Hawaiian Guava Cake: A Slice of Paradise
The moment I first encountered a slice of Hawaiian Guava Cake, I was transported to a sun-drenched beach with waves lapping gently at my feet and the sweet, tropical scent of paradise wafting through the air. It wasn’t just dessert; it was an experience that awakened my senses and made me feel alive in a way that only good food can. This Decadent Hawaiian Guava Cake: A Slice of Paradise is not merely about satisfying your sweet tooth; it’s about indulging in vibrant flavors that celebrate life, love, and the warmth of gatherings filled with laughter and joy. The bright notes of guava dance gracefully with the creamy richness of coconut, creating a symphony that is as enticing to the palate as it is to the heart. Trust me when I say this cake will become a beloved centerpiece at every gathering!
Baking this cake brings back memories of joyful afternoons spent in the kitchen surrounded by family. Each ingredient tells a story—like how guava, often considered a treasure in Hawaiian culture, symbolizes abundance and health. This cake embodies both tradition and innovation, inviting you to create new memories while honoring timeless flavors. Whether you’re celebrating a special occasion or simply craving something deliciously tropical, this recipe is your ticket to paradise right at home.
Decadent Hawaiian Guava Cake: A Slice of Paradise: Tropical Bliss on Your Plate
Get ready to dive into a mouthwatering journey filled with tropical flavors! This cake combines the fruity essence of guava with luscious cream cheese frosting topped off with coconut—a true delight for any dessert lover. You’ll find that each bite transports you straight to an island getaway; it’s like taking a mini-vacation without ever having to leave your kitchen.
Ingredients:
As we embark on this culinary adventure together, let me reassure you that each ingredient plays an essential role in crafting this delightful cake. It’s all about harmony and balance, so let’s break down what makes these components shine.
- 1 box Strawberry Cake Mix. This serves as the foundation for our cake—its sweetness and moistness are paramount to achieving that soft, tender crumb we all adore. While strawberry adds its own fruity flavor, it also complements the guava beautifully. If you’re feeling adventurous or want to customize further, feel free to swap in another cake mix flavor such as vanilla or lemon; just keep in mind how those flavors will play with our tropical stars!
- 1 cup Guava Nectar or Guava Juice (For batter). This liquid gold is where the magic truly happens! Guava nectar infuses our cake batter with its lush sweetness and distinct aroma, making every bite utterly intoxicating. When selecting guava juice or nectar, look for options without added sugars or artificial ingredients—this will ensure you’re getting pure flavor without distractions. If you’ve got fresh guavas on hand or prefer more control over sweetness, homemade guava puree would be an excellent alternative!
- 3 large Eggs (Room temperature). These eggs are non-negotiable when it comes to creating structure in your cake while adding moisture and richness as well. Room temperature eggs incorporate more easily into the batter than cold ones from the fridge—their ability to blend seamlessly is crucial for achieving an airy texture that helps your cake rise beautifully.
- 1/2 cup Coconut Oil (Melted). Using coconut oil adds not only moisture but also contributes a subtle coconut flavor that enhances our tropical theme! It’s important here because it keeps our cake moist while allowing us to achieve that light crumb we’re after. Just make sure it’s melted but not too hot when mixing—it should warm enough for blending but cool enough not to cook those precious eggs!
- 8 oz Cream Cheese (Room temperature). Ahh… this creamy delight brings richness and depth! Soften it beforehand; otherwise, you’ll end up with lumps instead of a smooth frosting later on! Cream cheese adds tanginess that balances out all those sweet notes from our other ingredients beautifully—truly elevating this cake into something extraordinary.
- 1/2 cup Granulated Sugar. Sweetness is essential here—not just for taste but also because sugar helps create structure within baked goods through caramelization during baking! We want just enough sugar so we can enjoy our tropical flavors without overwhelming them.
- 1 tsp Vanilla Extract. This humble little addition amplifies all other flavors present within our guava cake; think of it as a secret weapon enhancing each bite’s overall experience! Always choose high-quality pure vanilla extract over imitation whenever possible—the difference can be profound!
- 8 oz Cool Whip (Thawed). This fluffy topping provides lightness and creaminess that contrasts beautifully with our dense layers below! By incorporating Cool Whip into your frosting mixture instead of heavy whipped cream or buttercream alone creates an ethereal texture that’s absolutely divine.
- 2 1/2 cups Guava Nectar or Guava Juice (For glaze). Here we have another layer of guava goodness! The glaze adds shine while ensuring maximum flavor infusion—all while keeping things simple! Choose nectar if you’d like thicker consistency; juice will work perfectly fine too!
- 1/2 cup Granulated Sugar (for glaze). Just like before; sugar helps balance acidity while contributing sweetness needed for glazing success.
- 2 tbsp Cornstarch. This thickening agent works wonders when combined with water because it forms a slurry which helps stabilize our glaze—ensuring every drop coats evenly without running off completely!
- 1/4 cup Water (For slurry). Simply mixed together with cornstarch creates an easy-to-use paste ready whenever needed throughout preparation process!
- 1 cup Sweetened Coconut Flakes (For garnish). Finally—let’s not forget about presentation! Toasted coconut flakes bring crunchiness along with additional flavor dimension atop finished masterpiece—plus they look gorgeous too!
Equipment You’ll Need:
Before we start mixing things up in the kitchen, let’s gather some essential tools that’ll make our baking journey smooth sailing! Having the right equipment ensures everything goes off without a hitch and allows you to focus on enjoying the process rather than scrambling around looking for items.
- Mixing Bowls – A sturdy set of mixing bowls is essential for combining ingredients seamlessly—from beating eggs to mixing batter; you’ll need these trusty companions at hand! Opt for glass or stainless steel options—they’re durable and won’t retain odors or stains over time.
- Measuring Cups and Spoons – Precision is key in baking! Accurate measurements ensure consistent results every time you make this Decadent Hawaiian Guava Cake: A Slice of Paradise—so don’t skimp on these tools! Invest in dry measuring cups specifically designed for dry ingredients alongside liquid measuring cups marked clearly for easy pouring.
- Electric Mixer – Whether handheld or stand mixer, having one will save time whisking together batters effortlessly compared to doing by hand—it’s well worth it when preparing cakes like this one where texture matters immensely!
- Rubber Spatula – A versatile tool perfect for scraping down bowl sides ensures no bits get left behind during mixing process—and who wants wasted batter? Plus they work wonders folding mixtures gently together without losing airiness vital for fluffy cakes!
- 9×13-inch Baking Pan – The ideal size pan allows even heat distribution while accommodating generous layers needed here; aluminum pans conduct heat effectively ensuring optimal baking results throughout entire surface area!
Let’s gather all these elements before diving deep into preparing your heavenly creation—the anticipation builds just thinking about indulging soon!
Preparing the Decadent Hawaiian Guava Cake: A Slice of Paradise / Creating Tropical Bliss
Step 1: Preheat Your Oven
First things first—you’ll want to preheat your oven to 350°F (175°C) so it’s nice and warm by the time we’re ready to pop our cake inside! This step may seem trivial but trust me—it’s crucial as placing batter into an already heated environment allows immediate rising due to rapid leavening agent activation present within your ingredients like eggs & baking soda if used later on during preparation stages… Skipping this could lead flat results which nobody desires after putting effort into making something beautiful!
Step 2: Prepare Your Baking Pan
While waiting for oven heat up—a great opportunity arises here: grease your 9×13-inch baking pan generously using coconut oil or non-stick spray ensuring there are no corners untouched where sticking could occur later on during removal phase post-baking… Nobody wants their masterpiece torn apart upon trying serve guests right? Also consider lining bottom parchment paper as added insurance against any potential mishaps when removing post-cooling stage too… Better safe than sorry!
Step 3: Mix Together Ingredients
In one large mixing bowl combine your box strawberry cake mix along with room-temperature eggs plus melted coconut oil & guava nectar/juice until well combined—use electric mixer on medium speed about two minutes until mixture appears slightly thickened yet still airy looking overall… It’s important not rush through this step because overmixing can lead tough textures rather than soft & tender crumb desired outcome here… So take time letting everything blend nicely together smoothing out any lumps beforehand makes final product extra delightful!
Step 4: Pour Into Prepared Pan
Now comes one of my favorite parts—the pouring action! Gently pour freshly mixed batter into greased pan spreading evenly across surface using rubber spatula if necessary—it should flow effortlessly filling corners perfectly without leaving gaps behind which could lead uneven baking results later down line so give careful attention here… Once done place immediately inside preheated oven allowing magic begin happening transforming simple ingredients into ethereal dessert delight everyone craves…
Stay tuned as we continue crafting this delightful Decadent Hawaiian Guava Cake: A Slice of Paradise together—I’m thrilled just thinking about how incredible it’ll taste once fully assembled and garnished with luscious glaze followed by toasted coconut flakes… What could possibly be better?!
Step 5: Mix the Batter to Create Magic
Now, let’s dive into what I like to call the heart of our Decadent Hawaiian Guava Cake: the batter! In a large mixing bowl, combine the box of strawberry cake mix with that luscious cup of guava nectar or juice. This is where we start weaving together flavors that will transport you straight to a tropical paradise. Use a whisk or an electric mixer on medium speed for about two minutes, or until everything is just combined. It’s crucial not to over-mix here; we want those air bubbles to form gently, which will help your cake rise beautifully in the oven—think of it as giving your cake a warm, cozy hug.
As you’re combining these ingredients, take a moment to appreciate how vibrant and inviting this mixture looks. The bright pink hue from the strawberry cake mix dances harmoniously with the sunny yellow guava juice—it’s truly an intoxicating sight! After blending for those couple of minutes, add in three large eggs at room temperature and half a cup of melted coconut oil. The oil not only infuses a delightful hint of coconut flavor but also ensures that your cake remains moist and tender. Trust me on this: Using oil versus butter changes the texture entirely, making it rich yet light. Once everything is mixed seamlessly, let it rest for about five minutes; this allows the flour to hydrate fully and helps develop that wonderful texture we all crave in a cake.
Step 6: Bake Your Tropical Delight
Preheat your oven to 350°F (175°C) while your batter rests; this step is absolutely paramount because starting with a hot oven allows your cake to rise properly without deflating. We want it fluffy and airy! Grease and flour two 9-inch round baking pans generously; I recommend using coconut oil for greasing as it complements our flavor profile beautifully. Pour half of your vibrant batter into each pan—don’t worry if they seem slightly uneven; they’ll rise evenly in the oven if placed correctly on the middle rack.
Bake these beauties for approximately 25-30 minutes. You’ll know they’re ready when they puff up magnificently and spring back gently when touched—a true sign of doneness! If you want to be absolutely sure, insert a toothpick into the center; it should come out clean or with only a few moist crumbs clinging to it—no wet batter should remain! Once done, remove them from the oven and allow them to cool in the pans for about 10 minutes before transferring them onto wire racks. This cooling period is essential as it prevents them from becoming soggy by trapping steam inside. Plus, letting them cool gradually helps maintain their structure—nobody wants a crumbly mess!
Step 7: Whip Up That Irresistible Cream Cheese Frosting
While our cakes are cooling and tempting us with their delicious aroma, let’s whip up that utterly heavenly cream cheese frosting that will crown our creation like royalty! In another mixing bowl, blend eight ounces of room-temperature cream cheese with half a cup of granulated sugar using an electric mixer on medium speed until smooth and creamy—about two minutes should do the trick. This step is important because we want no lumps in our frosting; remember, every bite should be a luxurious experience!
Once combined, add in one teaspoon of vanilla extract for that aromatic depth—it really enhances everything you’ve created so far—and then fold in eight ounces of thawed Cool Whip gently using a spatula. Patience is key here; folding keeps that delightful lightness intact while ensuring every dollop has that creamy consistency you’re aiming for. It’s almost like folding clouds into sunshine—so dreamy! Make sure there are no streaks left behind; you want this frosting to be uniform and inviting.
Step 8: Assemble Your Slice of Paradise
Now comes one of my favorite parts—the assembly! Place one layer of your cooled cake on your serving plate or platter. Generously spread about one-third of your delectable cream cheese frosting over the top—you might even want to lick your spatula after this step because it’s simply divine! Then carefully place the second layer atop this frosted masterpiece and spread another third of frosting on top. Here’s where I encourage you not to rush—take your time smoothing out that frosting so it’s as beautiful as it is delicious.
But wait—we can’t forget about presentation! Drizzle the remaining frosting down the sides if you wish; let it cascade like melting ice cream on a hot summer day—it adds such charm! Finally, sprinkle those sweetened coconut flakes generously across the top—this not only adds texture but brings us back into that tropical vibe we’re celebrating today. Visualize how stunning this will look at any gathering—it practically screams “slice me!” At this juncture, allow your cake to chill in the refrigerator for at least 30 minutes before serving; chilling helps set everything together beautifully while enhancing those flavors even more—a little patience goes a long way!
Final Touches: Serving Your Decadent Hawaiian Guava Cake
As you prepare to serve what I promise will be an unforgettable dessert experience, imagine how delighted everyone will be when they take their first bite! Slice into this beautifully layered cake and observe how effortlessly each piece falls away—a testament to its moistness and tenderness. Each bite bursts with tropical flavor—the sweetness from guava mingling perfectly with creamy coconut undertones creates an extraordinary symphony for your taste buds.
I encourage you to savor every moment as you enjoy this Decadent Hawaiian Guava Cake: A Slice of Paradise with friends or family gathered around—nothing warms my heart more than sharing food made with love. Remember, food is not just about nourishment; it’s also about connection—the stories told at each gathering over dessert make these moments last forever. So grab that fork and dig in; you’re now indulging in something truly special!
Storage and Enjoyment Tips for Your Decadent Hawaiian Guava Cake: A Slice of Paradise
Now that you’ve created this stunning Decadent Hawaiian Guava Cake and filled your kitchen with its intoxicating aroma, it’s time to talk about how to store it for maximum enjoyment! Trust me when I say, this cake is not only a feast for the senses when freshly baked but can also be enjoyed later without sacrificing any of its delightful flavors. You’ll want to make sure every slice remains as vibrant and moist as the moment it came out of the oven. The key lies in proper storage techniques that keep this tropical treasure fresh and delicious.
Storing Leftover Decadent Hawaiian Guava Cake: A Slice of Paradise
To keep your leftover slices in tip-top shape, I recommend using an airtight container that seals tightly; this is absolutely paramount for preventing moisture loss. If you don’t have one on hand, a simple wrap with cling film will do the trick as well. Store your cake in the fridge where it will stay fresh for up to five days. Now here’s a little pro tip: placing a slice of bread in the container alongside your cake works wonders! The bread absorbs excess moisture, keeping your cake moist and utterly scrumptious. After a few days in the refrigerator, you might notice that the flavors have melded beautifully, creating an even more profound taste experience. When you’re ready to enjoy another slice, simply let it come to room temperature or give it a gentle warm-up in the microwave for about 10-15 seconds—just enough to bring back that melt-in-your-mouth texture!
Freezing Decadent Hawaiian Guava Cake: A Slice of Paradise for Later
If you’re like me and sometimes want to prepare ahead for those unexpected gatherings or just need some sweet goodness waiting patiently in your freezer, freezing portions of this cake is an excellent option! To freeze properly, begin by slicing your cake into individual pieces; this way, you can thaw only what you need without having to defrost the entire cake. Wrap each piece snugly in plastic wrap and place them inside a freezer-safe container or heavy-duty freezer bag. This method helps prevent freezer burn and keeps everything fresh for up to three months! When you’re ready to indulge again, simply transfer a slice from the freezer to the fridge overnight or pop it in the microwave for a quick reheat. This convenience factor makes it incredibly easy to have a little slice of paradise whenever that sweet tooth strikes!
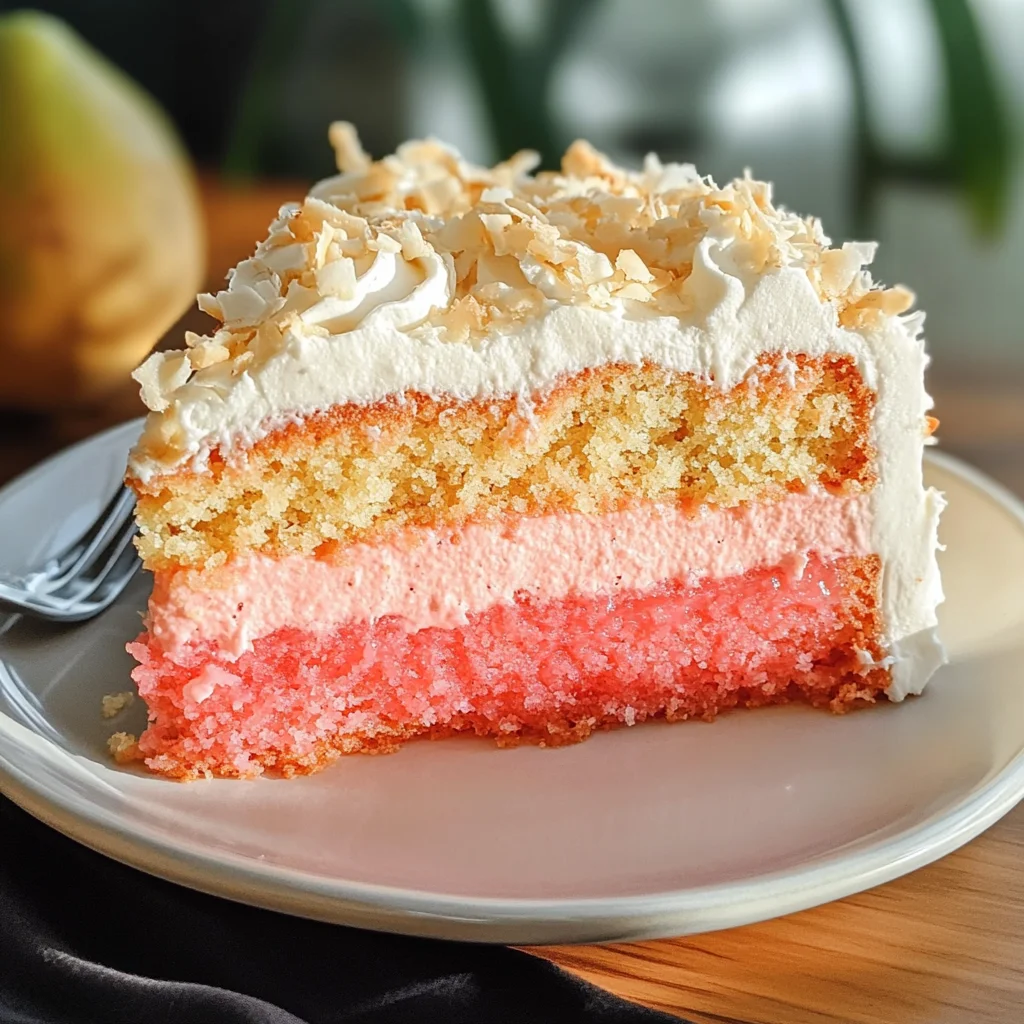
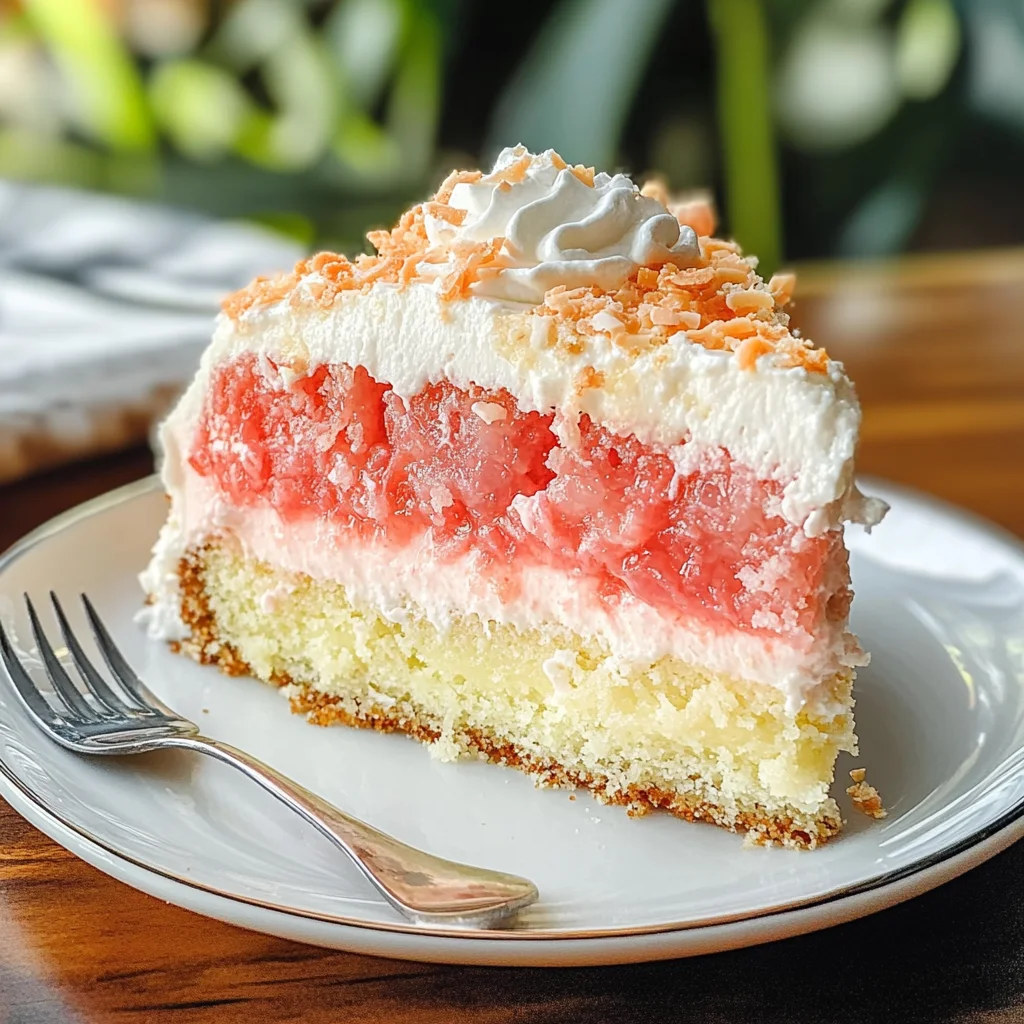
Decadent Hawaiian Guava Cake: A Slice of Paradise
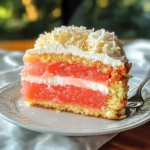
Decadent Hawaiian Guava Cake: A Slice of Paradise is a tropical delight that transports you to sun-kissed shores with every bite. This vibrant cake layers the luscious flavors of guava and coconut, creating a refreshing dessert that’s perfect for any occasion. Whether you’re celebrating a special event or simply indulging in something sweet, this cake is sure to become a favorite centerpiece at your gatherings. Topped with creamy frosting and toasted coconut flakes, it’s not just food; it’s an experience that brings joy and warmth to every moment shared.
- Prep Time: 20 minutes
- Cook Time: 30 minutes
- Total Time: 50 minutes
- Yield: Serves approximately 12 slices 1x
- Category: Dessert
- Method: Baking
- Cuisine: Tropical
Ingredients
- 1 box Strawberry Cake Mix
- 1 cup Guava Nectar or Guava Juice (for batter)
- 3 large Eggs (room temperature)
- 1/2 cup Coconut Oil (melted)
- 8 oz Cream Cheese (room temperature)
- 1/2 cup Granulated Sugar
- 1 tsp Vanilla Extract
- 8 oz Cool Whip (thawed)
- 2 1/2 cups Guava Nectar or Guava Juice (for glaze)
- 1/2 cup Granulated Sugar (for glaze)
- 2 tbsp Cornstarch
- 1/4 cup Water (for slurry)
- 1 cup Sweetened Coconut Flakes (for garnish)
Instructions
- Preheat your oven to 350°F (175°C) and grease a 9×13-inch baking pan.
- In a large mixing bowl, combine the strawberry cake mix, guava nectar or juice, eggs, and melted coconut oil. Mix on medium speed for about two minutes until well combined.
- Pour the batter into the prepared pan and bake for approximately 25-30 minutes, or until a toothpick comes out clean.
- While the cake cools, prepare the frosting by blending cream cheese and sugar until smooth. Fold in Cool Whip gently.
- Once cooled, spread frosting evenly over the top of the cake, drizzle with additional guava glaze made from simmering guava nectar and sugar with cornstarch slurry.
- Garnish with sweetened coconut flakes before serving.
Nutrition
- Serving Size: 1 slice (100g)
- Calories: 320
- Sugar: 26g
- Sodium: 180mg
- Fat: 14g
- Saturated Fat: 8g
- Unsaturated Fat: 6g
- Trans Fat: 0g
- Carbohydrates: 44g
- Fiber: 1g
- Protein: 3g
- Cholesterol: 50mg