Honey Garlic Shrimp Rice Bowls
What a delight it is to share with you my Honey Garlic Shrimp Rice Bowls! This recipe isn’t just about throwing together some ingredients; it’s about creating a dish that sings with flavor, wraps you in comfort, and brings a little piece of culinary magic to your dinner table. Imagine succulent shrimp, perfectly cooked until they blush pink, enveloped in a sticky honey garlic sauce that glistens like liquid gold. As you take a bite, the sweet undertones of honey dance harmoniously with the umami punch of soy sauce, while aromatic garlic and ginger elevate the entire experience to something truly extraordinary. This dish is not just food; it’s an invitation to gather around the table, share stories, and savor every moment.
Every time I prepare these Honey Garlic Shrimp Rice Bowls, I am reminded of how food connects us deeply to our emotions and memories. The vibrant colors of fresh veggies bring life to the plate, while the warm rice serves as a comforting base that soaks up all the delicious sauce. It’s quick enough for those busy weeknights but feels like a special occasion meal. Trust me when I say this: once you experience this delightful symphony of flavors, it will become a cherished recipe in your culinary repertoire.
Honey Garlic Shrimp Rice Bowls: A Flavorful Delight on Your Table
Let’s dive into this culinary adventure together! These Honey Garlic Shrimp Rice Bowls are easy to make yet deliver on taste like no other. Whether you’re preparing for family dinner or meal prepping for the week ahead, this dish promises satisfaction without hours in the kitchen. Let’s embark on this joyful cooking journey!
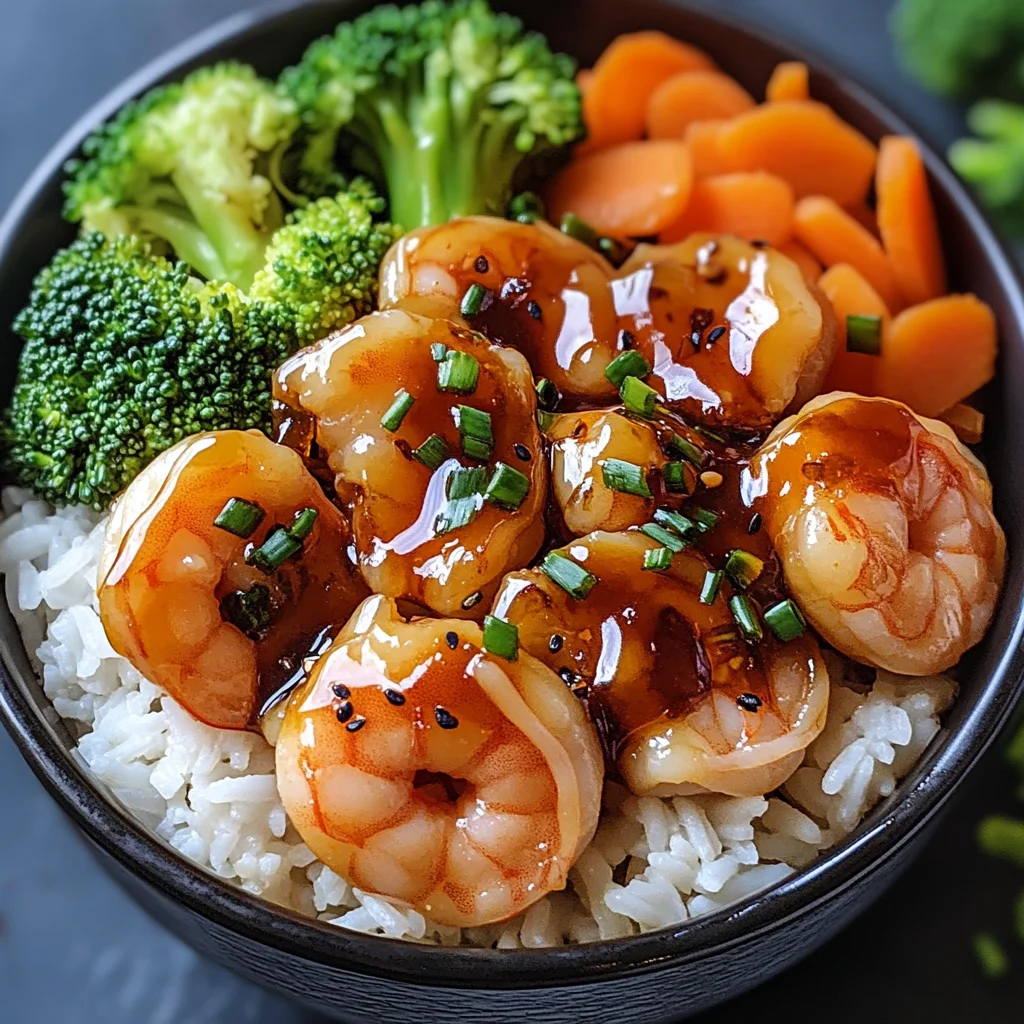
Ingredients:
As we gather our ingredients for these unforgettable Honey Garlic Shrimp Rice Bowls, think of each one as an essential note in a beautiful melody. Each component plays its part in creating harmony on your plate.
- 500g shrimp, peeled and deveined. The star of our dish! When selecting shrimp, look for those that are firm and have a slight sheen—this indicates freshness. You can use either large or medium shrimp depending on your preference; both will work beautifully here. If you’re feeling adventurous or want to save time, frozen shrimp can be an excellent alternative—just make sure they’re fully thawed before cooking.
- 2 cups cooked rice. Fluffy rice serves as the perfect canvas for our vibrant toppings. You can choose white rice for its classic appeal or brown rice for added nutty flavor and texture—both choices provide that comforting base we crave during mealtime. For even more excitement, try jasmine or basmati rice; their fragrant nature will elevate your dish to new heights!
- 1 cup broccoli florets. Fresh and vibrant broccoli not only adds color but also packs a nutritional punch with fiber and vitamins. When shopping for broccoli, select bright green florets with no yellowing—this ensures peak freshness and crunchiness. If broccoli isn’t your favorite veggie or if you’re looking to mix things up, feel free to substitute it with snap peas or bell peppers—the goal is to have something fresh and crunchy that complements our sweet shrimp.
- 1/2 cup carrots, sliced. Sweet and slightly earthy carrots add depth to our bowl while contributing lovely color contrast. Opt for fresh carrots that are firm and vibrant; they should snap easily when bent—this indicates they’re still crisp and full of flavor! If you’re short on time, pre-sliced carrots can save you some effort, but slicing them yourself allows you to control thickness and freshness.
- 2 tbsp honey. Ahh, honey—the secret ingredient that brings sweetness and richness to our sauce! Its sticky texture helps bind everything together beautifully while enhancing flavors with its natural sweetness. When choosing honey, consider local varieties or raw honey for an unprocessed option; each type will impart unique notes into your dish that tell a story about where it came from.
- 3 tbsp soy sauce. This liquid gold adds depth and umami richness that’s absolutely non-negotiable in Asian-inspired recipes like ours! While traditional soy sauce works wonders here, you could also explore low-sodium options if you’re watching your salt intake—that way you still get all the flavor without overwhelming your palate.
- 3 garlic cloves, minced. Garlic is what elevates our dish from good to extraordinary—its pungent aroma fills your kitchen as it cooks, making your mouth water in anticipation! Try using fresh garlic whenever possible; pre-minced varieties tend to lose their robust flavor over time.
- 1 tbsp sesame oil. This oil brings an irresistible toasted nuttiness that ties all flavors together brilliantly! It’s crucial not just for taste but also adds richness without heaviness—making it absolutely paramount in our sauce creation process.
- 1 tsp ginger, grated. The warmth of ginger complements the sweetness of honey beautifully while adding complexity with its aromatic nature—you’ll be amazed at how these two elements play off each other! Fresh ginger is best here; don’t rush this step by opting for powdered versions unless absolutely necessary—they simply lack the zing we’re after!
- 1 tbsp olive oil. A splash of olive oil serves as our cooking fat—it’s great at high heat while contributing subtle fruitiness that’s pleasant against more intense flavors from garlic and ginger.
- Sesame seeds (optional) & Green onions, chopped – These are optional garnishes that add not just an appealing visual element but also additional texture and flavor contrasts when sprinkled atop your finished bowls!
Now that we have everything prepared let’s set ourselves up for success by ensuring we have the right tools at hand!
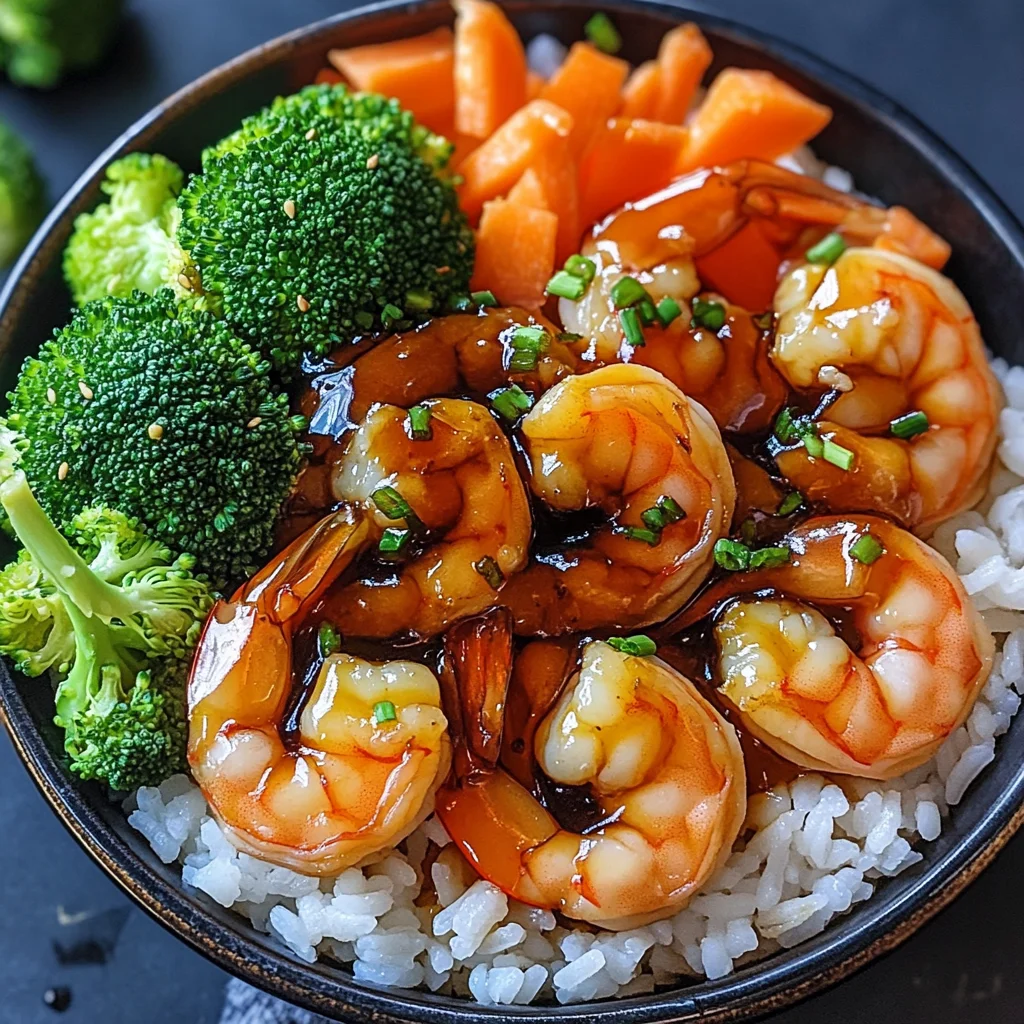
Equipment You’ll Need:
Having the right equipment makes cooking such a smoother experience—it turns potential chaos into delightful simplicity! With these essentials at your side, you’ll create something wonderful without any hiccups along the way.
- Large skillet or wok – A good-quality skillet allows for even cooking and browning without sticking—a must-have when sautéing shrimp quickly over high heat! If you don’t own one yet, investing in non-stick cookware will make cleanup easier too.
- Spatula or wooden spoon – An essential tool for stirring ingredients during cooking; you’ll need something sturdy enough to withstand high heat without scratching surfaces while ensuring every morsel gets coated evenly in our luscious sauce!
- Measuring cups & spoons – Precision is key when balancing flavors! Having these handy ensures you’re following measurements accurately so every bite tastes just right—as any good cook knows: consistency leads toward perfection!
With our ingredients prepped and equipment ready let’s dive into creating these delicious Honey Garlic Shrimp Rice Bowls!
Step 1: Heat Things Up!
Start by heating both olive oil and sesame oil together in your large skillet over medium-high heat until shimmering—this step is crucial as it sets the stage for developing those rich flavors later on! As they warm up together (about 30 seconds), breathe in deeply—the nutty aroma wafting through will tease your senses into anticipation.
Step 2: Aromatics Galore
Add minced garlic along with freshly grated ginger into the hot oil mixture—now we’re talking magic! Sauté them gently until fragrant (around 30 seconds). Don’t rush this step! The goal here is not only melting down their raw edges but allowing those bold aromas to infuse throughout all remaining ingredients later on too—you’ll notice how heavenly it smells already!
Step 3: Meet Our Star Player
Once you’ve achieved aromatic bliss from sautéing aromatics perfectly golden brown (but NOT burnt!), it’s time to introduce those beautiful shrimp into this savory scene! Add them directly into the pan carefully laying them out flat rather than crowding too much at once—allowing each piece space ensures they cook evenly without steaming instead (which would compromise their juicy texture).
Step 4: Cook Until Pink Perfection
Allow shrimp around 2–3 minutes per side until they turn vibrantly pink while curling slightly—that’s when you’ll know they’re done cooking perfectly! Keep flipping gently so nothing sticks too hard—but trust me when I say: do not walk away during this important moment… because overcooking leads us straight down dry territory instead of tender juiciness—which we certainly want here!
Stay tuned as we continue crafting this delectable recipe together—I promise you won’t want to miss what comes next!
Bringing It All Together: The Art of Cooking Honey Garlic Shrimp Rice Bowls
Step 5: Creating the Sticky Sweet Sauce
Now that your shrimp are glistening in that heavenly olive and sesame oil, it’s time to elevate them with a truly magical sauce. In a small bowl, whisk together 2 tablespoons of honey and 3 tablespoons of soy sauce until they form a silky mixture. This step is absolutely paramount because the honey not only provides that sticky sweetness we crave but also helps balance the savory notes from the soy sauce. When you combine these two ingredients, you’re creating a symphony of flavors that will coat each shrimp and vegetable beautifully. Trust me, this is where the magic happens!
Once your mixture is ready, pour it into the pan with your sizzling shrimp. You’ll want to do this gently; you don’t want to splash any hot oil. As soon as that honey-soy mixture hits the heat, you’ll hear a delightful sizzle—this is an indication that you’re on the right track! Allow everything to simmer for about 2-3 minutes, letting those flavors meld together into a luscious glaze. Keep an eye on it; you want the sauce to thicken just slightly without caramelizing too much. The aroma wafting through your kitchen will be utterly intoxicating, drawing everyone in like moths to a flame.
Step 6: Introducing Fresh Vegetables
Now comes one of my favorite parts: adding in our vibrant vegetables! Carefully toss in 1 cup of broccoli florets and 1/2 cup of sliced carrots right into that pan with your shrimp and sauce. This step is crucial for several reasons. Not only do these veggies add color and crunch, but they also bring essential nutrients to your dish—think fiber and vitamins! I always say, “The more colors on your plate, the healthier it is!”
Stir everything together gently so that the sauce coats both your shrimp and veggies evenly. Cook them for about 3-4 minutes, allowing just enough time for the broccoli to turn bright green and maintain its pleasing crunch while softening slightly. This gentle cooking preserves their integrity, ensuring they still offer that satisfying bite when you dig in later. As you stir, take a moment to breathe in all those aromas mingling together; it’s like stepping into a bustling Asian market filled with tantalizing scents. Don’t rush this step—let those flavors develop and embrace one another!
Step 7: The Perfect Rice Bed
While those delicious flavors are coming together in your pan, let’s talk about the base for our Honey Garlic Shrimp Rice Bowls—fluffy rice! If you haven’t already prepared 2 cups of cooked rice, now’s the perfect time to get it ready! You can use jasmine or basmati rice for an aromatic touch or even brown rice if you’re looking for something heartier and more nutritious.
When it comes to cooking rice, precision is key! Make sure you follow package instructions carefully—typically, this involves rinsing the rice thoroughly under cold water first to remove excess starch (which prevents stickiness). Then cook according to your preferred method: stovetop or rice cooker works wonders! If using a stovetop pot, remember to let it simmer covered without lifting the lid too often; this keeps steam trapped inside for perfectly fluffy grains.
Once your rice is cooked and all those little grains are nice and airy, fluff it gently with a fork before serving—this little touch makes all the difference in texture! A well-prepared bed of rice not only absorbs all that glorious honey garlic sauce but also provides balance against the richness of shrimp and veggies.
Step 8: Plating Your Masterpiece
Now comes perhaps one of my favorite moments—the plating! Grab four bowls (or however many servings you’re preparing) because it’s time to assemble our Honey Garlic Shrimp Rice Bowls like true culinary artists! Start by spooning an ample serving of fluffy rice into each bowl as your base; think of it as creating a canvas upon which you’ll paint your masterpiece.
Next, ladle generous portions of that sticky shrimp-and-vegetable mix atop each mound of rice. Allow some of that beautiful sauce to drizzle over the sides—it adds such visual appeal and makes every bite feel luxurious! For an extra touch of flair (and flavor!), sprinkle some sesame seeds over each bowl for added texture—a delightful contrast against those succulent shrimp—and finish with freshly chopped green onions for brightness. Each bite will be profoundly satisfying with layers of flavor dancing together harmoniously.
As you stand back admiring your creation before diving in, take a moment to appreciate not just how good it looks but also how much love went into making this dish from scratch. It’s these moments where we connect with food on deeper levels—nourishing body and soul alike.
Final Touches: Enjoying Every Bite
Step 9: Savoring Your Creation
Finally, it’s time for what we’ve all been waiting for—the tasting! Gather around the table with family or friends (or indulge solo—I won’t judge!), because these Honey Garlic Shrimp Rice Bowls are meant for sharing joy as much as they are meant for savoring flavors. As you take your first bite, close your eyes momentarily; allow yourself to be transported by that blend of sweet honey mingling with rich garlic notes wrapped around tender shrimp.
Feel free to adjust any elements based on personal preferences—perhaps add some crushed red pepper if you desire heat or toss in some snap peas or bell peppers if they catch your fancy. This recipe is incredibly versatile; once you’ve mastered it, don’t hesitate to make it uniquely yours!
I promise you, whether it’s a busy weeknight dinner or a gathering with loved ones, these bowls will quickly become a beloved staple in your kitchen repertoire. So grab those forks or chopsticks (whichever suits your mood), dig in heartily, and relish every last bite—you’ve earned it! Happy cooking!
Storage and Enjoyment Tips for Your Honey Garlic Shrimp Rice Bowls
Now that you’ve created your divine Honey Garlic Shrimp Rice Bowls, it’s time to savor every bite! But let’s be honest; life can get busy, and sometimes we need to save a little goodness for later. These bowls are not only a delight to eat fresh but also store beautifully, ensuring you can indulge in that sweet and savory flavor even days after cooking. So let’s dive into how to preserve this deliciousness without losing any of that magical taste!
Storing Leftover Honey Garlic Shrimp Rice Bowls
To keep your Honey Garlic Shrimp Rice Bowls at their best, I recommend transferring any leftovers into an airtight container. This is crucial because it helps lock in moisture and keeps the flavors bright. You can store them in the refrigerator for up to three days — though I promise you, they’re so good you might not have any left by then! If you want to maintain the texture of the shrimp and veggies, consider placing a slice of bread inside the container; this little trick absorbs excess moisture and helps prevent sogginess. When you reheat these fabulous bowls, you’ll find that the flavors meld even more beautifully as they sit; it becomes an utterly intoxicating dish once again! Simply pop them in the microwave for about 2-3 minutes or until heated through, stirring halfway for even warmth. Trust me, you’ll love how each bite tastes just as delightful as when it first graced your table.
Freezing Shrimp for Later
If you’re looking to make meal prep a breeze, freezing components of your Honey Garlic Shrimp Rice Bowls is an absolute game-changer! To freeze properly, allow the shrimp and sauce to cool completely before placing them in freezer-safe bags or containers — this will help avoid ice crystals that can ruin texture and flavor. You can keep these frozen for up to three months, making them ideal for those busy weeknights when you crave something delicious but don’t have time to cook from scratch. When you’re ready to enjoy them again, simply thaw overnight in the fridge or use the defrost setting on your microwave if you’re in a hurry. The beauty of this option lies in its convenience; imagine pulling out a flavorful bowl from the freezer on a hectic day and knowing that in just minutes, a warm, comforting meal awaits you!
So whether you’re enjoying them fresh off the stove or savoring leftovers later on, these storage tips ensure that every moment with your Honey Garlic Shrimp Rice Bowls is filled with joy!
Honey Garlic Shrimp Rice Bowls
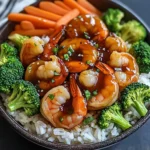
Indulge in the delightful flavors of Honey Garlic Shrimp Rice Bowls, where every bite offers a perfect balance of sweet and savory. This quick and easy recipe features succulent shrimp coated in a sticky honey garlic sauce, paired with fluffy rice and vibrant vegetables. It’s not just a meal; it’s an experience that invites you to gather around the table, share stories, and create lasting memories. Whether you’re whipping it up for a busy weeknight dinner or planning a cozy gathering with friends, these bowls promise satisfaction and joy.
- Prep Time: 15 minutes
- Cook Time: 10 minutes
- Total Time: 25 minutes
- Yield: Serves 4
- Category: Main
- Method: Stir-frying
- Cuisine: Asian
Ingredients
- 500g shrimp, peeled and deveined
- 2 cups cooked rice (jasmine or brown)
- 1 cup broccoli florets
- 1/2 cup sliced carrots
- 2 tbsp honey
- 3 tbsp soy sauce
- 3 garlic cloves, minced
- 1 tbsp sesame oil
- 1 tsp ginger, grated
- 1 tbsp olive oil
Instructions
- Heat olive oil and sesame oil in a large skillet over medium-high heat.
- Add minced garlic and grated ginger, sautéing until fragrant (about 30 seconds).
- Add shrimp to the pan in a single layer; cook for about 2-3 minutes per side until pink.
- In a small bowl, whisk together honey and soy sauce; pour over shrimp.
- Toss in broccoli florets and sliced carrots; stir gently to coat everything in sauce.
- Cook for an additional 3-4 minutes until veggies are bright and tender-crisp.
- Serve over a bed of fluffy rice.
Nutrition
- Serving Size: 1 bowl (approximately 350g)
- Calories: 400
- Sugar: 10g
- Sodium: 750mg
- Fat: 15g
- Saturated Fat: 2g
- Unsaturated Fat: 12g
- Trans Fat: 0g
- Carbohydrates: 45g
- Fiber: 4g
- Protein: 27g
- Cholesterol: 175mg