Pickled Red Onions
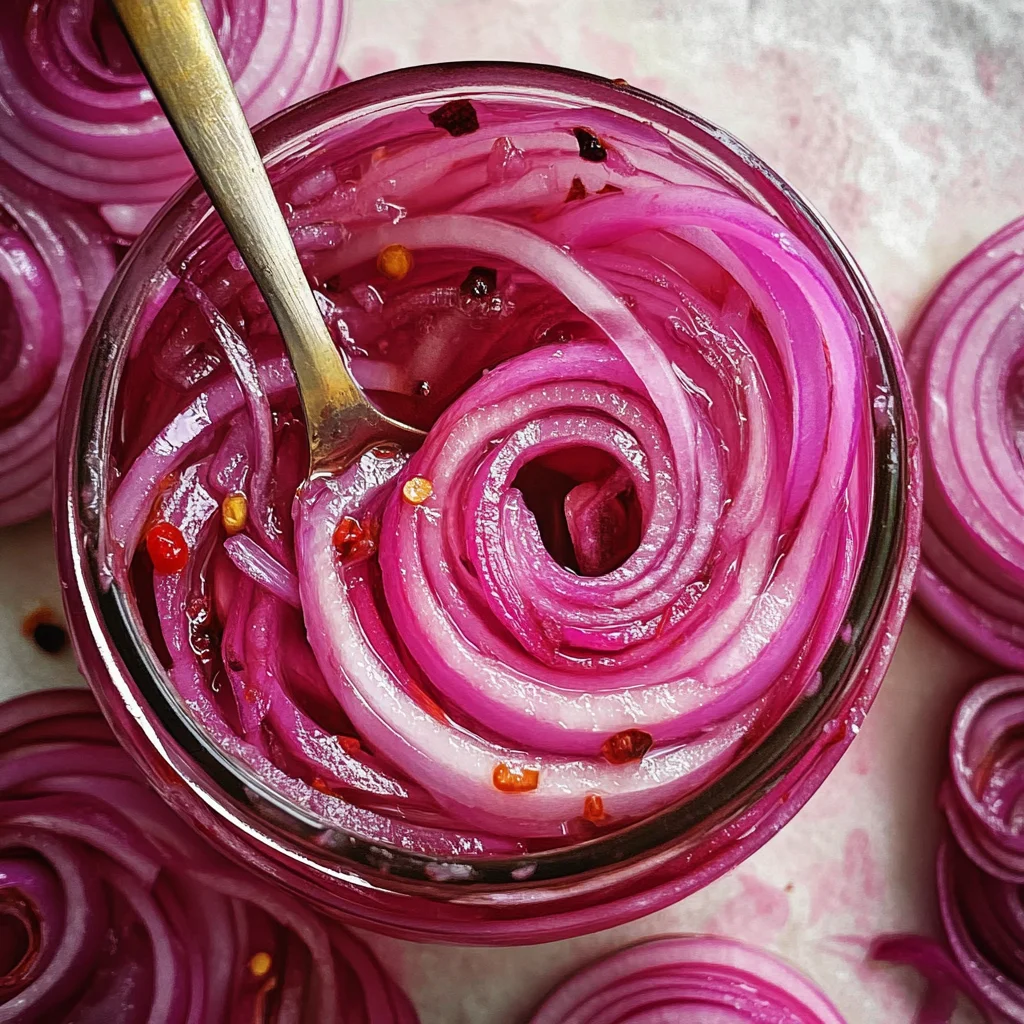
There’s something undeniably magical about the way simple ingredients can transform into something extraordinary with just a little love and time. When I think of pickled red onions, I’m transported back to vibrant summer picnics, where every bite was a burst of flavor, elevating each dish from ordinary to unforgettable. These quick pickled red onions are more than just a condiment; they are an experience—a delightful dance between sweet and tangy that tantalizes your taste buds. Imagine biting into a taco or burger, and right there, nestled among the other ingredients, are these crisp, radiant pink rings that add not only flavor but a pop of color to your plate. It’s moments like these that remind me why I fell in love with cooking in the first place.
What makes this recipe so special is its simplicity paired with its versatility. With just five base ingredients that you likely already have in your kitchen, you can whip up a jar of these pickled beauties in mere minutes. They are perfect for adding zest to avocado toast or brightening up a salad. And trust me when I say that once you make them, you’ll find yourself incorporating them into almost every meal! The balance of sweetness from the sugar and the sharp tang of vinegar creates an utterly intoxicating flavor profile that dances on your palate. So grab your favorite cutting board and let’s dive into this culinary adventure together!
Pickled Red Onions: A Zesty Condiment That Will Elevate Any Dish
These pickled red onions are an easy-to-make condiment that brings life to everything from tacos to salads. Their vibrant color and crisp texture make them not only delicious but visually appealing too!
Ingredients:
As we embark on this culinary journey together, let’s take a moment to appreciate each ingredient’s role in creating our pickled red onions masterpiece. Each component is vital and plays an integral part in building those complex flavors we’re after.
- 2 medium red onions (or 3 small ones). The star of our show! Red onions bring not only their stunning color but also their sweet yet slightly sharp flavor, which mellows beautifully during the pickling process. When selecting your onions, look for firm bulbs with smooth skin—this indicates freshness. If you’re feeling adventurous or want to experiment, you could even try using shallots for a different flavor profile; however, traditionalists will always steer toward red onions for their classic taste.
- 1 1/4 cup water. This might seem like a mundane element in our recipe, but it’s crucial for creating the brine that will soak into our onions. Warm water helps dissolve the salt and sugar more efficiently than cold water would. Think of it as the gentle embrace that allows all flavors to meld together beautifully.
- 1 1/4 cup white vinegar. This ingredient is non-negotiable; it provides the tangy backbone that defines our pickles’ character! The acidity from white vinegar balances out the sweetness from our sugar while ensuring that everything stays crisp rather than mushy. If you find yourself without white vinegar, feel free to substitute with apple cider vinegar for a slightly fruity twist—the possibilities are endless!
- 3 tbsp sugar (of choice). Whether you opt for granulated sugar, coconut sugar, or even maple syrup if you’re feeling experimental, this sweet element is essential for creating that delightful contrast against the vinegar’s sharpness! Sugar balances flavors and helps create harmony within your pickle brine—don’t skip this step!
- 1 tbsp sea salt. Salt is not just for seasoning; it’s vital for drawing out moisture from the onions while enhancing their natural flavors as they pickle. It helps preserve them longer too! Opting for sea salt over table salt ensures you’re avoiding any additives while allowing for richer flavor development.
- 1/4-1/2 tsp red pepper flakes (optional). If you’re like me and enjoy a little heat in your life, consider adding these red pepper flakes! They provide just enough warmth to elevate your pickles without overwhelming the other flavors. Adjust according to your preference—after all, cooking should be about what speaks to you personally!
Equipment You’ll Need:
Having the right tools at your disposal makes this entire cooking experience smoother and infinitely more enjoyable! While these items might not be “ingredients,” they play an essential role in crafting something truly wonderful.
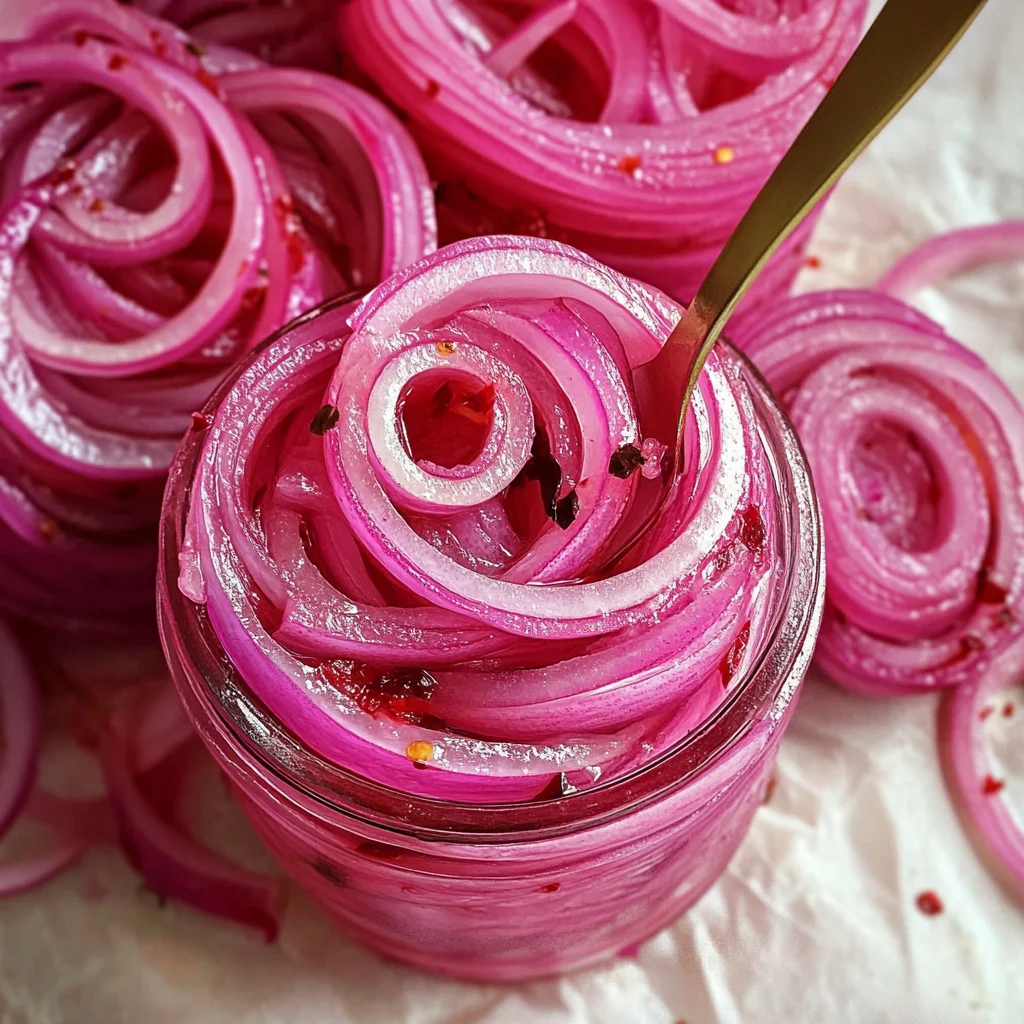
- Mason jars – A sturdy mason jar (at least 750 ml) is ideal for storing your pickled creations safely while allowing flavors to develop beautifully over time. Their airtight seal keeps everything fresh! If you don’t have mason jars handy, any clean glass container will do—just ensure it has a tight-fitting lid.
- Saucepan – You’ll need a small saucepan to warm your water before mixing it with vinegar and seasonings. The gentle heat aids in dissolving salt and sugar effortlessly—trust me on this one; it’s absolutely paramount!
- Cutting board & knife – A good cutting board paired with a sharp knife will make slicing those gorgeous red onions much easier—and safer! You want thin slices or half-moons so they can soak up all that brine goodness effectively.
- Spoon – Having a trusty spoon on hand is crucial for stirring up our brine mixture until all components dissolve completely! It’s also handy when pressing down on those lovely onion slices once they’re packed tightly into their jar.
Preparing the Pickled Red Onions
Step 1: Infusing Warmth
To begin our flavorful adventure, start by pouring 1 1/4 cups of water into your saucepan over medium-low heat—just enough warmth to coax those flavors out without boiling away any potential goodness! Turn off the heat before it begins simmering; we’re looking for warmth here rather than bubbling chaos! Set aside once heated; this water will soon become part of our magical brine.
Step 2: Slicing with Love
Now comes one of my favorite parts: slicing those beautiful red onions! Grab your sharp knife (or mandoline if you’re feeling fancy) and carefully cut them into thin rings or half-moons—whatever suits your fancy best! Take care during this process; there’s no rush here—the goal is precision over speed because even slices ensure even absorption of flavors later on as they pickle together harmoniously.
Step 3: Creating Our Brine Symphony
Incorporate those sliced onions into either one large mason jar or two smaller ones if you’d prefer portion control! Next comes our brine: Add salt along with any optional red pepper flakes directly into that warm water mixture we set aside earlier followed by sugar and white vinegar—give everything a good stir until both sugar and salt dissolve completely! This step transforms simple ingredients into liquid gold—the very essence of what will soon become our flavorful marinade!
Step 4: Marrying Flavors
Carefully pour this shimmering liquid over those lovingly sliced onions within their jar(s)! Press down gently with a spoon so every piece is submerged beneath this luscious brine—it’s crucial for uniform flavor infusion! Once sealed tightly with their lids, transfer them straight to your fridge where magic happens—a minimum soak time of thirty minutes is possible if you’re impatient (I won’t judge), but letting them marinate overnight yields truly extraordinary results!
Now you’ve embarked on an exciting journey crafting homemade pickled red onions; I promise you won’t regret it! Enjoy these vibrant additions atop any dish imaginable—from tacos bursting with flavor to salads needing that extra zing—they elevate every meal effortlessly!
How to Make Truly Irresistible Pickled Red Onions
Oh, my friends, let’s dive into the world of pickled red onions! This delightful condiment is like a burst of sunshine trapped in a jar. With just five simple ingredients and minimal effort, you can create a tangy, sweet, and utterly intoxicating addition to your meals that will elevate everything from tacos to salads. Trust me on this: the first time you taste these vibrant jewels, you’ll be hooked. Now, let’s continue our journey through the steps to achieving pickled perfection!
Step 5: The Magic of Marination
Once your mason jar is filled with those beautifully sliced red onions, it’s time for the magic of marination to begin! This step is absolutely vital because it allows the onions to absorb all the flavors from the pickling liquid. By combining salt, sugar, and vinegar in warm water, we’re creating an environment where those onions can truly soak up the sweet and tangy goodness. Now, don’t rush this step! After pouring the mixture over your onions, give them a gentle press with a spoon. This helps ensure that all the rings are submerged in that luscious brine. It’s like giving your onions a nice little spa treatment—they deserve it!
Now here’s where patience comes into play: while you can technically start enjoying your pickled red onions after just 30 minutes in the fridge, letting them marinate overnight is where the real transformation happens. With each passing hour, those flavors deepen and intertwine into a glorious symphony of taste. Imagine waking up to a jar of vibrant pink onions waiting for you—what could be better? I promise you; if you can resist the temptation for at least a few hours, you’ll be rewarded with something profoundly satisfying.
Step 6: Storage Strategies for Success
As you carefully seal your jar with its lid and place it in the fridge, consider how to make these pickled red onions last longer than just one delicious meal. Proper storage is essential—not only does it keep your creation fresh, but it also allows the flavor to develop further over time. To ensure longevity, store them in an airtight container (which you’ve already done if you used a mason jar!). The key here is to keep them submerged under the brine; if any onion pieces poke out above the liquid line, they might lose their beautiful crunch or discolor.
What’s fantastic about these pickled red onions is that they can last up to two weeks in your fridge—though I doubt they’ll last that long once everyone gets wind of how fabulous they are! You might notice that as days go by, their color intensifies and their flavor mellows beautifully—there’s something so rewarding about seeing your hard work evolve right before your eyes. So go ahead and use those gorgeous rings on everything from grilled veggies to rice bowls; they’re incredibly versatile!
Step 7: How to Serve Your Pickled Red Onions
Now that you’ve mastered making pickled red onions and have allowed them ample time to soak up all that flavorful brine, it’s time for my favorite part: serving them! Picture this: you’ve just made a batch of spicy tacos or perhaps crafted some creamy avocado toast. What could possibly take these dishes from great to utterly extraordinary? That’s right—your pickled red onions! The vibrant color alone adds such visual appeal; it’s like garnishing with happiness.
When serving these beauties, don’t shy away from piling them high on your dish. They add a crunch and zesty pop that perfectly balances out rich or savory flavors. Not only do they work wonders on tacos and burgers—as I mentioned—but also try adding them atop grain bowls or even alongside charcuterie boards for an unexpected twist! Their sharpness cuts through richness beautifully; I mean who wouldn’t want an extra layer of flavor? As my friends often say when they see these on my table: Are those magic onions? It’s hard not to feel proud when presenting such a simple yet transformative condiment.
Step 8: Enjoying Every Last Bite
Finally, as you savor each bite adorned with these quick-pickled wonders, take a moment to appreciate not only what’s on your plate but also the journey it took to get there—from slicing those vibrant onions to watching them transform in their briny bath. Each mouthful offers both texture and flavor—a delightful interplay between sweetness and acidity that dances upon your palate. It’s not just food; it’s an experience!
Don’t forget—the beauty of homemade pickled red onions lies not only in their taste but also in their simplicity. You can experiment with different ingredients too! Want more heat? Add more red pepper flakes or even some sliced jalapeños next time around! Trust me on this; each variation brings its own unique charm while keeping true to that beloved base recipe we started with.
Final Touches: Elevate Every Meal
As we wrap up this adventure together in creating pickled red onions, remember that this condiment isn’t just about enhancing dishes; it’s about bringing joy to every meal you share with loved ones. Whether you’re hosting friends for dinner or simply treating yourself after a long day at work, having a jar of homemade pickled red onions at hand will always remind you of how simple ingredients can create something truly extraordinary.
So there you have it—a recipe that’s not just quick but also packed full of love! Now go forth and pickle those red onions like there’s no tomorrow because once you do—you’ll never look back! Happy cooking!
Storage and Enjoyment Tips for Your Pickled Red Onions
Now that your quick pickled red onions are ready to be enjoyed, I can hardly contain my excitement for you to dive into this vibrant flavor explosion! They are not just a condiment; they’re a delightful enhancement that adds a sweet and tangy kick to any dish. As you embark on this culinary journey, let’s talk about how to store these beauties so you can savor their deliciousness for days to come.
Storing Leftover Pickled Red Onions
To keep your pickled red onions fresh and tangy, it’s best to store them in a glass jar with a tight-fitting lid—something like a mason jar works wonders! Ideally, you want to keep them in the refrigerator where the cool temperatures help maintain their crispness and bright flavors. These pickled gems will stay good for about two weeks, but trust me when I say they taste even better after a day or two as the flavors deepen and mingle beautifully. To maintain their quality, avoid introducing moisture by using clean utensils each time you scoop some out. If you notice your onions losing their snap, popping a piece of bread into the jar overnight can work its magic by absorbing excess moisture—it’s a little trick I swear by! Each bite after storage delivers that perfect balance of sweetness and acidity, making your taste buds sing!
Freezing Pickled Red Onions for Later
If you’re looking to extend the life of your pickled red onions beyond two weeks, freezing is an excellent option! While I don’t usually recommend freezing for preservation due to potential texture changes, if you find yourself with an excess batch that you absolutely can’t consume in time, simply transfer the onions into a freezer-safe bag or airtight container, ensuring all air is removed before sealing. They can be kept frozen for up to three months. When you’re ready to enjoy them again, just pop them in the fridge overnight to thaw—they’ll be just as flavorful! This is such a convenient way to always have these delightful toppings on hand when inspiration strikes for tacos or salads, allowing you to indulge in that sweet-tangy goodness whenever the craving hits.
Pickled Red Onions
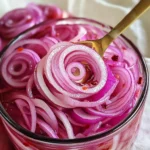
There’s a special charm in crafting your own Pickled Red Onions, transforming humble ingredients into a vibrant and zesty condiment that elevates any dish. With just a handful of pantry staples, you can whip up these quick pickles in minutes. The balance of sweetness from the sugar and the sharp tang from vinegar creates a delightful flavor explosion that pairs wonderfully with tacos, salads, sandwiches, and more. Not only do these pickled onions add a burst of color to your meals, but they also provide a refreshing crunch that makes every bite memorable. Perfect for meal prep or as a gourmet topping for entertaining, once you make them, you’ll find countless ways to enjoy their deliciousness!
- Prep Time: 10 minutes
- Cook Time: 5 minutes
- Total Time: 15 minutes
- Yield: About 12 servings 1x
- Category: Condiment
- Method: Pickling
- Cuisine: American
Ingredients
- 2 medium red onions
- 1 1/4 cup water
- 1 1/4 cup white vinegar (or apple cider vinegar for variation)
- 3 tbsp sugar (of choice)
- 1 tbsp sea salt
- 1/4–1/2 tsp red pepper flakes (optional)
Instructions
- In a small saucepan, warm the water over medium-low heat without boiling. Remove from heat once warmed.
- Slice red onions into thin rings or half-moons and place them in a mason jar.
- In the warmed water, stir in salt, sugar, and optional red pepper flakes until fully dissolved.
- Add white vinegar to the mixture and stir well.
- Pour the brine over the onions in the jar, ensuring all pieces are submerged. Press down gently if needed.
- Seal the jar tightly and refrigerate for at least 30 minutes before serving; overnight is best for maximum flavor.
Nutrition
- Serving Size: 30g
- Calories: 15
- Sugar: 3g
- Sodium: 280mg
- Fat: 0g
- Saturated Fat: 0g
- Unsaturated Fat: 0g
- Trans Fat: 0g
- Carbohydrates: 4g
- Fiber: 0g
- Protein: <1g
- Cholesterol: 0mg