Air Fryer Chicken Cutlets
There’s something undeniably magical about the process of cooking, particularly when it comes to a dish like Air Fryer Chicken Cutlets. It’s not just about putting ingredients together; it’s about creating an experience that tantalizes your senses and warms your soul. Imagine the aroma wafting through your kitchen as those cutlets cook, a promise of golden-brown crispiness waiting to be savored. With each bite, you’re not just tasting tender, juicy chicken coated in perfectly seasoned breadcrumbs; you’re also embracing the joy of making a meal that feels both comforting and satisfying. Trust me on this—this recipe is more than just food; it’s a delightful journey into healthier eating without sacrificing flavor.
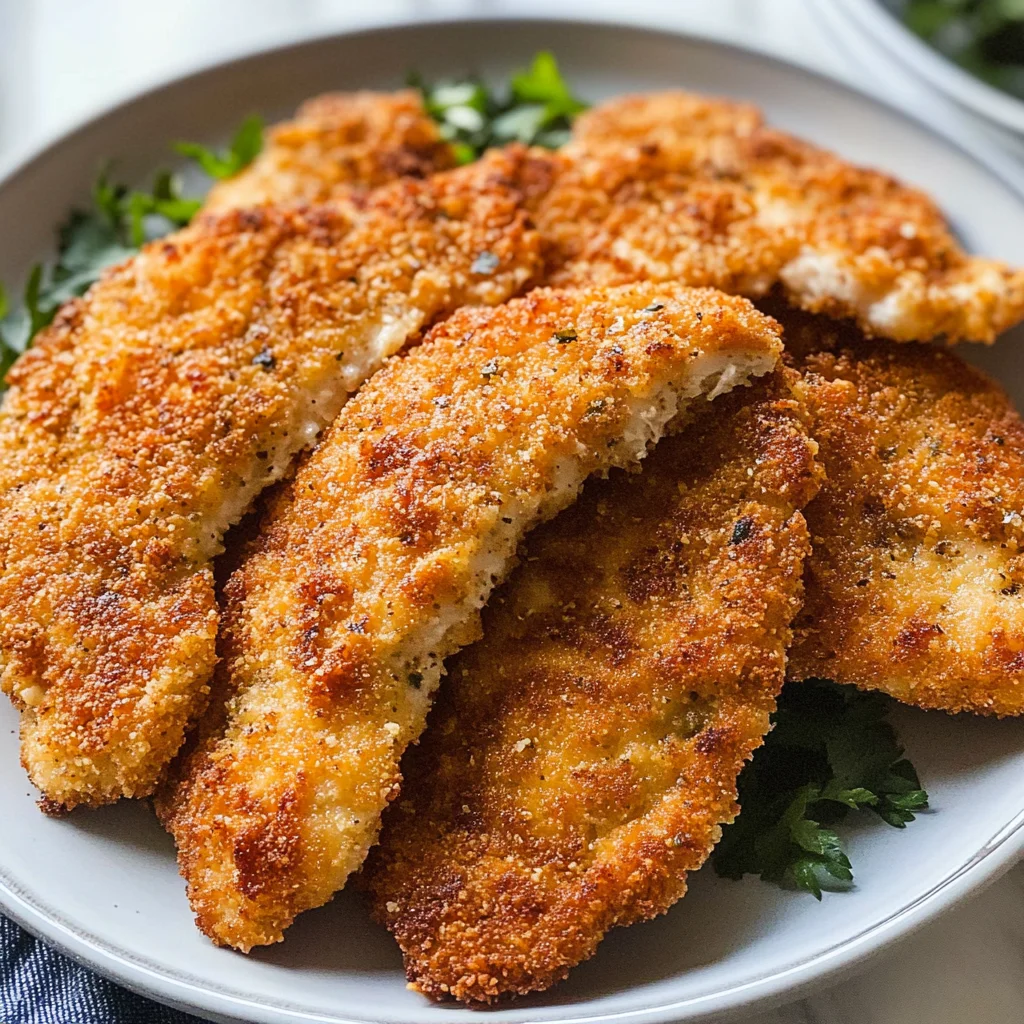
These Air Fryer Chicken Cutlets hold a special place in my heart for so many reasons. Not only are they incredibly quick to prepare—taking just 20 minutes from start to finish—but they allow you to indulge in the crispiness we all crave without the guilt that often accompanies fried foods. The air fryer transforms simple chicken breasts into something utterly intoxicating, with a texture that’s both crispy outside and tender inside. Whether you enjoy them alongside a colorful medley of vegetables or sliced atop a fresh salad, I promise you’ll find endless ways to serve these cutlets. They’re perfect for weeknight dinners when time is tight but flavor is non-negotiable.
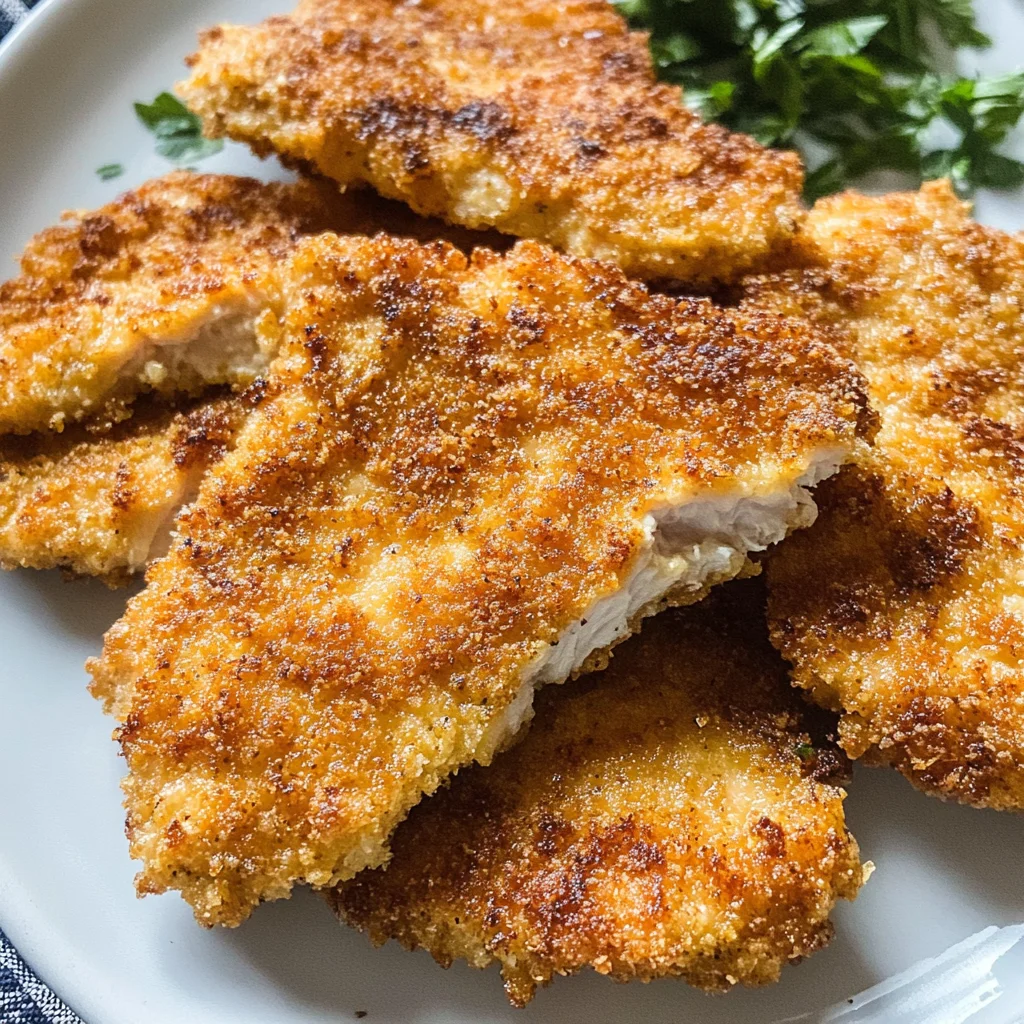
Air Fryer Chicken Cutlets: Crispy Goodness in Just 10 Minutes
Welcome to the wonderful world of Air Fryer Chicken Cutlets! This recipe is not only simple; it’s bursting with flavor and provides a satisfying crunch that makes it irresistible. Whether you’re new to cooking or a seasoned pro looking for quick dinner ideas, these cutlets will soon become one of your go-to recipes!
As we embark on this culinary adventure together, gather your ingredients and prepare for some delightful moments in the kitchen. Each ingredient plays an important role in achieving that perfect balance between taste and texture.
Ingredients:
- 2 chicken breasts (thinly sliced into 3 cutlets). Chicken breasts are lean protein powerhouses that serve as the canvas for our flavorful masterpiece. When choosing chicken, look for fresh cuts with no discoloration or unpleasant odors—quality matters immensely here! Thinly slicing them not only helps them cook faster but also ensures they remain juicy and tender throughout the cooking process. If you prefer dark meat, feel free to substitute with boneless skinless thighs; they’ll add richness without compromising on tenderness.
- 2 eggs. Eggs are essential for our breading process, acting as the glue that holds our seasoned breadcrumbs onto the chicken. Beaten until frothy, they create a beautiful layer that crisps up in the air fryer, giving that gorgeous golden color we all adore. Opt for large eggs if possible; if you’re watching cholesterol intake, egg whites can be used instead without sacrificing flavor too much.
- 1 cup seasoned breadcrumbs. These little nuggets of joy are what give our cutlets their signature crispiness and depth of flavor. Seasoned breadcrumbs come pre-flavored with herbs and spices that elevate our dish effortlessly—think garlic powder, onion powder, or Italian herbs! If you’re feeling adventurous (or if you can’t find seasoned ones), use plain breadcrumbs mixed with your own blend of seasonings or even panko for an extra crunch.
- ½ cup all-purpose flour. Flour serves as our first layer in the breading station—it helps absorb moisture from the chicken while providing a base for our egg wash to adhere properly. This step is crucial because it prevents sogginess and allows us to achieve that coveted crunch after cooking. If you’d like a gluten-free option, almond flour works beautifully here!
- ½ tsp salt. Salt is arguably one of the most vital ingredients when it comes to enhancing flavors in any dish. It brings out the natural taste of our chicken while also seasoning every layer of our breading. Don’t skip this step! A touch more or less can always be adjusted according to your personal preference.
- ¼ tsp black pepper. This humble spice adds just enough warmth and complexity to balance out the dish’s flavors without overpowering them. Freshly cracked black pepper is best if you have it on hand; it packs more aromatic punch than pre-ground varieties!
Equipment You’ll Need:
Having the right tools can make all the difference in your cooking experience! While these may not be ingredients, they are essential partners in creating something wonderful.
- Air fryer – This magical appliance circulates hot air around food, allowing it to cook evenly while producing that satisfying crispiness we all love from frying but with far less oil! It’s crucial for achieving perfectly cooked chicken cutlets without turning your kitchen into an oil-splattered battleground.
- Baking sheet – A simple yet indispensable tool; use it to hold your breaded cutlets before cooking them in the air fryer. It keeps things organized and makes transferring everything easier as well.
- Shallow bowls – Having separate shallow bowls for flour, eggs, and breadcrumbs makes your breading station efficient and clean! It allows you easy access while ensuring proper coating on each piece without mess.
- Whisk – A trusty whisk is needed for beating those eggs until they’re nice and frothy! This step ensures even coating on every slice of chicken while adding air into the mixture—vital for creating lightness during cooking.
Preparing the Air Fryer Chicken Cutlets
Step 1: Prepare Your Chicken
Start by patting those beautiful chicken slices dry with a paper towel—this step is absolutely paramount because excess moisture will hinder our goal of achieving crispiness! Once dried, sprinkle salt and pepper generously on both sides; this seasoning forms an essential foundation for flavor throughout every bite of these Air Fryer Chicken Cutlets.
Step 2: Create Your Breading Station
In a small bowl, whisk together those two eggs until they’re fully beaten—aim for light bubbles forming on top as this indicates they’re well-mixed! Next comes assembling your breading station: place flour in one shallow bowl and seasoned breadcrumbs in another nearby so everything is within reach during assembly time—that organization will save precious minutes later!
Step 3: Breading Magic
Dip each chicken slice first into flour—make sure it’s fully coated before gently shaking off any excess flour back into its bowl (this prevents clumping). Next up is dunking it into those beaten eggs; ensure every inch gets covered because this sticky layer is key for holding onto those breadcrumbs later on! Finally comes pressing each piece into the breadcrumb mixture—don’t rush this step! Press down gently but firmly to secure an even coat across each side before placing them neatly onto your baking sheet where they’ll rest briefly before heading off into their hot-air paradise.
Step 4: Preheat Your Air Fryer
Preheat your air fryer at 400 degrees Fahrenheit—it’s important not only because we want everything hot from start to finish but also because starting at high heat ensures quicker cooking times while sealing moisture inside our cutlets effectively! Once heated through (usually takes about 3-5 minutes), carefully arrange your breaded chicken cutlets inside its basket so they sit comfortably in one single layer—this spacing allows optimal airflow around each piece resulting in golden-brown perfection!
Stay tuned as we continue exploring how this effortless recipe unfolds deliciously right before us…
Step 5: Air Frying for That Perfect Crisp
Now comes the exhilarating moment where all your hard work pays off—the air frying! Preheat your air fryer to a sizzling 400 degrees Fahrenheit, which is absolutely paramount for achieving that golden-brown exterior that we all crave. The preheating step is not just a formality; it ensures that the hot air circulates properly around each chicken cutlet, creating that coveted crispy crust while keeping the insides tender and juicy. As you place the breaded chicken cutlets in the basket, make sure they are in a single layer—this is crucial because overcrowding will steam them instead of crisp them up. Trust me on this; nobody wants soggy chicken!
Spritz each cutlet with a light spray of cooking oil. This little detail transforms your dinner from good to extraordinary by promoting browning and enhancing flavor without drowning your cutlets in excess oil. Cook for 5 minutes, but don’t just set a timer and walk away—use this time to revel in the tantalizing aroma wafting through your kitchen. You’ll know they’re ready to flip when they start to turn a lovely light golden hue. After precisely five minutes, flip those beauties over with care; you want to maintain that beautiful coating you worked so hard on. Spraying this side with oil again will ensure even browning, so don’t skip this step! Cook for another five minutes and watch as they transform into crispy perfection right before your eyes.
Step 6: Resting—The Secret to Juicy Chicken
Once those glorious air fryer chicken cutlets are done cooking, it’s so tempting to dive right in—but hold on just a moment! Allow your chicken cutlets to rest for about 3-5 minutes before serving. This might seem like an annoying wait, but I promise you it’s worth every second. During this resting phase, the juices redistribute throughout the meat, allowing each bite to be profoundly satisfying and moist rather than dry or chewy. Think of it as giving your chicken a little time-out after its hot date with the air fryer—a well-deserved breather!
While they’re resting, take a moment to clean up your workspace or prepare any sides you’d like to serve alongside these cutlets; perhaps a vibrant salad or some roasted veggies would complement them beautifully. If you’re feeling adventurous, consider making a quick dipping sauce—they are incredibly versatile and can be paired with anything from tangy mustard to zesty salsa verde! Remember, patience here is key; an extra few moments will elevate your dish from merely delicious to truly extraordinary.
Step 7: Garnishing for Visual Delight
As those delightful cutlets rest, why not add a splash of color and freshness? A sprinkle of freshly chopped parsley over the top adds not only visual appeal but also an invigorating burst of flavor that brightens every bite. Fresh herbs can elevate any dish from ordinary to outstanding; they bring life and vibrancy that’s hard to resist! I always feel that garnishing is more than just decoration—it’s my way of showing love through food. Plus, those vibrant green flecks contrast beautifully against the golden brown chicken.
Not only does this garnishing step enhance aesthetics, but it also provides an aromatic element that invites everyone to dig in. If you’re feeling particularly fancy (or if you have some on hand), consider adding lemon zest or thinly sliced green onions along with your parsley for another layer of flavor complexity. Look at it this way: You’ve put so much effort into crafting these delicious air fryer chicken cutlets; why not finish strong? Your friends and family will be impressed by both presentation and taste!
Step 8: Serving Suggestions—Endless Possibilities Await
Now that you’ve mastered the art of making succulent air fryer chicken cutlets, let’s talk about serving suggestions because this is where creativity shines! These versatile beauties can stand alone as the star of any meal or be incorporated into other dishes for added pizzazz. Picture plating one perfectly crispy cutlet atop a bed of mixed greens dressed lightly with olive oil and vinegar—a quick salad that sings with freshness alongside those juicy bites! Or why not slice them into strips for a delightful topping on a vibrant grain bowl? The options are endless!
If you’re hosting friends or family, consider setting up a fun cutlet bar where everyone can customize their plates with various toppings like avocado slices, fresh tomatoes, or even homemade sauces like tzatziki or chimichurri. This interactive dining experience not only makes meals more enjoyable but allows everyone to tailor their plate exactly how they like it—a win-win situation if there ever was one! And remember, these air fryer chicken cutlets store wonderfully in an airtight container in the fridge for up to three days—perfect for meal prep or quick lunches throughout the week. Just reheat them in the air fryer for about 3-4 minutes before serving again; they’ll maintain their crunchiness as if they were freshly made.
Final Touches That Make It Special
As we wrap up this journey together through crafting these marvelous air fryer chicken cutlets, I want you to remember one thing: cooking is about joy and connection—both with what you create and those you share it with. From selecting quality ingredients at your local market to savoring each bite at the dinner table surrounded by loved ones, every moment contributes to an experience that nourishes both body and soul.
So gather around—and whether it’s just yourself enjoying a well-deserved treat after a long day or hosting friends for an unforgettable dinner party—these air fryer chicken cutlets are sure to impress and satisfy! I hope you’ll cherish this recipe as much as I do because it’s more than just food; it’s love served on a plate. Happy cooking!
Storage and Enjoyment Tips for Your Air Fryer Chicken Cutlets
Now that your Air Fryer Chicken Cutlets have emerged from the appliance, exuding a golden-brown hue and delightful aroma, it’s time to dive into the joy of enjoying them! But wait—what if you find yourself with leftovers? Trust me, you’ll want to preserve that crispy goodness for future enjoyment. Proper storage not only extends the life of your cutlets but also ensures that every bite remains as deliciously satisfying as the first. So let’s talk about how to store them without compromising their marvelous texture.
Storing Leftover Air Fryer Chicken Cutlets
To keep your leftover Air Fryer Chicken Cutlets fresh and flavorful, it’s best to place them in an airtight container. This could be a glass or BPA-free plastic container; just make sure it seals tightly! Store them in the refrigerator where they’ll stay good for about three days. To maintain that crispy exterior, consider placing a slice of bread in the container with the cutlets. This little trick absorbs excess moisture, ensuring that your chicken cutlets retain their delightful crunch. When you eventually get around to reheating them—perhaps for a quick lunch or dinner—you’ll find they still taste incredible, though I recommend using your air fryer again for reheating. This way, you’ll revive that enchanting crispness while keeping the insides juicy and tender.
Freezing Air Fryer Chicken Cutlets for Later
If you’re thinking ahead and want to stock up on these mouthwatering delights, freezing is an excellent option! To freeze your Air Fryer Chicken Cutlets properly, allow them to cool completely before wrapping them individually in plastic wrap or aluminum foil. Then place them in a freezer-safe bag or container, ensuring you remove as much air as possible before sealing. These beauties can be stored frozen for up to three months! When you’re ready to enjoy them again, simply take out a cutlet and reheat it directly from frozen—no need for thawing! Just pop it back into your air fryer at 375 degrees F for about 10-12 minutes until heated through and crispy again. The convenience factor here is undeniable; imagine having a homemade meal waiting for you on those busy days when cooking feels impossible!
So whether you’re savoring them fresh or saving some for later, these tips will ensure your Air Fryer Chicken Cutlets remain as delightful as ever!
Air Fryer Chicken Cutlets

Enjoy crispy Air Fryer Chicken Cutlets ready in just 10 minutes! Perfectly tender inside and golden outside—try this quick recipe today!
- Prep Time: 10 minutes
- Cook Time: 10 minutes
- Total Time: 20 minutes
- Yield: Makes approximately 6 servings 1x
- Category: Main
- Method: Frying
- Cuisine: American
Ingredients
- 2 chicken breasts (thinly sliced into 3 cutlets)
- 2 large eggs
- 1 cup seasoned breadcrumbs
- ½ cup all-purpose flour (or almond flour for gluten-free)
- ½ tsp salt
- ¼ tsp black pepper
Instructions
- Pat chicken slices dry and season both sides with salt and pepper.
- Prepare a breading station: set up shallow bowls with flour, beaten eggs, and seasoned breadcrumbs.
- Dredge chicken slices in flour, dip in egg, then coat with breadcrumbs.
- Preheat air fryer to 400°F (200°C). Arrange breaded cutlets in a single layer in the basket.
- Lightly spray each cutlet with cooking oil and air fry for 5 minutes; flip and cook for an additional 5 minutes until golden brown.
- Let rest for 3-5 minutes before serving.
Nutrition
- Serving Size: 1 cutlet (about 117g)
- Calories: 256
- Sugar: 1g
- Sodium: 467mg
- Fat: 8g
- Saturated Fat: 2g
- Unsaturated Fat: 6g
- Trans Fat: 0g
- Carbohydrates: 20g
- Fiber: 1g
- Protein: 28g
- Cholesterol: 160mg