American Flag Strawberry Poke Cake
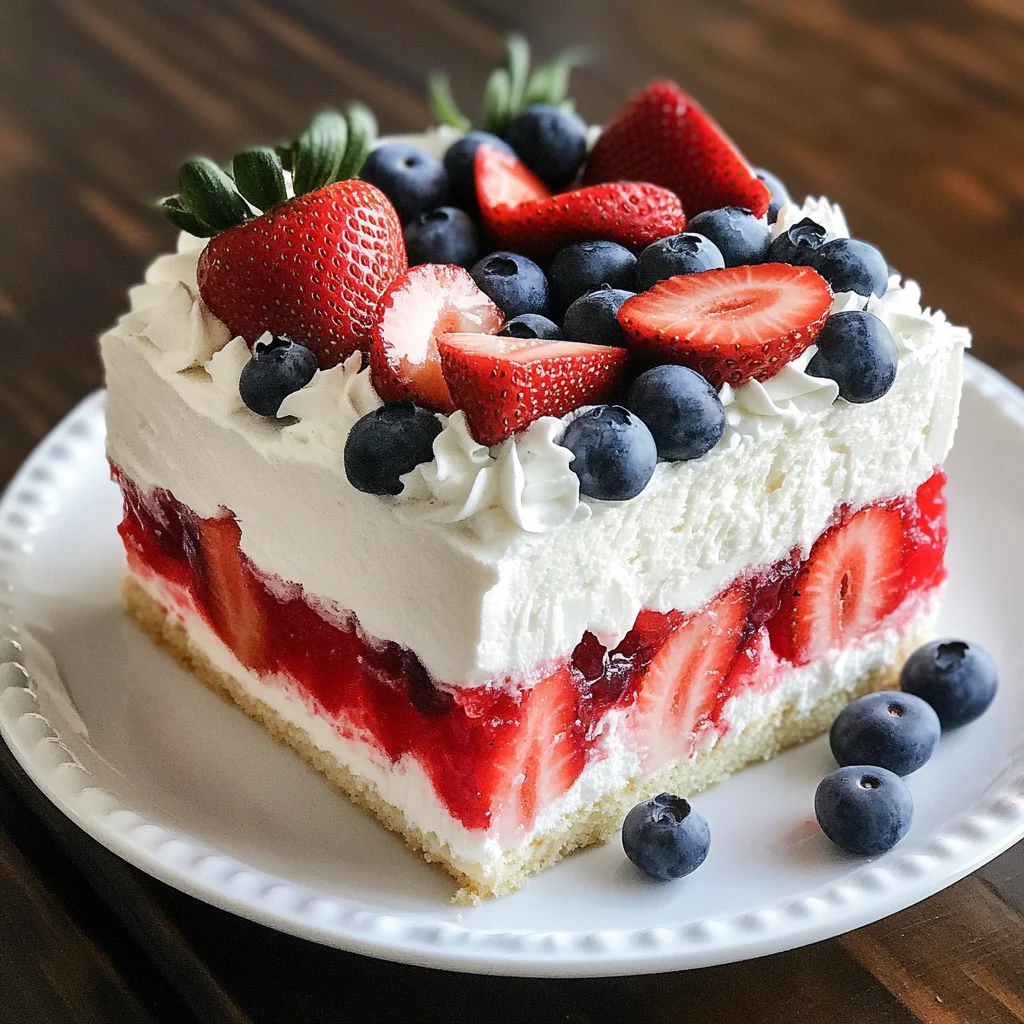
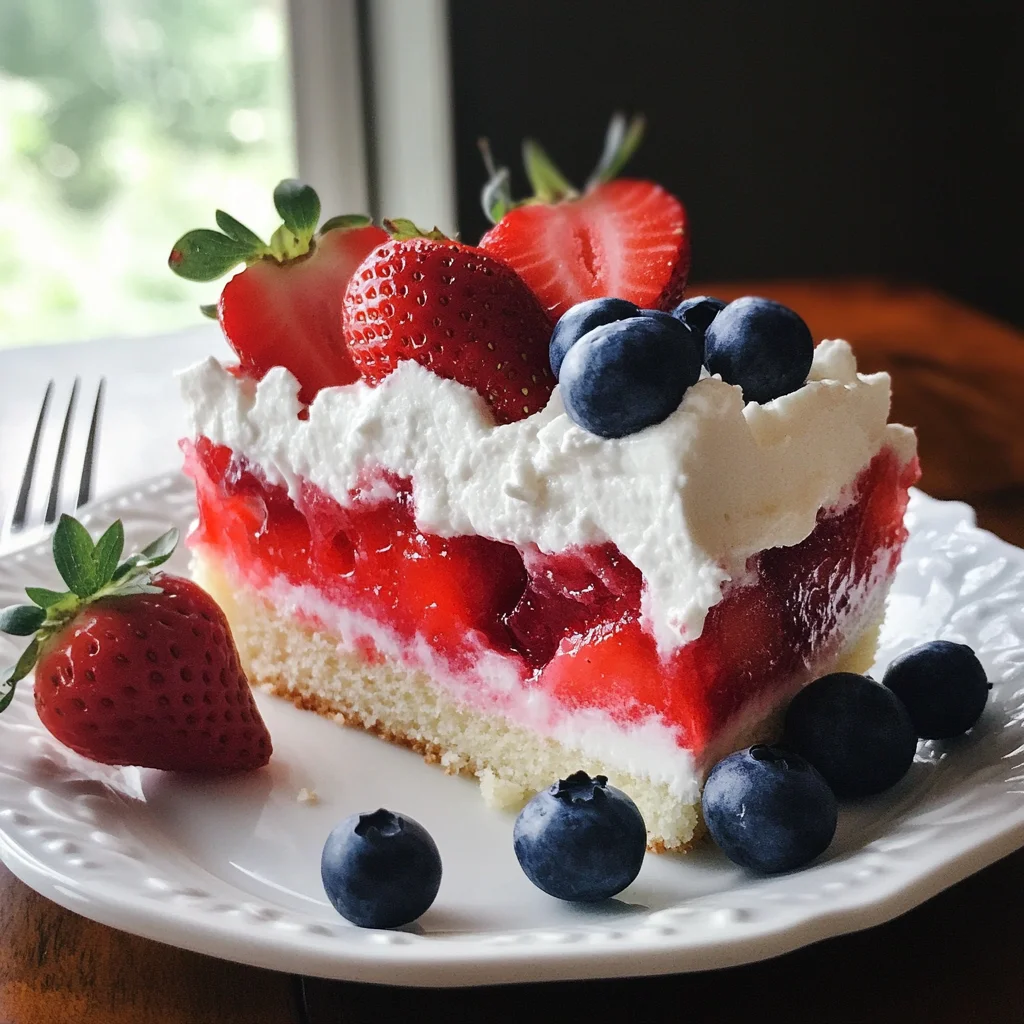
The air is filled with excitement, and the moment you lift the cover off this stunning dessert, you’ll feel like you’ve just opened a treasure chest of memories and joy. The American Flag Strawberry Poke Cake is more than just a recipe; it’s a celebration of colors, flavors, and the kind of happiness that only comes from sharing good food with loved ones. Imagine layers of moist white cake soaking in vibrant strawberry Jell-o, topped generously with a fluffy cream cheese frosting that’s as light as a cloud. Every slice is not just food; it’s an experience that bridges tradition and innovation in the most delightful way possible.
As I think back to my childhood, I remember summer barbecues where this cake made its grand entrance at every gathering—its red, white, and blue hues always eliciting gasps of delight. This dessert embodies everything we love about Americana: it’s festive, colorful, and utterly delicious. For those warm days when you want to impress without spending all day in the kitchen, this American Flag Strawberry Poke Cake is your go-to option. You can’t help but feel uplifted by its cheerful vibe. Trust me on this; once you share this cake with friends or family, they’ll be begging for the recipe!
American Flag Strawberry Poke Cake: A Colorful Celebration of Flavor
Let’s dive into this delightful recipe together! Making an American Flag Strawberry Poke Cake is like painting a masterpiece with edible ingredients—each layer adds depth to the overall experience. It’s perfect for holidays like Independence Day or any casual gathering where laughter flows as freely as lemonade. Plus, it’s ridiculously easy to whip up—you’ll wonder why you didn’t make it sooner!
Ingredients:
Embarking on our culinary journey requires gathering these essential ingredients that will transform simple components into something spectacular! Each ingredient plays a pivotal role in crafting that beautiful dessert everyone loves.
- 15 oz boxed white cake mix. This foundation provides the airy texture we adore in cakes—it’s light yet satisfying. When selecting your cake mix, opt for one without artificial flavors or preservatives if you can; quality matters! The cake mix combines effortlessly with boiling water to create that fluffy goodness we’re after.
- 1 cup boiling water. This step might sound simple, but adding boiling water to the cake mix enhances moisture content significantly. It activates the ingredients in the mix and helps achieve that tender crumb we all crave. Trust me on this; don’t skip this step!
- 3 oz box strawberry flavored Jell-o. This is where the magic truly begins! That vibrant strawberry Jell-o will seep into your cake’s pores, infusing it with sweet berry flavor while giving it a dazzling pink hue. It creates those iconic “pokes” throughout your creation—an absolute must for our poke cake!
- 1/2 cup cold water. Mixing cold water with the hot Jell-o aids in cooling down the mixture quickly while ensuring it dissolves perfectly without clumping. The contrast between hot and cold helps balance the temperature and texture for optimal soaking.
- 8 oz tub Cool-Whip non-dairy whipped topping. This delightful topping brings an airy lightness that contrasts beautifully with the denser cake layers underneath. It’s incredibly easy to work with and gives us that creamy finish without dairy—a fantastic alternative for those avoiding animal products!
- 8 oz package cream cheese (softened). Softened cream cheese is non-negotiable here; it’s crucial for achieving a smooth frosting texture that’s both rich and tangy—a perfect match for our fruity flavors! If it’s too cold, you’ll end up with clumps instead of silky frosting.
- 1 cup powdered sugar. This ingredient adds sweetness without being overly heavy or gritty—a key player in creating that luscious frosting texture we all dream about! When mixing, add it gradually to avoid clouds of sugar dust everywhere!
- 1 teaspoon vanilla. A splash of vanilla elevates every dessert imaginable by enhancing its overall flavor profile beautifully—think of it as a warm hug in a bottle! Always use pure vanilla extract when possible; it’s worth every drop for its authentic taste.
- 1 pound strawberries (sliced thin). Fresh strawberries are not just visually appealing but also provide bright flavor bursts within every bite! Look for juicy berries that are firm yet fragrant—these will be your showstoppers atop your cake.
- 1 to 2 cups blueberries (amount varies by size). These little gems add pops of color alongside their subtle sweetness and slight tartness to balance out our other flavors perfectly! Choose plump blueberries—they should spring back when gently squeezed but yield slightly under pressure.
Equipment You’ll Need:
Having the right tools makes cooking not only easier but also more enjoyable! Think of them as partners in your culinary adventure—reliable allies that help bring your vision to life.
- 9×13-inch baking pan – Essential for holding our batter while baking evenly across all sides, ensuring perfect texture throughout! If you’re using glass or metal pans, adjust your baking time slightly since they conduct heat differently.
- Mixing bowls – A good set of mixing bowls allows you to easily combine your ingredients without making a mess everywhere else! Opt for various sizes so you have flexibility depending on what you’re preparing.
- Hand mixer or stand mixer – This tool is important for whipping together our frosting smoothly while saving energy during mixing sessions! A hand mixer can be less daunting than a stand mixer if you’re just starting out—plus it’s great for quick jobs!
- Fork or skewer – Perfect for poking holes into our cooled cake before pouring on that delightful Jell-o mixture! A fork does wonders here—just be gentle so you don’t tear apart too much of your lovely creation!
Preparing the American Flag Strawberry Poke Cake
Step 1: Bake Your Base
To begin crafting this stunning American Flag Strawberry Poke Cake, preheat your oven according to the directions on your boxed white cake mix—this ensures even cooking from start to finish! As you pour your dry mix into a large mixing bowl, take a moment to admire how simple yet promising these ingredients look together—the anticipation builds as you add one cup of boiling water directly into the mixture. Stir vigorously until everything blends seamlessly; soon enough you’ll have batter resembling liquid gold gleaming back at you from your bowl!
Next comes pouring this luscious batter into your greased 9×13-inch baking pan—a crucial step because it prevents sticking later on when it’s time to serve this beauty up! Bake according to package instructions until golden brown or until a toothpick inserted comes out clean—trust me when I say there’s nothing better than that aroma wafting through your kitchen during baking time!
Step 2: Poking Perfection
Once baked, allow your masterpiece to cool for about 20 minutes—but don’t walk away just yet! Grab yourself a large fork (or skewer) and gently poke holes all over the top surface of the warm cake; aim for even spacing throughout rather than clustering them too close together (about one inch apart works well). Why do we do this? Those little holes will eagerly absorb all that sweet strawberry Jell-o goodness we’re about to pour over shortly—it ensures maximum flavor infusion throughout each slice later on!
Step 3: Prepare Your Berry Mixture
Now let’s turn our attention back towards preparing those vibrant layers beneath each slice—the magic lies within making sure our Jell-o mixture is dissolved correctly first before applying it onto our poked cake surface! Begin by pouring three ounces of strawberry-flavored Jell-o powder into a separate bowl along with one cup of freshly boiled water from earlier—mix thoroughly until fully dissolved (this should take mere moments). Once done mixing perfectly together without any lumps remaining visible at all—which would ruin everything—we’ll then add half a cup cold water next; combining hot liquids introduces an element called “contrast cooling,” helping everything set nicely once poured onto baked goods like ours!
Step 4: Pouring Time!
With everything prepped beautifully now comes my favorite part—pouring that glorious liquid sunshine over our beautiful base layer! Take care while doing so: gently drizzle slowly over top while ensuring even coverage across those poked holes previously created (no need rush!). As soon as all Jell-o has been absorbed completely within those tiny openings created earlier—it’ll start transforming into something magical right before our eyes… Cover tightly afterward using plastic wrap before placing safely inside refrigerator space available; let chill patiently for three hours (or longer if preferred!) allowing flavors meld beautifully together forming harmonious deliciousness awaiting us ahead!
Stay tuned as we continue crafting this irresistible treat together—I promise there’s lots more fun ahead in getting ready for serving time soon enough!
Step 5: Whipping Up the Creamy Topping
Now that your cake has cooled and the vibrant Jell-O is beautifully infused into its tender crumb, it’s time to create that luscious topping that will elevate our American Flag Strawberry Poke Cake to new heights. In a large mixing bowl, you’ll want to combine an 8 oz tub of Cool-Whip non-dairy whipped topping with an 8 oz package of softened cream cheese. This part is crucial—softening the cream cheese allows it to blend seamlessly, creating a smooth and velvety texture without any lumps. I can’t stress enough how important this step is! If your cream cheese isn’t adequately softened, you’ll end up with clumpy frosting which can be a bit disheartening when all you want is that creamy goodness.
Once you have your cream cheese softened to room temperature (I recommend taking it out of the fridge at least half an hour before you start), add in one cup of powdered sugar and one teaspoon of vanilla extract. The powdered sugar sweetens and thickens the topping while the vanilla brings forth a warm aroma that dances in the air, promising delightful flavors ahead. Using a hand mixer, beat everything together until it’s completely smooth and creamy—this should take about 2-3 minutes. Trust me on this: if you see any stubborn little lumps, don’t hesitate to pop the mixture in the microwave for about 20 seconds to warm it slightly, then give it another good stir. You’ll be rewarded with a frosting that’s not just visually appealing but also incredibly delicious!
Step 6: Frosting Your Cake
With your frosting now at its peak of perfection, it’s time for the fun part—spreading it onto your gorgeous cake! Gently remove the plastic wrap from your chilled cake and grab a spatula or an offset knife for this task. Start from one side of the cake and smoothly glide your spatula across the top, ensuring even coverage over every inch of that colorful canvas below. Remember, this isn’t just about slapping on some frosting; it’s about creating a beautiful layer that adds depth to the flavors you’ve already built with the Jell-O soaked cake underneath.
As you frost, take care to let some of those vibrant red strawberry slices peek through here and there as they will add visual interest and make each slice even more appealing when served. The contrast of colors from strawberries and blueberries against that creamy white topping is nothing short of stunning! This step may seem simple, but it’s non-negotiable; a well-frosted cake not only looks inviting but also ensures every bite is balanced with sweetness and richness from the toppings. Once frosted, cover your masterpiece again with plastic wrap and place it back in the fridge for at least 30 minutes. This chilling time allows everything to meld together beautifully; think of it as letting all those fabulous flavors get acquainted so they can throw a mini party in every bite!
Step 7: Decorating Your Flag Cake
Now comes arguably my favorite part—the decoration! It’s time to transform our frosted cake into an edible American flag using fresh strawberries and blueberries. Start by slicing your strawberries thinly; you’ll need enough slices to create those bold red stripes across two-thirds of your cake while leaving space for our blue field up in the corner. As you arrange them on top of your cake, don’t worry about being perfect; remember, this is all about celebrating creativity! The juicy red strawberries will provide not only color but also a burst of refreshing flavor that complements our rich cream cheese frosting.
Next comes our beloved blueberries. You’ll want to scatter them generously into that top-left corner where we’re representing the stars on our flag. Depending on their size, aim for around 1 to 2 cups—just enough so they create a lovely cluster without crowding out each other too much. The deep blue hue contrasts beautifully against both the bright red strawberries and pristine white frosting—it’s truly mesmerizing! Don’t rush this step; take your time arranging them until you’re satisfied with how they look because presentation matters as much as taste in desserts like these! Once decorated, pop your cake back into the fridge until you’re ready to serve it—this will keep everything fresh and cool.
Step 8: Chilling Your Creation
Ahh, patience is indeed more than just a virtue—it’s essential when crafting desserts! After decorating your American Flag Strawberry Poke Cake, allowing it to chill for at least another hour (or longer if possible) is absolutely paramount. This step does wonders; during this time, all those vibrant flavors have an opportunity to mingle and deepen, creating an experience that’s more than just eating—it’s savoring each moment!
You might wonder why chilling is so important? Well, first off, it helps firm up that luscious cream cheese frosting just enough so when you slice into it later on, every piece holds its shape beautifully instead of sliding off like some cakes do—nobody wants a messy dessert on their hands! Furthermore, chilling enhances those tantalizing fruity flavors as they become more pronounced and integrated after spending some quality time together in cooler temperatures. So be patient; I promise it’s worth every second!
Conclusion:
As we bring our delightful journey through making the American Flag Strawberry Poke Cake to a close, I can’t help but feel an overwhelming sense of excitement for you! From blending those fluffy layers of white cake with vibrant strawberries and blueberries to finishing off with that luscious Cool Whip cream cheese frosting, this recipe embodies joy in every bite. The combination of textures—from the moist cake base bursting with fruity goodness to the smooth frosting—creates an experience that’s profoundly satisfying. It’s not just dessert; it’s an invitation to celebrate life’s special moments!
This recipe is undoubtedly a must-try because it’s so much more than just delicious—it’s about creating memories in your kitchen with loved ones. Imagine gathering around as you bake together, laughter echoing through the air as you pour vibrant Jell-O over warm cake or arrange the fresh fruit into a beautiful flag pattern. It shines at summer barbecues or family picnics but is absolutely perfect for any occasion where smiles are needed—think birthday parties or holiday gatherings. When you pull that lovely creation from the refrigerator on serving day, its colors will radiate happiness, enticing everyone around.
For serving suggestions that elevate this already stellar dessert even further, imagine savoring one slice alongside a scoop of velvety vanilla ice cream; that contrast between cold creaminess and juicy fruit will have you dancing with delight! For an afternoon pick-me-up during those sunny days outdoors, pair it with refreshing iced tea or lemonade—they harmonize beautifully with those bright flavors! And if you’re feeling adventurous on flavor explorations, consider serving slices drizzled with chocolate sauce or accompanied by fresh whipped coconut cream—each addition brings something unique and utterly intoxicating.
Feeling adventurous? This recipe is wonderfully adaptable too! You might substitute raspberries for some of those strawberries if you’re looking for a deeper berry flavor or mix up different flavored Jell-O for fun twists on color and taste. You could even experiment by swapping out blueberries for thinly sliced kiwi—a vibrant green addition that adds both beauty and zest! Whatever direction you choose to take this beloved family recipe, I encourage you not only to try it but also share your experiences with friends and family—let’s connect over food! I’m thrilled you’ve come along on this culinary adventure today; now go forth and create something extraordinary!
American Flag Strawberry Poke Cake

Celebrate summer with vibrant layers of sweetness in this American Flag Strawberry Poke Cake—an irresistible dessert that’s perfect for gatherings!
- Prep Time: 30 minutes
- Cook Time: 30 minutes
- Total Time: 1 hour
- Yield: Serves approximately 12 1x
- Category: Dessert
- Method: Baking
- Cuisine: American
Ingredients
- 15 oz boxed white cake mix
- 1 cup boiling water
- 3 oz box strawberry flavored Jell-o
- 1/2 cup cold water
- 8 oz tub non-dairy whipped topping
- 8 oz package cream cheese (softened)
- 1 cup powdered sugar
- 1 teaspoon vanilla extract
- 1 pound strawberries (sliced thin)
- 1 to 2 cups blueberries
Instructions
- Preheat your oven as per the instructions on the boxed cake mix.
- In a large mixing bowl, combine the cake mix with boiling water and stir until smooth.
- Pour the batter into a greased 9×13-inch baking pan and bake according to package instructions until golden brown.
- After cooling for about 20 minutes, poke holes in the top of the cake using a fork.
- Dissolve strawberry Jell-o in boiling water, then add cold water; pour over the poked cake and refrigerate for at least three hours.
- In another bowl, beat together softened cream cheese, powdered sugar, non-dairy whipped topping, and vanilla until smooth.
- Spread the frosting over the chilled cake, then decorate with sliced strawberries for stripes and blueberries for stars.
- Chill again for at least one hour before serving.
Nutrition
- Serving Size: 1 slice (about 120g)
- Calories: 270
- Sugar: 24g
- Sodium: 330mg
- Fat: 9g
- Saturated Fat: 4g
- Unsaturated Fat: 5g
- Trans Fat: 0g
- Carbohydrates: 44g
- Fiber: <1g
- Protein: 3g
- Cholesterol: 10mg