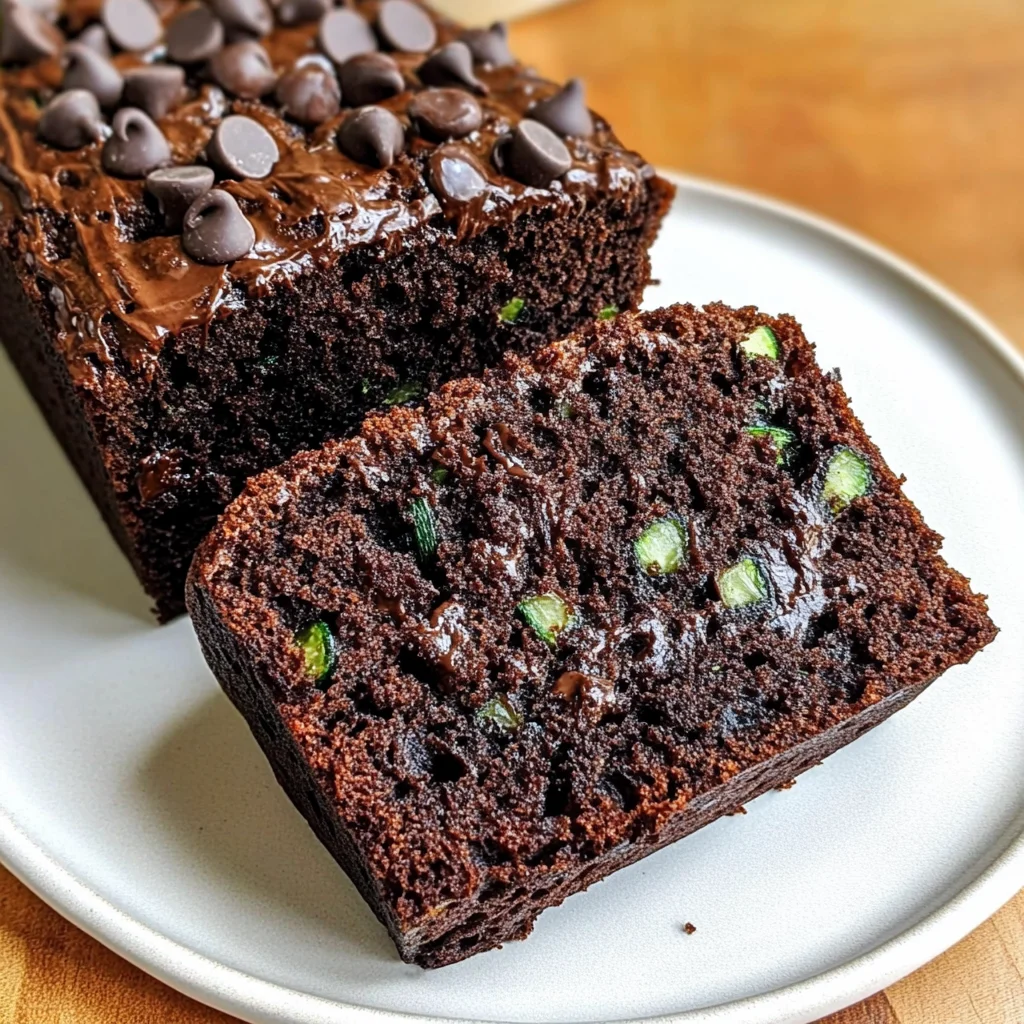
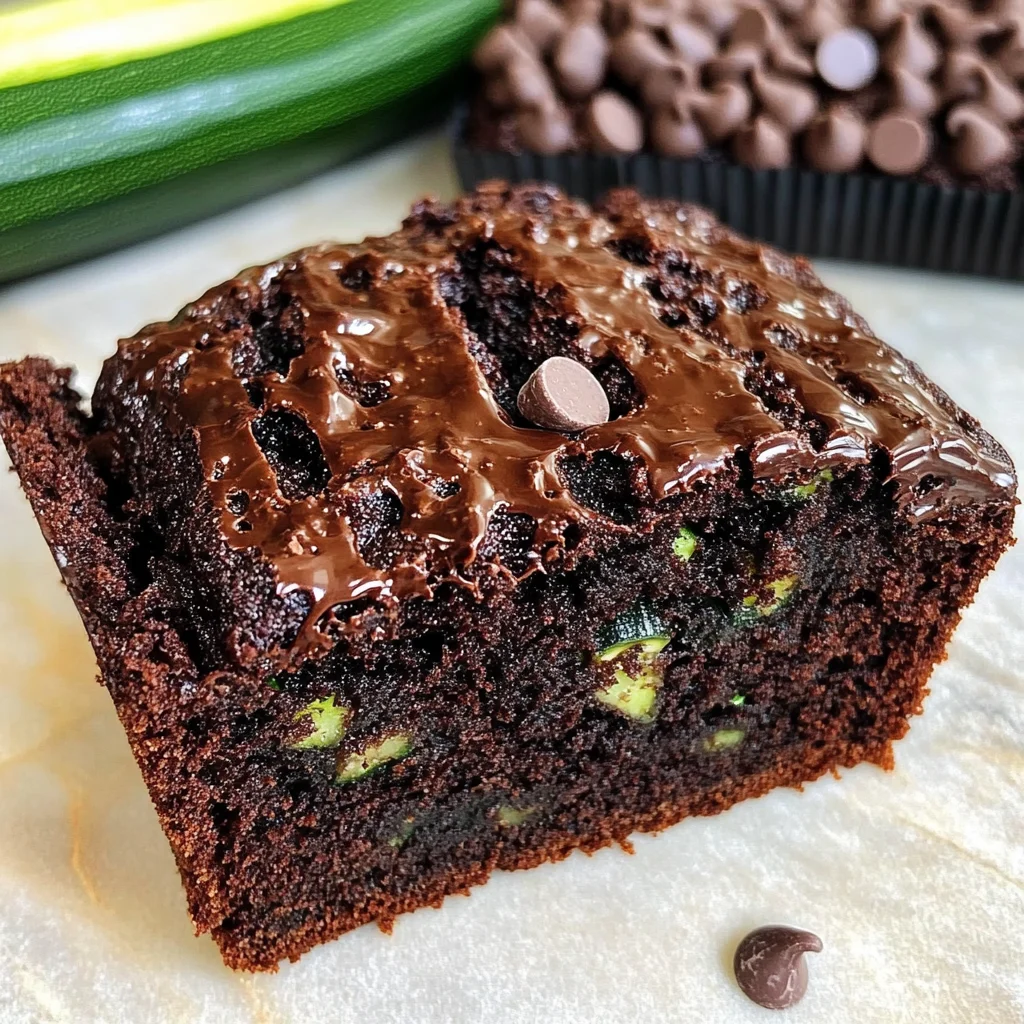
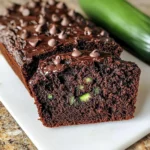
Chocolate Zucchini Bread
There’s something inexplicably magical about the smell of baked goods wafting through the house, isn’t there? It’s an aroma that brings comfort and warmth, like a cozy hug on a chilly day. One of my all-time favorite recipes that evokes such feelings is Chocolate Zucchini Bread. Now, before you raise an eyebrow at the idea of adding zucchini to a sweet treat, let me assure you: this delightful loaf will remind you of your favorite chocolate cake! The rich chocolate flavor mingles beautifully with the tender, moist texture provided by the zucchini, creating a symphony of flavors that is utterly intoxicating. As I bake this bread, I feel connected to generations of home bakers who’ve known just how to create joy from simple ingredients.
You see, this recipe is more than just a way to use up extra zucchini; it’s about embracing creativity in the kitchen and enjoying the delicious results that come from it. Chocolate Zucchini Bread has become a staple in my home not only for its scrumptious taste but also for its versatility—it’s perfect for breakfast, an afternoon snack, or even a dessert. And trust me when I say that when you share it with friends or family, they won’t even notice they’re eating vegetables! So grab your mixing bowls and let’s dive into this delightful baking adventure together!
Chocolate Zucchini Bread: A Delectable Delight
This easy chocolate zucchini bread will transport you straight back to childhood memories of decadent desserts with every bite.
Embarking on this culinary journey is as simple as gathering your ingredients and letting your creativity flow. Each element plays a vital role in crafting this culinary masterpiece. Let’s take a look at what we need!
Ingredients:
- 1 cup all-purpose flour. The foundation of our Chocolate Zucchini Bread rests upon this humble ingredient. All-purpose flour provides structure while still keeping things light enough for that dreamy texture we crave. When selecting flour, look for brands that have finely milled grains—this ensures better mixing and incorporation into your batter without clumps. If you’re looking for a gluten-free option, almond flour works wonderfully here too; just remember to adjust your liquid ratios slightly.
- 1/2 cup Dutch process cocoa or unsweetened cocoa. This ingredient is what gives our bread its rich chocolatey essence! Dutch process cocoa has been treated to neutralize acidity; it produces a darker color and mellower flavor compared to natural cocoa powder. Whichever version you choose, make sure it’s of high quality; it truly makes all the difference in flavor depth. If you can find artisanal brands at your local market or online, don’t hesitate to splurge on them—they elevate the experience!
- 1 teaspoon baking soda. A crucial leavening agent in our recipe, baking soda reacts with the acidity in the cocoa powder and zucchini to create carbon dioxide bubbles that help our bread rise beautifully as it bakes. Make sure you use fresh baking soda; if it’s past its prime, you’ll miss out on that delightful lift and airy crumb we adore.
- 1/2 teaspoon sea salt. Salt might seem like an afterthought in sweet recipes, but trust me—it enhances flavors like nothing else! It balances out the sweetness and brings out the richness of chocolate in ways that are simply profound. A good quality sea salt can add subtle nuances that elevate your Chocolate Zucchini Bread from ordinary to extraordinary.
- 2 large eggs (at room temperature). Eggs play several roles in our bread—they bind together ingredients while also contributing moisture and richness. Using eggs at room temperature helps them blend more smoothly into your batter without shocking other ingredients like melted butter or oil; this ultimately leads to better texture throughout the loaf.
- 1/4 cup unsalted butter (melted and slightly cooled). Butter adds depth of flavor and moisture while giving our bread that luscious mouthfeel we all crave! Melting it beforehand allows for easier incorporation into the batter—just ensure it’s not too hot when mixing; otherwise, you risk scrambling those precious eggs!
- 1/4 cup canola oil (vegetable oil or melted coconut oil). The addition of oil not only enhances moisture but also keeps our bread tender longer than butter alone would allow due to its liquid state at room temperature. Canola oil has a neutral flavor which won’t interfere with the chocolate notes; however, if you’re feeling adventurous, melted coconut oil adds an intriguing hint of tropical essence.
- 3/4 cup packed light brown sugar. Brown sugar introduces lovely caramel notes alongside sweetness; packing it firmly helps ensure you’re measuring accurately since it’s denser than granulated sugar! Feel free to experiment with dark brown sugar if you’d like a deeper flavor profile—it pairs beautifully with chocolate.
- 1 teaspoon pure vanilla extract. Vanilla extract is like magic in any baked good; it rounds out flavors beautifully while lending warmth and richness overall! Always opt for pure vanilla extract rather than imitation—its complexities are worth every penny spent.
- 1 1/2 cups packed shredded zucchini. Here’s where we sneak in some veggies! Grated zucchini provides moisture without overpowering other flavors—a genius addition if I do say so myself! When preparing your zucchini, be sure to squeeze out excess water using a clean kitchen towel before mixing it into the batter; otherwise, you’ll end up with too much liquid!
- 1 cup semisweet chocolate chips (divided). Ahh—the pièce de résistance! Chocolate chips add pockets of gooey goodness throughout each slice; dividing them allows for both swirls within the loaf as well as those glorious bits peeking out on top once baked. Choose high-quality chips—your taste buds will thank you later!
Equipment You’ll Need:
As any seasoned cook will tell you, having the right tools makes all the difference between creating a masterpiece or struggling through frustration in the kitchen! These essential partners will help ensure smooth sailing as we embark on making our delightful Chocolate Zucchini Bread.
- 9-by-5-inch loaf pan – This size is perfect for achieving that classic loaf shape we’re after while ensuring even baking throughout! Opt for non-stick versions or use parchment paper lining if you want extra insurance against sticking—either way guarantees easy removal once baked.
- Mixing bowls (medium & large) – A good set of mixing bowls is essential when combining dry ingredients separately from wet ones before bringing them together harmoniously later on! Look for sturdy options that won’t easily tip over during enthusiastic stirring sessions.
- Whisk – A reliable whisk helps incorporate air into batters while breaking up lumps effortlessly—all critical components when striving toward lightness within those slices!
- Rubber spatula – You’ll want one handy for folding together different mixtures without deflating precious air bubbles formed during whisking earlier stages—great care must be taken here!
- Grater – To prepare our star ingredient—zucchini—you’ll need either box grater or food processor attachment capable enough to produce fine shreds quickly without excess fuss involved!
Now that we’ve gathered everything together let’s jump right into preparing our flavorful Chocolate Zucchini Bread!
Step 1: Preheat Your Oven and Prepare Your Pan
First things first—let’s get that oven warmed up! Preheating is crucial because placing batter into cold ovens can lead to uneven rising; nobody wants dense bread instead of fluffy delight! Set yours at 350°F (175°C) while greasing your trusty 9-by-5-inch loaf pan generously with nonstick cooking spray—I promise this step will save us from sticky situations later on!
Step 2: Combine Dry Ingredients
In one medium bowl, grab your whisk and combine all-purpose flour with cocoa powder, baking soda, and sea salt until evenly mixed—this ensures every bite bursts forth flavors cohesively rather than sporadically scattered throughout each slice! Be careful not to rush through this step—the gentle aeration created by whisking plays an important role in yielding lighter textures down below once baked.
Step 3: Mix Wet Ingredients
Now onto one larger bowl where we’ll introduce eggs alongside melted butter and oil along with vanilla extract—all these components work together seamlessly under gentle stirring motions until smoothness reigns supreme within their depths (don’t worry if some small brown sugar clumps linger!). Each element contributes vital moisture levels needed later during baking process whilst enhancing overall richness felt upon tasting final result!
Step 4: Bring It All Together
Carefully fold dry mixture into wet mixture using rubber spatula—we want everything combined thoroughly yet gently so we preserve any airy bubbles formed during previous steps—overmixing risks tougher crumb texture which isn’t ideal here at all! Once blended well enough without any visible flour streaks remaining behind afterward comes time introduce shredded zucchini next followed closely by three-fourths cup semi-sweet chocolate chips added last minute right before transferring batter directly into prepared pan ready await transformation inside oven’s heat ahead…
I can already feel my excitement building as I think about how deliciously moist this Chocolate Zucchini Bread will turn out! Stay tuned as we continue our journey through each step leading us closer towards indulging ourselves together…
Step 5: Pouring the Batter – A Delicious Transformation
Now that you’ve combined your ingredients into a glorious mix, it’s time for one of the most satisfying moments in this entire process: pouring the batter into the prepared loaf pan. Gently transfer that rich, chocolatey mixture into your greased 9-by-5-inch loaf pan, making sure to scrape every last bit from the sides of the bowl with a spatula—this is where all the magic lies! The batter should be thick and luscious, with beautiful flecks of shredded zucchini peeking through. This is not just about filling the pan; it’s about creating a foundation for a loaf that will rise beautifully in the oven while retaining that utterly intoxicating moistness we’re after.
Now here’s an important tip: before you pour, take a moment to check the consistency. It should flow easily but still hold its shape, resembling a thick cake batter. Trust me on this—getting this right ensures that your bread doesn’t become dense or gummy. Once poured, sprinkle those remaining 1/4 cup of chocolate chips over the top. This is crucial—the surface coverage adds an extra layer of chocolatey indulgence, giving you delightful morsels in each slice. As you look at that ready-to-bake loaf, I promise you’ll feel a sense of accomplishment already!
Step 6: Baking – The Anticipation Builds
With your oven preheated to 350°F (175°C), it’s showtime! Carefully place your loaf pan on the middle rack and close that oven door, sealing in all those delightful aromas as they begin to mingle and rise. Baking is such a transformative process; as the heat envelops your bread, it activates the leavening agents and triggers a magical reaction between the cocoa powder and sugars, creating that beautiful crust while maintaining an incredibly moist interior. You’ll want to set your timer for 50-60 minutes but keep an eye on it towards the end—ovens can vary widely in temperature.
As your kitchen fills with the aroma of fresh-baked chocolate goodness, you might find yourself eagerly anticipating that first slice! But don’t rush! When checking for doneness, insert a toothpick into the center of your bread—if it comes out mostly clean with just a few melted chocolate bits clinging to it, then you’ve hit gold! Remember, if you see gooey batter on your toothpick, give it another five minutes; patience here is non-negotiable because underbaking can lead to a soggy texture.
Step 7: Cooling – Embrace Patience
Once those heavenly scents have reached their peak and your Chocolate Zucchini Bread has baked to perfection, it’s time for some cooling magic! Remove your loaf pan from the oven and place it on a wire cooling rack; this step is absolutely paramount in ensuring that your bread doesn’t steam itself into oblivion inside the pan. Letting it cool for about 15 minutes allows it to firm up slightly so when you remove it from the pan, it holds its shape beautifully.
After that initial cooling time has passed, run a knife around the edges to loosen any stubborn spots—this little act can save you from heartbreak later when you try to get out those gorgeous slices! Carefully invert your loaf onto the rack; let gravity do its work as you gently coax out this masterpiece. Allowing it to cool completely before slicing isn’t just an exercise in patience; it’s essential for achieving clean cuts and maintaining its moist texture without squishing everything together. Trust me on this—you want those beautiful slices to shine!
Step 8: Slicing and Serving – The Moment of Truth
Ahh, here we are—the moment we’ve all been waiting for! Once cooled slightly (though still warm is perfectly acceptable!), grab yourself a sharp serrated knife and prepare for slicing heaven. As you cut through this Chocolate Zucchini Bread, you’ll notice how effortlessly it glides through thanks to its perfectly moist crumb structure—this is what we were aiming for! Each slice should be tender yet firm enough not to crumble apart completely; if yours does fall apart slightly, don’t fret; it just means you’ve made something so delicious everyone’s going to want more!
At this point, I highly encourage you to serve these slices warm with a smear of nut butter or simply enjoy them as they are. Each bite reveals layers of flavor—the richness of chocolate mingling with hints of zucchini makes each mouthful deeply satisfying without being overwhelming. It’s like enjoying decadent dessert while sneaking in some wholesome veggies—a true win-win scenario! You can even freeze any leftovers (if there are any!) by wrapping them tightly in plastic wrap followed by aluminum foil—trust me when I say this bread freezes beautifully! Simply defrost before serving again.
Conclusion:
As we come full circle on our journey through this remarkable recipe for chocolate zucchini bread, I can’t help but feel excited about what you’ve created! Baking is such a personal experience; it’s not just about following steps but infusing love and warmth into every ingredient. This particular recipe stands out because of its perfect balance—the richness of cocoa mingling with the subtle sweetness of zucchini creates an utterly extraordinary bread that feels like a hug in every bite. With its soft crumb and pockets of melty chocolate chips, it’s truly special and destined to become one of your family favorites.
This chocolate zucchini bread isn’t just another dessert; it’s an experience waiting to be savored. I encourage you to make it during those cozy weekends when you’re surrounded by family or friends who appreciate good food as much as you do. The joy you’ll feel when pulling this loaf from the oven—its deep brown exterior promising deliciousness—is something I hope you’ll cherish as much as I do. There’s nothing quite like enjoying a warm slice alongside a cup of tea or coffee while sharing stories and laughter with loved ones.
For serving suggestions, imagine savoring one delectable slice with a dollop of whipped coconut cream on top—truly divine! Or perhaps pairing it with fresh berries that burst with tartness against the rich chocolatey backdrop would elevate your tasting experience even further. If you’re feeling adventurous, why not drizzle melted dark chocolate over each slice or serve it alongside vanilla ice cream for an indulgent dessert that will leave everyone begging for seconds?
Feeling adventurous? This recipe is wonderfully adaptable! You could experiment by adding nuts like walnuts or pecans for crunch or swapping out some flour for whole wheat flour if you’re looking for something heartier yet still deliciously moist. You might even try incorporating spices like cinnamon or nutmeg to deepen those flavors further—it’s all about what excites your palate! So go ahead, dive into this delightful adventure in baking, share your creations with others, and let me know how your version turns out—I’m thrilled to hear from you!
Chocolate Zucchini Bread
Indulge in the rich and decadent experience of Chocolate Zucchini Bread, a delightful treat that combines the beloved flavors of chocolate with the subtle moisture of zucchini. This easy-to-make recipe transforms ordinary ingredients into an extraordinary loaf that is perfect for breakfast, as a snack, or even as a dessert. Each slice is infused with the warmth of cocoa and the sweetness of brown sugar, while hidden shreds of zucchini ensure a moist texture without compromising on flavor. With its irresistible taste and simple preparation, this Chocolate Zucchini Bread is sure to become a staple in your kitchen. Gather your ingredients and let’s embark on this delicious baking adventure!
- Prep Time: 15 minutes
- Cook Time: 60 minutes
- Total Time: 1 hour 15 minutes
- Yield: Approximately 12 servings 1x
- Category: Dessert
- Method: Baking
- Cuisine: American
Ingredients
- 1 cup all-purpose flour
- 1/2 cup Dutch process cocoa powder
- 1 teaspoon baking soda
- 1/2 teaspoon sea salt
- 2 large eggs (at room temperature)
- 1/4 cup unsalted butter (melted and slightly cooled)
- 1/4 cup canola oil
- 3/4 cup packed light brown sugar
- 1 teaspoon pure vanilla extract
- 1 1/2 cups packed shredded zucchini
- 1 cup semisweet chocolate chips (divided)
Instructions
- Preheat your oven to 350°F (175°C) and grease a 9-by-5-inch loaf pan.
- In one bowl, whisk together flour, cocoa powder, baking soda, and sea salt.
- In another bowl, mix eggs, melted butter, canola oil, brown sugar, and vanilla until smooth.
- Gently fold the dry ingredients into the wet mixture until just combined.
- Stir in shredded zucchini and three-fourths of the chocolate chips.
- Pour batter into the prepared pan and sprinkle remaining chocolate chips on top.
- Bake for 50-60 minutes or until a toothpick comes out mostly clean.
- Allow to cool in the pan for 15 minutes before transferring to a wire rack to cool completely.
Nutrition
- Serving Size: 1 slice (85g)
- Calories: 200
- Sugar: 12g
- Sodium: 150mg
- Fat: 9g
- Saturated Fat: 3g
- Unsaturated Fat: 5g
- Trans Fat: 0g
- Carbohydrates: 30g
- Fiber: 2g
- Protein: 3g
- Cholesterol: 30mg