Crispy Chinese Scallion Pancakes (Cong You Bing)
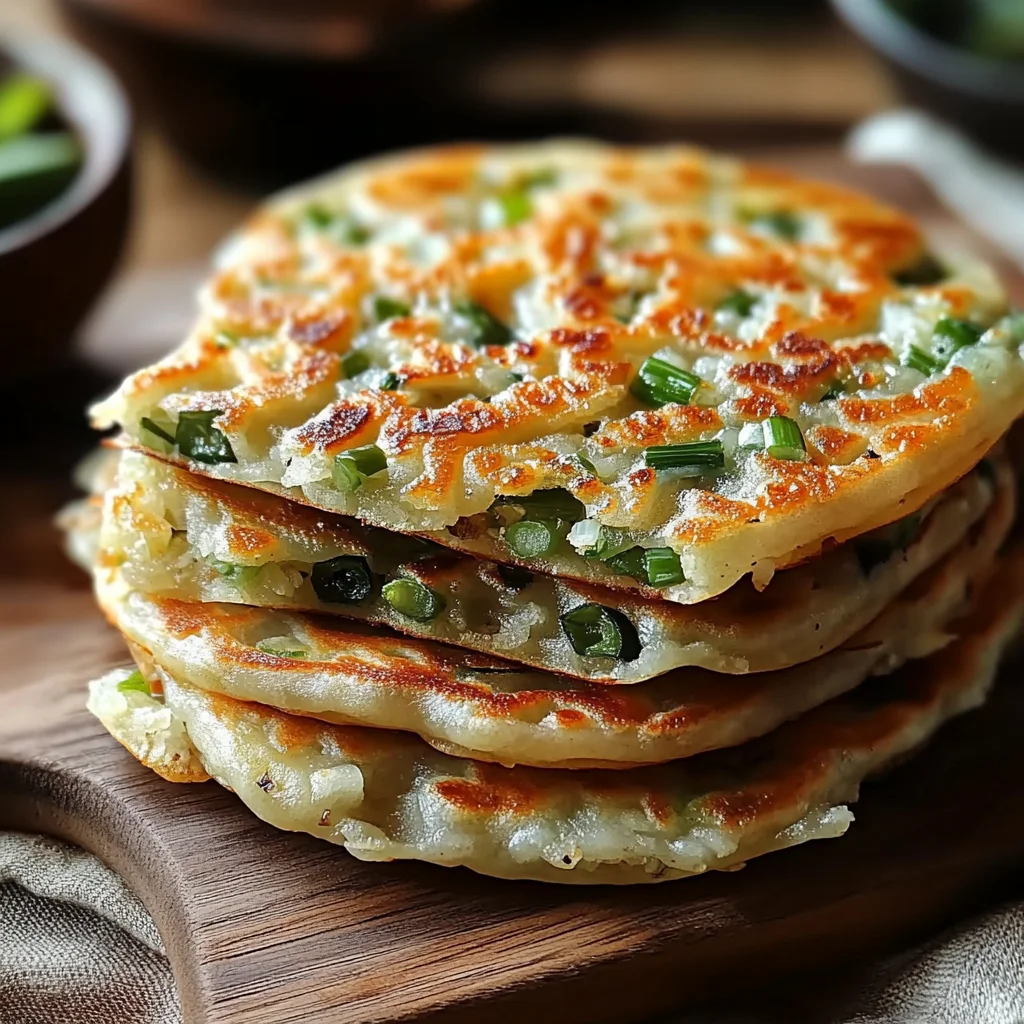
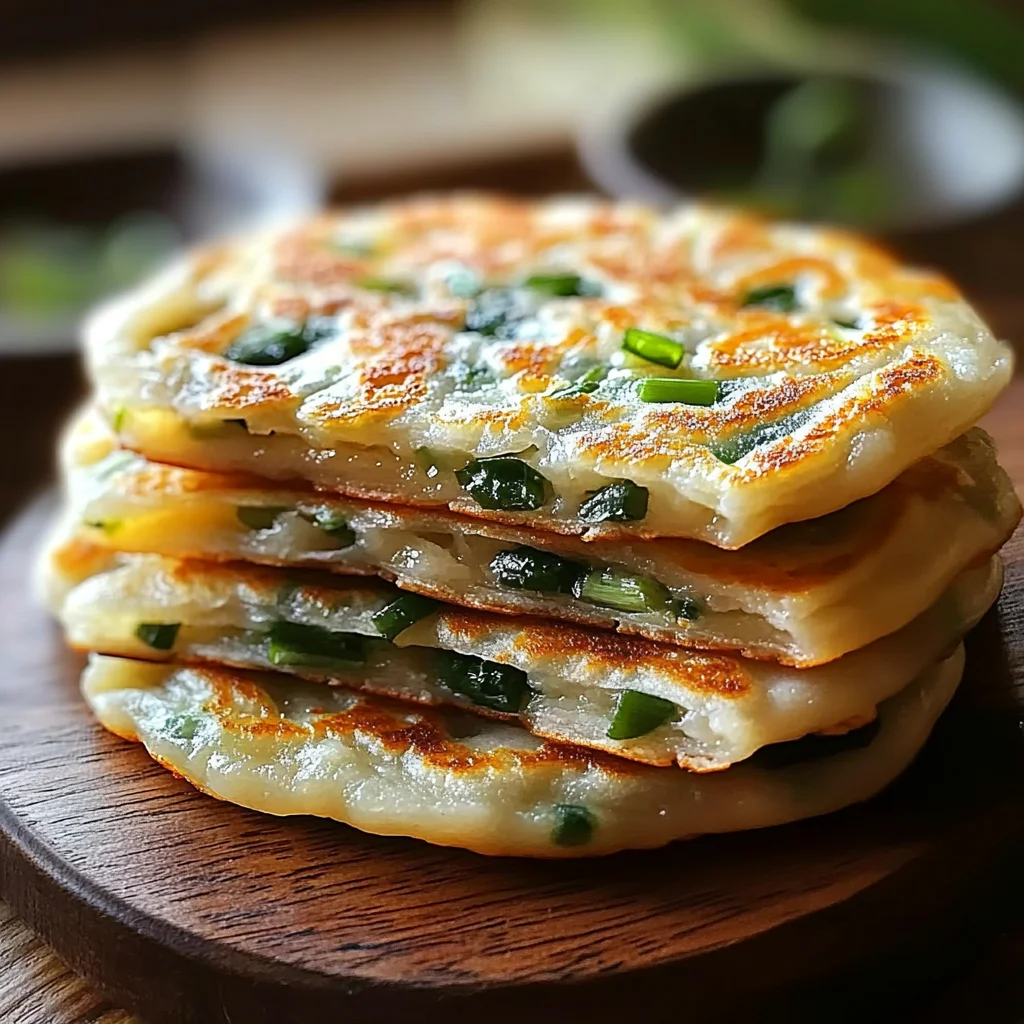
There’s something profoundly comforting about the act of making Crispy Chinese Scallion Pancakes, or cong you bing. As soon as you start mixing the flour and water, you can almost hear the echoes of laughter from family gatherings, the sizzling sound in a hot pan, and the aroma that wafts through the air, inviting everyone to come together. This recipe is not just about creating a delicious dish; it’s a heartfelt experience that connects us to our past, to family traditions, and to the simple joys of cooking. The golden layers of these pancakes flake apart like a warm hug, revealing tender green onions nestled within. I promise you, every step is steeped in nostalgia and savory delight.
What makes these scallion pancakes truly special isn’t just their crispy texture or satisfying flavor; it’s the hands-on process that draws you in. You’ll find joy in the rhythm of rolling out dough and coiling it into spirals—it’s almost meditative. Each pancake is an invitation: an invitation to explore flavors, share stories with loved ones, and perhaps even create new memories around the dinner table. Trust me on this; whether you’re familiar with these street snacks or experiencing them for the first time, this recipe will envelop your kitchen in warmth and love.
Crispy Chinese Scallion Pancakes (Cong You Bing): A Cozy Culinary Journey
Let’s embark on this culinary adventure together! Making crispy Chinese scallion pancakes is like stepping into a world where food becomes art. With just a few humble ingredients, you’ll create something utterly intoxicating that’s perfect for any occasion—be it a casual weeknight dinner or a festive gathering with friends. So roll up your sleeves and let’s get started!
Ingredients:
As we gather our ingredients for these delightful scallion pancakes, remember that each one plays a vital role in crafting something extraordinary.
- 2 ½ cups all-purpose flour. This is your foundation—the backbone of your scallion pancakes. All-purpose flour has just the right amount of protein to develop gluten without becoming too tough, granting a perfect balance between chewiness and crispness when cooked. When choosing flour, opt for unbleached varieties if possible; they tend to yield better flavor and texture because they’re minimally processed.
- ¾ cup hot water (plus more as needed). The temperature of your water is absolutely paramount here! Using hot water helps to partially cook the flour during mixing, which creates a soft dough that’s incredibly pliable. As you mix your dough, feel free to add additional water by the tablespoon if it seems dry—this will ensure your pancakes have that lovely tender quality.
- 4 tablespoons vegetable oil (divided). This liquid gold does wonders! It adds richness and moisture while also helping to create those indulgently crispy layers when frying. Since this recipe calls for both mixing oil into the dough and frying with it later on, I recommend using a neutral-flavored oil like canola or sunflower oil—these won’t overpower your beautiful scallions.
- 1 teaspoon salt. Salt may seem simple but think of it as an essential enhancer—a flavor conductor that brings out all those cozy notes in your ingredients. It’s crucial for seasoning both the dough and enhancing the natural sweetness of your scallions.
- 1 ½ cups finely chopped scallions (green parts only). Ahh, those vibrant green beauties! Fresh scallions are what elevate these pancakes from good to truly extraordinary—their sharpness balances perfectly against the rich layers of dough while providing a pop of color. When selecting scallions at the store or farmer’s market, look for firm stalks with bright green tops; avoid any wilted or yellowing parts as they signify age.
- Sesame oil for brushing. This fragrant oil adds an unmistakable depth of flavor—just imagine how divine it smells! Its nutty aroma enhances each bite while contributing to that sought-after crispy exterior when fried. A little goes a long way here; use it sparingly as you brush it onto your rolled-out dough.
- Extra flour for rolling out the dough. Having some extra flour on hand is crucial for dusting your work surface as well as preventing sticking during rolling out your dough. You want each layer to glide smoothly without tearing or losing its shape—this little detail makes all the difference!
Equipment You’ll Need:
Having the right tools makes our culinary journey smoother and more enjoyable—and trust me when I say this process will be much easier with them by your side!
- Mixing bowl – A sturdy mixing bowl is essential for holding all those ingredients as we bring our pancake dough together. Opt for one that’s large enough so you can comfortably mix without worrying about spills—it can be glass or stainless steel based on what feels best in your hands.
- Rolling pin – This tool is critical for evenly rolling out our dough into thin sheets; its smooth surface allows us to apply even pressure while shaping our pancakes without tearing them apart.
- Skillet or frying pan – A heavy-bottomed skillet distributes heat evenly across its surface—a non-stick option works beautifully here since we’ll need minimal oil during frying to achieve that perfect crispiness.
- Spatula – A wide spatula will help us flip our pancakes easily once they’ve achieved that golden brown perfection while allowing us to gently press down during cooking to ensure even browning—this step is absolutely crucial!
Now that we have everything ready let’s jump into making our Crispy Chinese Scallion Pancakes (Cong You Bing) together!
Step 1: Crafting Your Dough
The first step in creating these delightful pancakes begins with making our dough—a process filled with anticipation! In a large mixing bowl, add your measured all-purpose flour and slowly pour in that hot water while stirring vigorously with chopsticks or a fork until it begins forming a shaggy mass resembling crumbles rather than cohesive dough at first glance—that’s completely normal! Once it’s cool enough to handle (you don’t want any burns!), transfer it onto a lightly floured surface and start kneading vigorously for 8–10 minutes until you achieve smoothness—it should feel elastic under your fingertips by then! This kneading process helps develop gluten which gives structure when frying later on—it’s essential not to skip this part! After kneading, cover your beautiful creation with a damp cloth (this keeps moisture locked in) and let it rest for about 30 minutes—don’t rush this step; giving gluten time to relax makes rolling out much easier!
Step 2: Divide & Roll
Once you’ve patiently waited thirty minutes—and maybe even enjoyed another cup of coffee—it’s time for some fun! Gently divide your rested dough into four equal portions; don’t stress over perfection here—remember rustic charm is part of their appeal! Flour your surface again lightly before taking one portion at a time; roll it out into an elongated rectangle about ¼-inch thick using gentle pressure so we don’t tear through any layers yet formed inside—it might not look like an exact rectangle initially either—and that’s okay too! The key here is ensuring they’re thin enough so they’ll cook through quickly but still thick enough that they hold together nicely once we add those mouthwatering fillings.
Step 3: Adding Flavors
Now comes one of my favorite parts: adding flavor! Brush generously over each rolled-out rectangle with aromatic sesame oil—you’ll notice how beautifully fragrant this step becomes—as well as sprinkling evenly with salt over its entirety followed by tossing on plenty of finely chopped scallions! Make sure they’re distributed evenly across all edges so every bite bursts forth with fresh green goodness—we want everyone who takes one bite savoring those symphonies of flavors mingling together harmoniously within each layer!
Step 4: Rolling & Coiling
This next moment feels like magic unfolding before our eyes: take hold of one end from the longer side (lengthwise) and begin rolling up tightly like jelly rolls would be done until reaching completion—that snugness ensures none escapes during cooking later on either! Once rolled up completely now gently coil this long tube into spiral shape tucking its end underneath itself carefully while flattening slightly downwards using palms—this creates those flaky layers we adore when biting into finished pancakes later down line—you may even feel pride swell within watching how lovely they’re turning out already!
Stay tuned because next we’ll dive deeper into transforming these spiraled wonders into perfectly fried delights bursting forth with irresistible aromas filling up kitchens everywhere around them…
Step 5: Roll and Coil – The Art of Creating Layers
Now that we’ve got our dough resting, it’s time to unleash our creativity by rolling and coiling. This step is where the magic truly begins! After that well-deserved rest, grab one piece of your dough and lightly flour your work surface to prevent sticking. Gently roll out the dough into a thin rectangle—aim for about 1/8 inch thick. Don’t fret if it’s not perfectly uniform; that rustic charm is what makes homemade food special! The goal here is to create enough surface area for the scallions, which will give us those delightful layers.
Once you have your rectangle, grab your brush and delicately coat the surface with sesame oil. This isn’t just for flavor; it acts as a barrier preventing the filling from making the dough soggy while also adding that nutty aroma that fills your kitchen with warmth. Next, sprinkle an even layer of salt across the rectangle followed by a generous handful of finely chopped scallions. The vibrant green hues are not just visually appealing; they offer a fresh, oniony bite that beautifully complements the crispness of the pancake. Trust me on this—don’t skimp on the scallions! They’re truly the stars of this dish.
After you’ve added your luscious filling, it’s time to roll! Like you’re rolling up a jelly roll, start from one end and gently but firmly roll the dough into a log shape. As you do this, envision how each layer will create that wonderful texture when cooked. Once fully rolled, take this log and coil it into a spiral shape—think of it like tucking in a fluffy blanket. This coiling technique is absolutely paramount because it creates those flaky layers we adore in scallion pancakes! Tuck that end underneath to secure it all together, then gently flatten your coil with your palm. This action helps to bring everything together before we roll it out again.
Step 6: Roll Again – Flattening for Greatness
With our delightful spiral formed, we need to gently roll it out once more into a pancake shape. Place your coiled masterpiece back on the floured surface and using your rolling pin, carefully flatten it to about ¼ inch thickness. This step is crucial because how thick or thin you roll will influence both cooking time and texture. If you’re too heavy-handed here, you risk squeezing out all those lovely scallion bits—but if you’re too gentle, you may end up with an overly thick pancake that won’t cook properly.
As you roll out this pancake, be attentive to how pliable and elastic the dough feels in your hands—this is a sign of well-kneaded dough! If at any point you feel resistance or stickiness, don’t hesitate to dust with extra flour or let the dough rest for another few moments before continuing. Remember, patience here pays off big time! The perfect scallion pancake should be tender yet sturdy enough to hold its shape during frying while allowing those crispy edges to shine through beautifully as they cook.
Step 7: Frying – The Sizzle That Makes It Special
Now comes perhaps my favorite part—the frying process! Heat up about 1 tablespoon of vegetable oil in a skillet over medium heat until it’s shimmering—a sure sign that it’s ready for our pancake. Carefully place your rolled-out pancake into the hot oil and watch as it begins to sizzle in delight! This sound is music to my ears because it signifies transformation; no longer is this just dough—it’s on its way to becoming something utterly intoxicating!
Cook each side for about 2–3 minutes until they turn golden brown and crispy. While cooking, I often use a spatula to press down lightly on the pancake; this technique ensures even browning and enhances crispiness throughout. Pay close attention during these moments; observing how the edges bubble up slightly can be such an exciting sight! You want them perfectly browned—not burnt—so keep an eye on their progress as they fry away. Once you’ve achieved that gorgeous golden color on both sides, you’ll know it’s time to remove them from heat.
Step 8: Final Touches – Slice & Serve with Love
As we approach the grand finale of our Crispy Chinese Scallion Pancakes (Cong You Bing), let those beautiful golden discs cool slightly on a wire rack or plate lined with paper towels—this allows any excess oil to drain off while keeping them crispy without getting soggy underneath. Once they’ve cooled just enough to handle without burning yourself (trust me, I’ve been there!), slice them into wedges or triangles—you can choose whatever shape makes you happiest!
The moment when you take that first bite is nothing short of magical. Pair these pancakes with your favorite dipping sauce; I personally love a simple concoction of soy sauce mixed with a splash of vinegar and chili oil for that perfect balance of salty, tangy goodness with just enough heat to awaken those taste buds! Each bite delivers an explosion of flavor—a crunchy exterior giving way to soft layers infused with fresh scallions has always filled my heart with joy.
Remember this: cooking is as much about sharing as it is about creating delicious food. So gather around friends or family and enjoy these delightful treats together; there’s something profoundly satisfying about breaking bread over warm pancakes fresh off the stove. Whether you’re serving these as an appetizer or enjoying them as an afternoon snack paired with tea, I promise you—they’ll leave everyone smiling and asking for more!
Conclusion:
As we come to the end of our culinary journey through these Crispy Chinese Scallion Pancakes (Cong You Bing), I want to thank you for sharing this experience with me! There’s something profoundly satisfying about rolling out dough and watching it transform into golden, flaky layers filled with scallions’ invigorating aroma. It’s this alchemy—the mingling of simple ingredients—that truly elevates these pancakes beyond mere food into an expression of love and creativity shared around the table.
Now more than ever, I believe that cooking should be filled with joy—and there’s no greater joy than making something delicious from scratch that brings people together. These pancakes are not only versatile but also incredibly accessible; whether it’s a casual weeknight dinner or part of an elaborate feast, they shine like stars on any table! Picture yourself pulling these crispy delights from the pan, their steam wafting through the air as your friends gather around eagerly—these are moments worth cherishing.
Imagine savoring one alongside a steaming bowl of homemade soup or perhaps dipping it into a zesty soy sauce mixture enriched with chili oil for that perfect kick! For an afternoon pick-me-up, try pairing them with a refreshing cucumber salad or even some pickled vegetables—they contrast beautifully against those rich flavors. And don’t forget how wonderful they’d be served as part of an elaborate spread at your next get-together or family gathering; everyone will be clamoring for seconds!
Feeling adventurous? This recipe is wonderfully adaptable! Try adding different herbs like cilantro or even minced garlic into your filling for an extra punch—or experiment with spices such as five-spice powder or cumin for an unexpected twist. The beauty of cooking lies in its flexibility; let your imagination take flight as you create variations that reflect your tastes and preferences! I encourage you to roll up your sleeves and give this recipe a go—share it with loved ones and let me know how it turns out! Your kitchen is about to become a haven of flavor and warmth.
Crispy Chinese Scallion Pancakes (Cong You Bing)
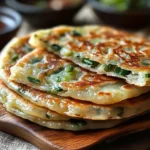
Crispy Chinese Scallion Pancakes (Cong You Bing) are a delightful fusion of texture and flavor that evokes the warmth of home-cooked meals. These golden-brown treats feature flaky layers filled with vibrant green scallions, making them an irresistible snack or appetizer perfect for any occasion. The process of crafting these pancakes—from mixing the dough to frying them to crispy perfection—is a joyful culinary journey that invites you to connect with tradition and family. Whether served alongside a flavorful dipping sauce or as part of a larger feast, these scallion pancakes promise comfort and satisfaction in every bite.
- Prep Time: 30 minutes
- Cook Time: 20 minutes
- Total Time: 50 minutes
- Yield: Makes approximately 8 servings 1x
- Category: Appetizer
- Method: Frying
- Cuisine: Chinese
Ingredients
- 2 ½ cups all-purpose flour
- ¾ cup hot water
- 4 tablespoons vegetable oil (divided)
- 1 teaspoon salt
- 1 ½ cups finely chopped scallions (green parts only)
- Sesame oil for brushing
- Extra flour for rolling out the dough
Instructions
- In a mixing bowl, combine all-purpose flour and hot water, stirring until crumbly. Knead on a floured surface for 8-10 minutes until smooth. Cover and let rest for 30 minutes.
- Divide the dough into four portions. Roll each into a rectangle about ¼ inch thick, brushing with sesame oil and sprinkling with salt and scallions.
- Roll tightly into a log, coil it into a spiral, then flatten slightly. Roll out again to about ¼ inch thick.
- Heat vegetable oil in a skillet over medium heat. Fry each pancake for 2-3 minutes per side until golden brown and crispy.
- Drain on paper towels, slice into wedges, and serve warm with your favorite dipping sauce.
Nutrition
- Serving Size: 1 pancake (70g)
- Calories: 180
- Sugar: 0g
- Sodium: 220mg
- Fat: 8g
- Saturated Fat: 1g
- Unsaturated Fat: 6g
- Trans Fat: 0g
- Carbohydrates: 25g
- Fiber: 1g
- Protein: 4g
- Cholesterol: 0mg