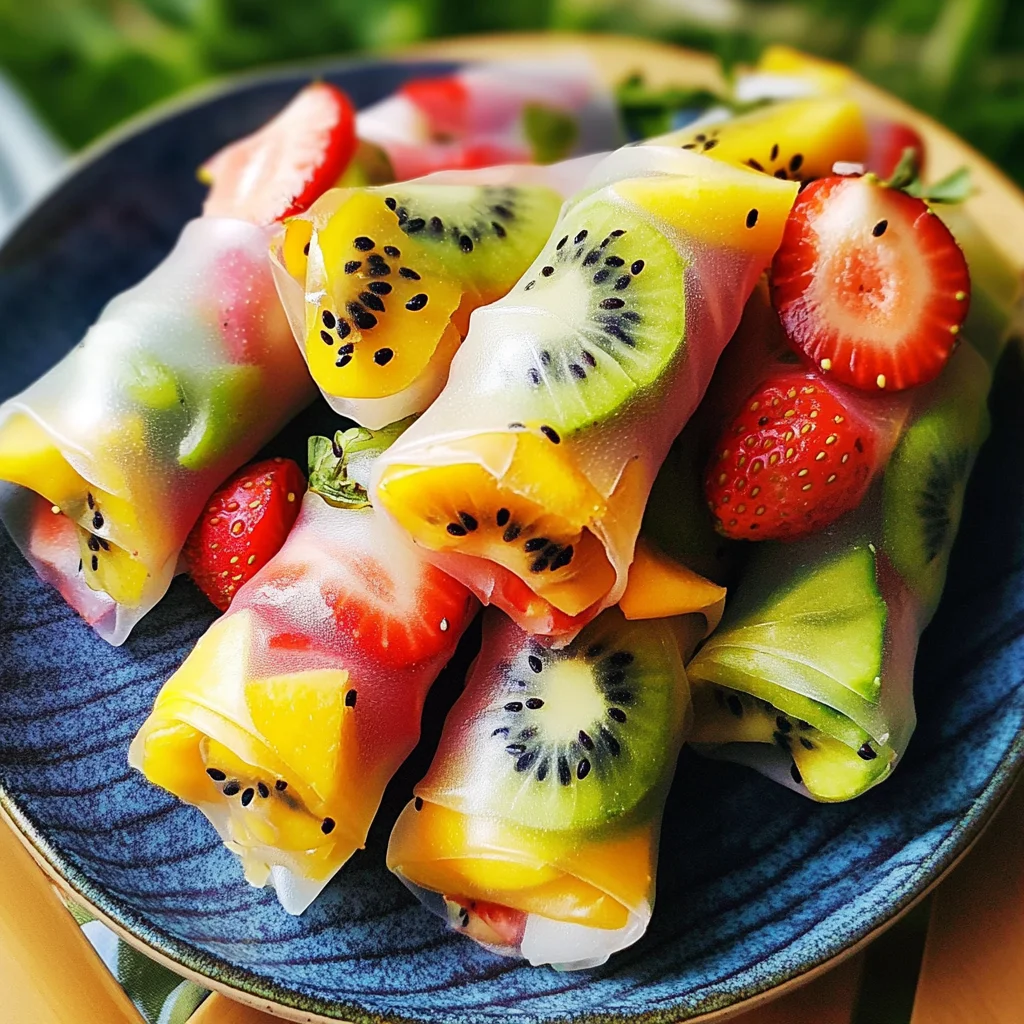
Fruit Spring Rolls – Kids Party Favorite!
There’s something truly magical about the way food brings people together, isn’t there? It’s not just about nourishment; it’s about memories, laughter, and love. As I sit down to share this recipe for Fruit Spring Rolls – Kids Party Favorite!, I can’t help but reminisce about the vibrant colors and joyful chaos of parties filled with giggles and sticky fingers reaching for something delicious. These rolls are not only a feast for the eyes but also a playful invitation to creativity in the kitchen. Imagine a beautiful array of fresh fruits wrapped in delicate rice paper, each bite bursting with sweetness – it’s like a celebration of nature’s candy! Trust me when I say that these delightful treats will be the star of any gathering, captivating kids (and adults!) alike.
What makes these Fruit Spring Rolls so special is their simplicity combined with the joyous experience they create. There’s no cooking involved, which means kids can roll up their sleeves and dive right into assembly. It’s an activity that sparks imagination—each person can mix and match their favorite fruits, creating a personalized roll that reflects their own taste preferences. The combination of textures—the crispness of the wrappers juxtaposed with the juiciness of the fruits—transforms each bite into a moment of pure bliss. And best of all? They’re healthy! So you can feel good about serving them at your next party. Let’s embark on this culinary journey together!
Fruit Spring Rolls – Kids Party Favorite!: A Colorful Adventure in Every Bite
Welcome to a world where snacks become an adventure! This recipe for Fruit Spring Rolls will not only delight your taste buds but will also make your little ones feel like culinary artists in their own right. With vibrant colors and fresh flavors, these rolls are perfect for parties or just as a fun afternoon project at home. Plus, they’re incredibly versatile—feel free to get creative with whatever fruits you have on hand!
Ingredients:
As we gather our ingredients, let’s take a moment to appreciate what each one brings to this delightful dish. Cooking is all about understanding how every element plays its part, and I promise you’ll find joy in these choices.
- 15 Rice Paper Wrappers: These delicate sheets are the cornerstone of our spring rolls. Made from rice flour and water, they become pliable when soaked in warm water, allowing us to wrap our fruity treasures tightly without fear of breaking apart. When selecting rice paper wrappers, look for those that are translucent yet sturdy—they should feel slightly firm but flexible enough to bend easily without tearing. If you want to add some extra flair, consider using colored rice papers available at specialty stores!
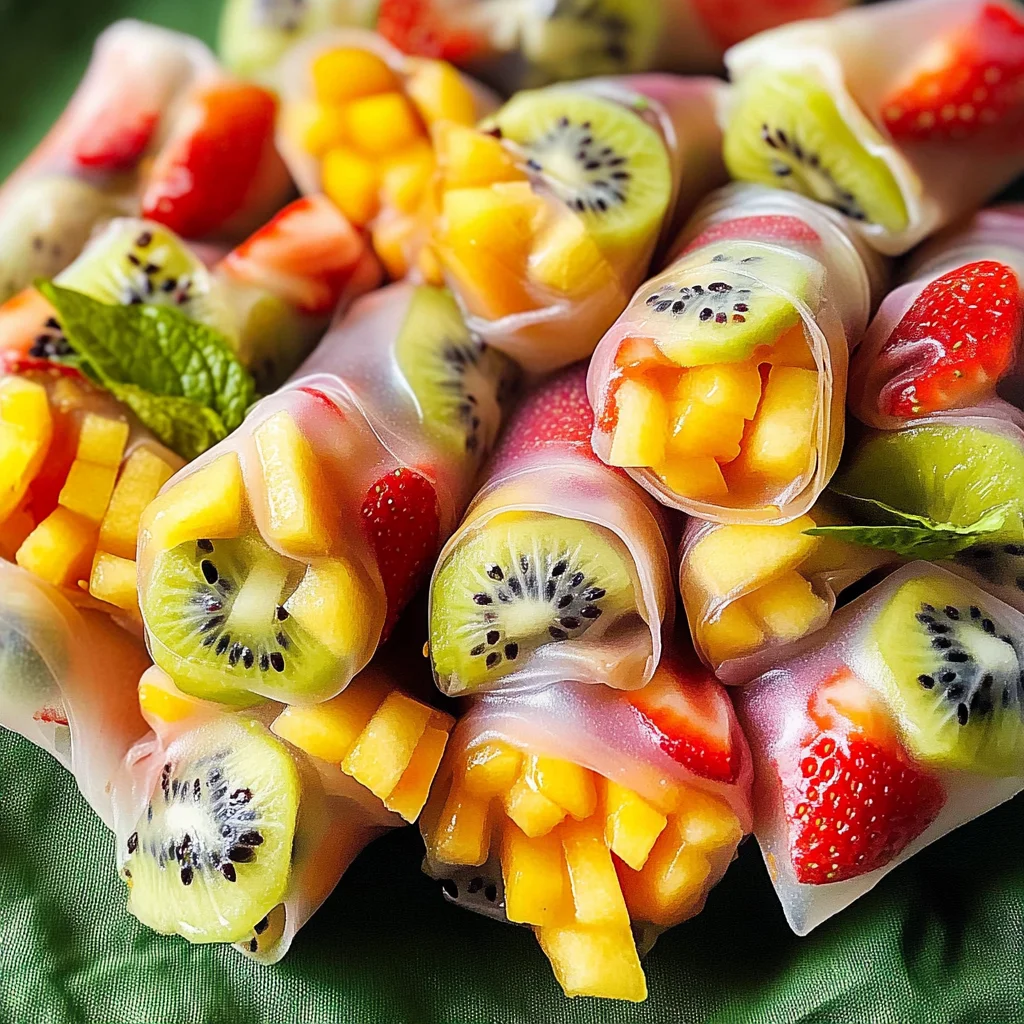
- 5 Cups of Fruits Cut into Matchsticks: Here’s where the magic begins! Choose any variety of fruits your little ones love; think apples, mangoes, cucumbers (yes, they’re technically a fruit!), bell peppers for crunch, or even kiwi for an unexpected twist. When cutting them into matchsticks—a technique where you slice them into thin strips—you enhance both texture and visual appeal. This cut allows children to grab just the right amount while enjoying every flavor explosion.
- 5 Strawberries Cut into Slices: Strawberries are not only delicious but also visually stunning when layered inside our translucent wrappers! Their bright red hue creates a gorgeous contrast against other fruits while adding that sweet-tart flavor we all adore. When slicing strawberries, aim for uniform thickness—about 1/4 inch—to ensure they fit perfectly within the wrapper without overwhelming it.
- 1/3 Cup Hot Water: This seemingly simple ingredient is non-negotiable! The hot water is crucial as it softens our rice paper wrappers quickly and effectively—think of it as giving them a warm bath before they embrace their fruity fillings! Use caution when pouring; keep it shallow enough so you don’t splash hot water everywhere—it can be quite slippery!
Equipment You’ll Need:
Before diving into our fun assembly process, having the right tools can make all the difference! Each piece is like an essential partner in this culinary dance.
- Shallow Plate: This will be your soaking station for the rice paper wrappers. A wide shallow plate allows ample space for each wrapper to float comfortably in hot water without overlapping too much—this is key to achieving perfect pliability!
- Cutting Board: A sturdy cutting board provides a safe surface for slicing fruits without risking any accidents (ouch!). Plus, it gives ample space for your little chefs to move around freely while prepping their ingredients.
- Sharp Knife: A sharp chef’s knife makes cutting through juicy strawberries or crisp apples effortless! Not only does it reduce preparation time but ensures clean cuts which present beautifully in your spring rolls.
- Plate or Serving Platter: Once assembled, you’ll want something lovely to display your colorful creations! A platter helps showcase these masterpieces beautifully; after all, we eat with our eyes first!
Preparing the Fruit Spring Rolls – Kids Party Favorite!
Step 1: Slice Your Strawberries with Care
Start by gently slicing those beautiful strawberries into thin rounds or half-moons—whichever shape excites your little chefs most! This process is crucial because it sets up the foundation for your rolls; remember that presentation matters when enticing picky eaters. The vibrant red color will peek through our transparent wrappers later on—like jewels embedded within treasure chests! Allowing kids to participate here not only teaches them knife skills but also fosters confidence as they create something visually stunning.
Step 2: Transform Fruits into Matchsticks
Next up is turning those chosen fruits into matchsticks! Have your kids cut them into long strips approximately six inches long; this length ensures easy wrapping later on while providing ample size for satisfying bites. If you’re working with firmer fruits like apples or carrots (yes!), consider showing them how to cut safely by ensuring fingers are tucked away from blades—the last thing anyone wants is an ouchie during snack prep! As they chop away happily alongside you, take this opportunity to chat about textures and flavors; perhaps ask questions like “Which fruit do you think will taste best together?”
Step 3: Soak Your Rice Paper Wrapper
Now comes one of my favorite steps—the soaking part! Carefully pour hot water onto your shallow plate until it’s just deep enough to immerse one rice paper wrapper comfortably without splashing everywhere (because who wants hot water on their hands?!). Place one wrapper gently onto its surface and allow it to soak for about ten seconds—keep an eye on it as it’ll transform from stiff and crunchy into soft magic before your eyes! This step is critical because if you leave it too long or don’t fully submerge it properly before use—it may tear during assembly—which can lead us down a frustrating path nobody wants!
Step 4: Assemble Your Flavorful Creations
Once softened adequately—and feeling delightfully pliable—place that wrapper onto a clean plate or cutting board (we don’t want any slipping!). In its center area (not too close towards edges!), layer several slices of strawberry first since they’ll show through beautifully once rolled up followed by those delightful matchstick fruits stacked atop each other like building blocks waiting patiently until we wrap them snugly inside! Don’t rush this step; it’s where individual preferences shine—encourage children to experiment with different combinations until they find flavors that resonate with them personally.
This initial phase lays groundwork towards creating something truly extraordinary; trust me when I say that seeing children engage their imaginations while creating delicious snacks has profound effects far beyond just food—it cultivates lasting memories and joyous moments shared over laughter-filled gatherings around tables adorned with colorful platters brimming full…stay tuned because we’re just getting started on this tasty adventure together!
The Grand Reveal: Serving Your Exquisite Fruit Spring Rolls
Step 9: Dipping Delights & Presentation Magic
Finally, as we approach serving these lovely creations at your gathering, let’s talk about presentation and dipping sauces—the finishing touches that elevate these Fruit Spring Rolls from delightful snacks to show-stopping party favorites! Consider preparing an easy dipping sauce like honey (or agave syrup) mixed with lime juice for a zesty kick or even coconut yogurt drizzled over them for an extra creamy element. Each dip adds another layer of flavor while complementing those fresh fruity notes beautifully.
When arranging your rolls on a platter, think color coordination—try placing different varieties together so guests can see all those stunning hues at once! And don’t forget garnishes! A sprinkle of toasted sesame seeds or some fresh mint leaves can add visual appeal and freshness right before serving. Encourage everyone to dive right in; watching kids’ faces light up as they take their first bites is truly one of life’s greatest joys.
So there you have it—the complete guide to making Fruit Spring Rolls – Kids Party Favorite! Not only are these delightful rolls easy enough for children to help prepare but they’re also healthy snacks packed with nutrients—all while being incredibly fun and visually captivating! I cannot wait for you and yours to experience this wholesome recipe together; trust me when I say they will quickly become an unforgettable staple at your celebrations! Enjoy every moment spent creating (and devouring!) these sweet treats together!
Storage and Enjoyment Tips for Your Fruit Spring Rolls – Kids Party Favorite!
Now that your Fruit Spring Rolls are beautifully crafted and ready to shine at the party, let’s talk about how to store any leftovers – if there are any! These delightful rolls are not only a hit with kids but are also fantastic for snacking throughout the week. If you do happen to have some rolls remaining after the festivities (which I must say is quite rare!), you can preserve their freshness with a few simple steps. Just place them in an airtight container lined with parchment paper to prevent sticking. This little trick will keep them moist without making them soggy. Store them in the refrigerator, where they’ll stay fresh for up to 2 days. Just remember, the longer they sit, the softer they may become, slightly altering their delightful crunch. If you find yourself with leftovers, simply serve them cold straight from the fridge for a refreshing snack or dip them in a sweet sauce for an extra burst of flavor!
Storing Leftover Fruit Spring Rolls – Kids Party Favorite!
When it comes to storing your leftover Fruit Spring Rolls, choosing the right container is absolutely paramount. You’ll want to use an airtight container that seals well; this helps maintain that lovely texture we all adore while preventing any unwanted air from sneaking in. I recommend placing a piece of parchment paper between layers if you’re stacking multiple rolls—this will help avoid any sticking and keep each roll intact. Stored correctly in the fridge, these beauties can last up to two days, but trust me when I say they taste best fresh! If you find yourself reaching for those rolls after a day or so, don’t fret; although they might lose some of their initial crispness, they still deliver that sweet explosion of fruit flavors that’ll make your taste buds dance! When you’re ready to indulge again, just grab one and enjoy it as is—no reheating necessary—because these fruit spring rolls are perfect served cold.
Freezing Components for Later
If you want to take your meal prep game up a notch with these scrumptious Fruit Spring Rolls, consider freezing some components for later use! Freezing sliced fruits is a brilliant option—just make sure to lay them out on a baking sheet lined with parchment paper before placing them in the freezer. This prevents clumping and ensures that each piece remains separate. Once frozen solid, transfer them into an airtight freezer bag or container. They can keep well in the freezer for about three months! Whenever you’re ready for another round of those delectable spring rolls, just pull out your frozen fruits and let them thaw at room temperature before assembling your rolls. The convenience factor here is truly exciting; you can whip up a fresh batch anytime without having to worry about shopping for ingredients last minute!
Fruit Spring Rolls – Kids Party Favorite!
Delightful Fruit Spring Rolls – Kids Party Favorite! Easy to make & fun for kids! Try this recipe today & watch smiles bloom at your next gathering.
- Prep Time: 20 minutes
- Cook Time: 0 minutes
- Total Time: 20 minutes
- Yield: Approximately 15 servings 1x
- Category: Dessert
- Method: No-cook
- Cuisine: Asian
Ingredients
- 15 Rice Paper Wrappers
- 5 Cups of assorted fruits (e.g., apples, mangoes, cucumbers, kiwis)
- 5 Strawberries
- 1/3 Cup hot water
Instructions
- Slice strawberries into thin rounds.
- Cut chosen fruits into matchsticks.
- Soak one rice paper wrapper in hot water for about 10 seconds until pliable.
- Lay the wrapper on a clean surface and place strawberry slices in the center, followed by the matchstick fruits.
- Fold one corner over the fruit, tuck in both sides, then roll tightly to seal.
- Repeat with remaining wrappers and fillings.
Nutrition
- Serving Size: 1 spring roll (45g)
- Calories: 60
- Sugar: 7g
- Sodium: 5mg
- Fat: 0g
- Saturated Fat: 0g
- Unsaturated Fat: 0g
- Trans Fat: 0g
- Carbohydrates: 14g
- Fiber: 1g
- Protein: 1g
- Cholesterol: 0mg