Ina Garten’s Perfect Peach Pie
There’s something utterly enchanting about a warm slice of peach pie, especially when it’s made with fresh, sun-ripened peaches that taste like summer itself. Ina Garten’s Perfect Peach Pie is more than just a dessert; it’s an experience that transports you to sun-soaked orchards, where the air is fragrant with the sweet scent of ripe fruit. As the buttery crust cradles the juicy, golden filling, every bite becomes a symphony of flavors that sings of nostalgia and comfort. This recipe captures not only the essence of ripe peaches but also the love and care that goes into creating a dish meant for sharing. I promise you, this pie will evoke memories of family gatherings and lazy summer afternoons spent on the porch, savoring each moment.
What I absolutely adore about this peach pie is how it embodies both simplicity and sophistication. It uses just a handful of ingredients to create something truly extraordinary. The combination of freshly squeezed orange juice and zest elevates the filling, adding a bright citrus note that complements the sweetness of the peaches in a way that’s simply divine. So whether you’re baking for a special occasion or just because it’s Tuesday, this pie is perfect for any time you want to celebrate life’s delicious moments. Trust me—once you make this pie, it will become your go-to summer treat!
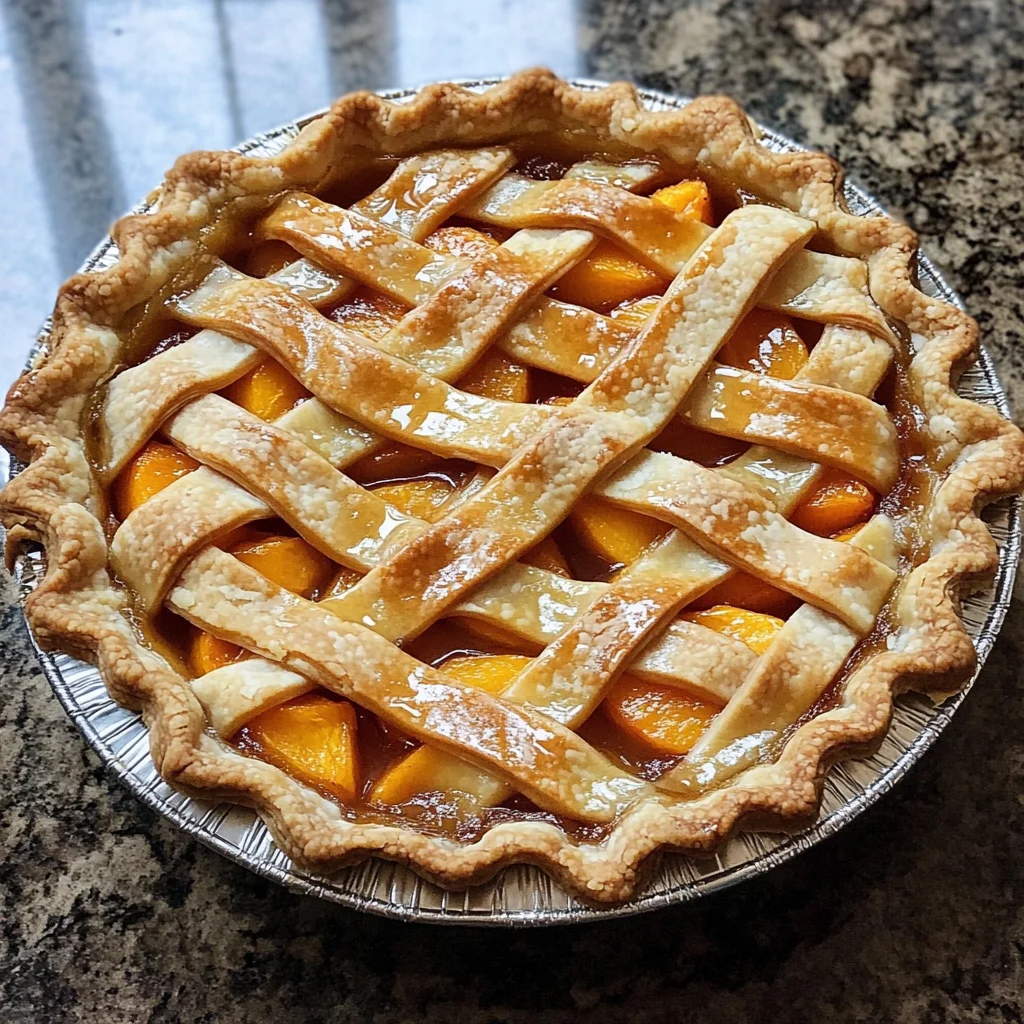
Ina Garten’s Perfect Peach Pie: A Slice of Summer Bliss
This delightful recipe is one I’ve cherished over the years, and I’m thrilled to share it with you! With its flaky crust and succulent peach filling, Ina Garten’s Perfect Peach Pie is pure bliss on a plate. The beauty of this pie lies not only in its taste but also in its ability to bring people together around the table. Let’s embark on this culinary journey together as we explore each ingredient and technique that makes this pie so special.
Ingredients:
As we dive into making this gorgeous peach pie, let’s take a moment to appreciate each ingredient we’ll be using. Each one plays an essential role in crafting that perfect balance of flavor and texture that you’ll fall in love with.
- 2 1/2 lb. ripe peaches (6-7 large peaches, peeled). The star of our show! When selecting peaches, look for those that are fragrant and slightly soft to the touch—this means they’re perfectly ripe and bursting with flavor. Fresh summer peaches provide natural sweetness and juiciness that no canned alternative can replicate. If you happen to find yourself without ripe peaches, nectarines can be a delightful substitute; they offer similar flavor profiles but with a firmer texture.
- 1/2 cup sugar, plus extra for sprinkling on lattice. Sugar does more than just sweeten—it also helps balance acidity and enhances the overall flavor profile of our peach filling. When sprinkled on top before baking, it caramelizes beautifully and gives our lattice crust a lovely golden finish that’s as pleasing to the eyes as it is to the palate. If you’re looking for alternatives, feel free to use coconut sugar or even honey; just remember that these may alter the final flavor slightly.
- 2 tbsp. cornstarch. This ingredient acts as our thickening agent—it’s what transforms our juicy filling into something sliceable instead of soup-like! Cornstarch works by absorbing moisture during baking while maintaining clarity in appearance compared to flour; it’s particularly wonderful here because we want all those beautiful peach juices to shine through without clouding them up.
- 1/2 tsp. grated orange zest. The zest from an orange adds an incredible aromatic component that brightens up our filling—think of it as sunshine captured in tiny flecks! When grating your orange zest, avoid grating too deep; we only want the colorful outer layer since that’s where all the essential oils reside—this adds vibrant flavor without bitterness.
- 1/4 cup freshly squeezed orange juice. Freshly squeezed juice amplifies that citrusy brightness while keeping our filling moist without being overly sugary or syrupy—plus it pairs so well with peaches! Use organic oranges if possible; their flavors tend to be more robust and natural-tasting compared to conventional ones.
- 1 tbsp. unsalted butter. A little bit of butter goes a long way in adding richness to our pie filling! As it melts during baking, it infuses everything with creamy goodness while helping bind flavors together harmoniously—it’s like having your own secret ingredient that elevates every bite!
- All-purpose flour. We’ll need this for both our crust and thickening up our filling slightly; flour provides structure while allowing some tenderness within our final product—too much flour can lead to dryness though! Opt for unbleached all-purpose flour whenever possible; its natural qualities yield better results.
- 1 recipe of double-crust pie crust (Perfect Pie Crust recipe follows). A great crust is fundamental—it acts as a vessel holding all those delicious juices while providing contrast with its flaky texture against tender filling! Homemade always wins here; store-bought just doesn’t have that homemade charm we crave!
- 1 egg beaten with 1 tablespoon water for egg wash. This simple mixture creates an appealing glossy finish on top once baked—it seals everything beautifully while promoting browning which enhances visual appeal significantly!
For the Pie Crust:
– 12 tbsp. very cold butter. Cold butter is non-negotiable here! It keeps our dough flaky rather than greasy since we want distinct layers formed during baking which create tantalizing textures—the colder your butter stays throughout mixing ensures success!
- 3 cups all-purpose flour. Just like before: quality counts! Good flour helps achieve desirable crumb structures within pies making them light yet sturdy enough not collapse under pressure from fillings.
- 1 tsp kosher salt. Salt may seem insignificant at first glance but trust me—it amplifies flavors across dishes including pies! It also balances sweetness ensuring nothing tastes overly sugary.
- 1 tbsp sugar. Again sugar serves two purposes: sweetening AND tenderness enhancement—just enough added here optimizes overall flavor experience!
- 1/3 cup very cold vegetable shortening . A touch of shortening creates tenderness while maintaining structural integrity within crusts due its high-fat content which resists melting before baking begins!
- 1/2 cup ice water . Ice water helps bring everything together without warming up fats prematurely—which could ruin flakiness needed later down road when rolling out dough properly!
Now that we’ve gathered these fantastic ingredients together let’s turn them into something magical!
Equipment You’ll Need:
Before we leap into action creating this masterpiece, let’s take stock of some essential tools you’ll need along the way—a well-equipped kitchen makes all endeavors smoother and enjoyable!
- Food processor: This tool becomes your best friend when making pie crusts! It allows for quick incorporation of butter into flour without melting any fat prematurely—perfectly blending until pea-sized pieces form ensures maximum flakiness later on!
- Rolling pin: A good-quality rolling pin is key for evenly rolling out your dough without tearing or sticking too much during transfer process onto pie pan; consider opting for one made from hardwood rather than plastic models which might lack proper weight behind them.
- 9 or 10-inch pie pan: While most pans will work fine here—a glass or ceramic option allows easy monitoring during baking process ensuring optimal results each time thanks primarily due visibility aspect involved!
- Sharp knife: A sharp knife makes cutting excess dough easy-peasy while also being essential tool used throughout peeling slicing bits needed prior assembly stage later down road!
Now we’re equipped with both ingredients AND tools necessary—it’s time roll up those sleeves get started preparing Ina Garten’s Perfect Peach Pie!
Step 1: Crafting Your Perfect Pie Crust
To kick things off gracefully let’s begin by whipping up that legendary double-crust pie crust which forms foundation beneath luscious peach filling waiting patiently ahead us! Start by dicing your very cold butter into small cubes (think about half-inch size) then promptly return them back inside refrigerator until ready use—as they must stay chilled until mixed properly ensuring flakiness persists throughout entire process ahead us! Meanwhile grab food processor insert flour alongside salt sugar pulse few times just combine those dry elements together nicely before introducing chilled diced cube butter shortening right next door inside mixing bowl ready action too…
Step 2: Blending Everything Together
Now here’s where magic happens folks—turn on food processor allow culinary machine do all work mixing effortlessly until mixture resembles coarse crumbs resembling pea-sized bits around edges ideally—a sign everything blended correctly here folks! Once achieved feel free drizzle ice-cold water mixture gradually pouring while keeping food processor running gently until cohesive dough ball forms itself perfectly shaped—that should take roughly thirty seconds max if executed correctly…
Step 3: Resting Time Is Key!
After combining well enough you’ll want dump entire mixture onto lightly floured surface gently shaping into round ball without kneading excessively (we don’t want tough crust!). Wrap tightly using plastic wrap refrigerate approximately thirty minutes minimum—or longer if desired but keep eye out since prolonged chilling could render dough too firm roll out smoothly later…
Step 4: Rolling Out Dough
Once chilled sufficiently remove carefully from fridge place back onto floured counter surface ready roll away—you’ll cut dough evenly halving ball shaped previously created earlier then proceed rolling one half outwardwards gently working from center towards edges expanding circle larger than interested size pan (nine ten inches)—aiming thinness around eighth inch thickness generally preferred here…
Let’s continue weaving this delightful story forward as we bring Ina Garten’s Perfect Peach Pie closer toward fruition by diving deeper into preparation steps ahead…
Ina Garten’s Perfect Peach Pie: A Slice of Summer
Ah, the allure of summer peaches! There’s something truly magical about biting into a perfectly ripe peach; its sweet juice drips down your chin while the sun warms your skin. I’ve always been captivated by how a simple fruit can transform into something utterly extraordinary when nestled within a flaky pie crust. Today, my friends, we’re embarking on a delightful journey to create Ina Garten’s Perfect Peach Pie, where fresh peaches meet a homemade pie crust in a symphony of flavors that will surely become a cherished addition to your dessert repertoire.
Step 5: Prepping for Pie Perfection
Now that you have your pie crust chilling comfortably in the refrigerator, it’s time to turn our attention to what truly makes this pie sing: the filling. Preheat your oven to 400 degrees Fahrenheit because we want it hot and ready to welcome our luscious creation. While that’s happening, grab that sheet pan and line it with parchment paper; this is not just for easy cleanup but also prevents any potential bubbling over from ruining your oven’s interior. Trust me, you’ll thank yourself later when you’re not scrubbing burnt bits off the bottom!
Next comes the fun part—peeling and slicing those beautiful peaches! Start by boiling a pot of water and carefully slip in your peaches for about 15 seconds up to 2 minutes, depending on their ripeness. This simple technique, known as blanching, allows the skins to slip off effortlessly. Plunge them immediately into an ice bath afterward; this stops the cooking process and keeps those gorgeous peaches vibrant. Once peeled, slice all but one peach into thick wedges and set them aside in a large mixing bowl. The remaining peach should be chopped into small pieces—this adds texture and sweetness throughout the filling.
Step 6: Crafting the Peach Filling
With your luscious peach slices awaiting their moment in the spotlight, it’s time to make the syrup that will bind them together in harmony. In a small saucepan over medium heat, whisk together the 1/2 cup of sugar, 2 tablespoons of cornstarch, grated orange zest, freshly squeezed orange juice, and 1 tablespoon of unsalted butter until combined. This mixture is crucial as it creates a lovely syrup that envelops the peaches in sweetness and helps thicken them during baking.
As you bring this delightful concoction to a boil, keep an eye on it—this is where patience comes into play! You want to stir occasionally until it thickens slightly; this usually takes about 3 to 4 minutes. Once boiling, add in your previously chopped peach pieces; they’ll infuse that syrup with even more flavor while softening just enough without turning mushy! Lower the heat and let everything simmer for another few minutes until you achieve that perfect syrupy consistency—you’re looking for something that lightly clings to your spoon but isn’t overly thick or gloopy.
Step 7: Marrying Peaches with Syrup
Now comes an essential step that many might overlook but I promise you—it’s absolutely paramount! Take that beautifully thickened syrup from your saucepan and pour it over your sliced peaches in the mixing bowl. Gently toss everything together with care; we want each slice coated yet intact—a gentle embrace rather than an overwhelming hug! At this point, sprinkle in 1-2 tablespoons of all-purpose flour as well. This will help absorb any excess liquid released by those juicy peaches during baking, ensuring we avoid a soggy bottom crust.
I know it might be tempting to skip this step or rush through it because you’re excited—I’ve been there too—but trust me on this! Allowing those flavors to meld for just a few moments before pouring them into your pie crust elevates this dish from good to great. Take a moment here—the aroma wafting through your kitchen is nothing short of intoxicating!
Step 8: Filling Your Crust with Love
With our filling now harmoniously blended, it’s time for one of my favorite parts—pouring it into our prepared pie crust! First things first: retrieve that chilled bottom crust from the fridge where it’s been patiently waiting for its turn at glory. Carefully pour all those beautiful peach slices along with their syrupy goodness into the crust; use a spatula if needed to scrape every last drop out of that bowl—let’s not waste any flavor here!
Before we cover our creation with that lovely lattice top, take a moment to brush some of the egg wash around the edges of your bottom crust using just enough so it gets sticky but not soggy—that way our top can adhere wonderfully when we weave them together later. Now’s also when you can admire how stunningly vibrant those peaches look against the buttery golden hue of your crust; isn’t food just spectacular?
Next Major Phase: Weaving Your Lattice Top
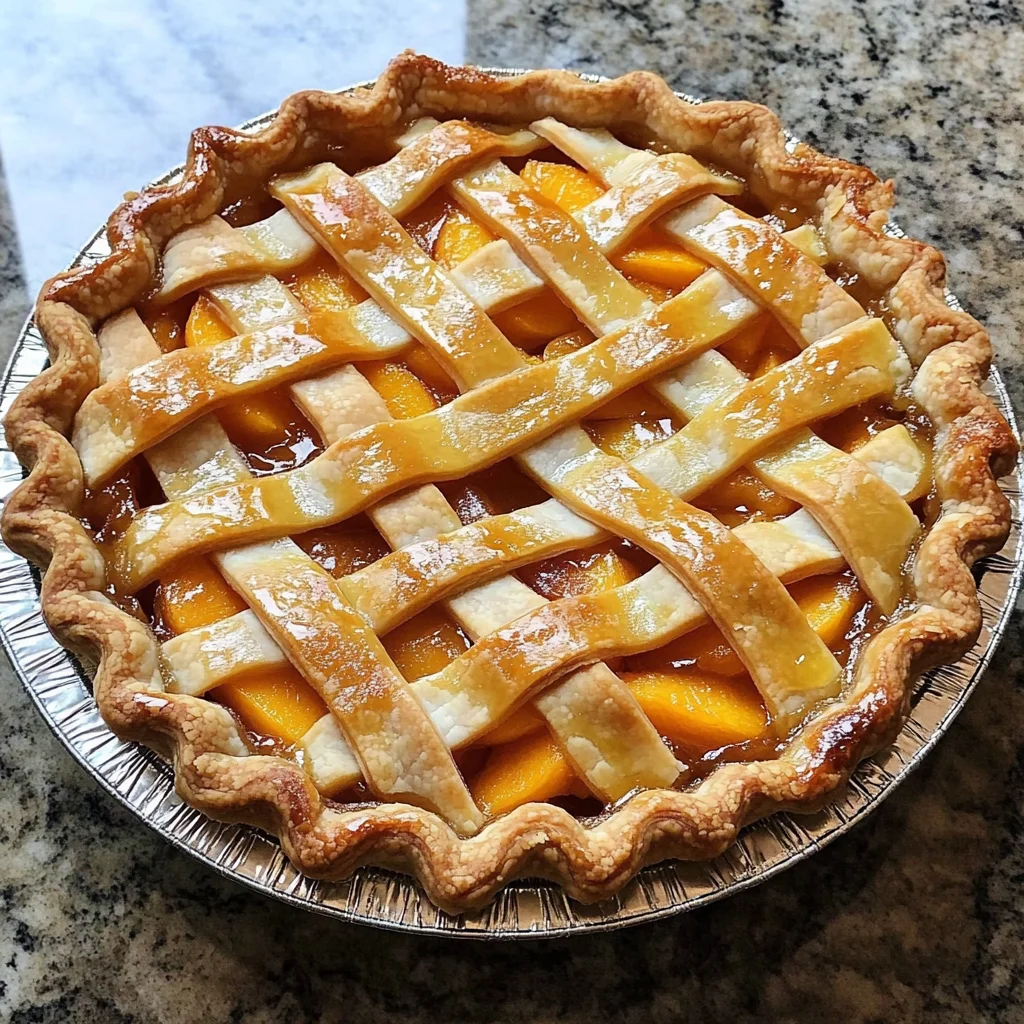
The anticipation is palpable as we prepare to crown our pie with its signature lattice crust! Retrieve that second half of dough from refrigeration—it should feel firm yet pliable at this point—and roll it out again into a circle larger than your pie dish. When cutting strips for weaving (about 1 inch wide), remember there’s no right or wrong way here—each design tells its own story! Lay out half of these strips vertically across the filling first.
Then comes my favorite part—the weaving! To do this gracefully requires both patience and practice; lift every other vertical strip up away from the filling and lay one horizontal strip down across before folding those strips back down over it again. Repeat until you’ve created an intricate lattice pattern across the top—it may seem daunting at first, but I promise you’ll find rhythm as you go along!
Step 9: The Finishing Touches
Before sliding our masterpiece into the oven, let’s give it some love! Brush that egg wash generously over every nook and cranny of your lattice work—it creates an alluring golden sheen while baking that’s just irresistible! Don’t forget to sprinkle some sugar on top because who doesn’t love that extra touch of sweetness? It’ll caramelize beautifully during baking.
Once everything looks picture-perfect (and oh-so-delicious), place your pie onto that prepared sheet pan as we discussed earlier—it’ll catch any drips and save us time cleaning later on! Bake in your preheated oven for about 45 minutes, keeping an eye on how beautifully golden brown it’s becoming—turning halfway through ensures even cooking throughout. If at any point those edges start browning too quickly, don’t hesitate to cover them with foil—a little precaution goes a long way!
As you remove this beauty from the oven after its time has come—you’ll be greeted by an utterly intoxicating aroma wafting through every corner of your home—let it cool slightly before serving so all those flavors settle beautifully together like old friends reuniting after years apart.
This pie is best enjoyed warm or at room temperature; each slice reveals tender peach slices enveloped in warm syrup beneath crisp pastry layers—it’s truly comfort food at its finest! So gather around friends and family because nothing brings people together quite like sharing slices of homemade goodness.
Enjoy every bite knowing you’ve created something genuinely special with love poured into each step along this delightful culinary adventure! 🍑🥧
Storage and Enjoyment Tips for Your Ina Garten’s Perfect Peach Pie
Now that your kitchen is filled with the intoxicating aroma of baked peaches and buttery crust, it’s time to dig into this gorgeous creation! Trust me, every slice of Ina Garten’s Perfect Peach Pie is a celebration of summer and nostalgia, but what happens when you have leftovers? Fear not! This pie is just as delightful the next day, if you can resist the temptation to devour it all in one sitting.
Storing Leftover Ina Garten’s Perfect Peach Pie
To keep your pie at its freshest, I recommend using an airtight container or covering it tightly with plastic wrap. It’s best to store your pie in the refrigerator where it will stay delicious for about 3 to 4 days. Now, here’s a little pro tip: if you want to maintain that perfect crust texture, place a slice of bread in the container with your pie. This non-negotiable trick helps to absorb moisture and prevents the crust from becoming soggy. After a day or two, you might find that the flavors meld beautifully—those sweet peaches soaking into every nook and cranny of that flaky crust creates a profoundly satisfying experience. When you’re ready to enjoy another slice, simply pop it into the oven at 350°F for about 10 minutes to warm up and get that crust nice and crispy again. I promise you; every bite will remind you of warm summer afternoons!
Freezing Components for Later
If you find yourself overwhelmed by deliciousness or want to save some for a rainy day, freezing is an excellent option! For best results, freeze either the baked pie or the unbaked assembled pie before baking. Wrap it tightly in plastic wrap and then aluminum foil to protect it from freezer burn—this method ensures maximum flavor preservation. You can keep your peach pie frozen for up to three months! When you’re ready to indulge again, simply thaw it overnight in the refrigerator if it’s already baked or pop the unbaked version directly into a preheated oven (no need for thawing!). This is such a convenient way to have dessert on hand without any fuss—imagine pulling out a homemade peach pie on a chilly evening; it truly feels like a warm hug from summer!
Ina Garten’s Perfect Peach Pie

Indulge in the warm, comforting flavors of Ina Garten’s Perfect Peach Pie, a delightful treat that captures the essence of summer in every bite. This homemade peach pie features fresh, sun-ripened peaches enveloped in a flaky crust, perfectly balanced with bright notes from orange juice and zest. With just a handful of ingredients, this recipe transforms into a nostalgic dessert that will evoke memories of sunny afternoons spent with loved ones. Whether celebrating a special occasion or simply enjoying a Tuesday treat, this peach pie is sure to become your go-to recipe for summer gatherings.
- Prep Time: 30 minutes
- Cook Time: 45 minutes
- Total Time: 1 hour 15 minutes
- Yield: Serves approximately 8 slices 1x
- Category: Dessert
- Method: Baking
- Cuisine: American
Ingredients
- 2 ½ lbs ripe peaches (peeled and sliced)
- ½ cup sugar
- 2 tbsp cornstarch
- ½ tsp grated orange zest
- ¼ cup freshly squeezed orange juice
- 1 tbsp unsalted butter
- All-purpose flour (for crust and thickening)
- Double-crust pie dough (homemade recipe)
Instructions
- Preheat your oven to 400°F (200°C). Prepare a sheet pan lined with parchment paper.
- Blanch the peaches in boiling water for 15 seconds, then transfer to an ice bath to cool. Peel and slice them.
- In a saucepan over medium heat, combine sugar, cornstarch, orange zest, orange juice, and butter; whisk until combined and bring to a boil.
- Add chopped peach pieces to the syrup and simmer for about 3-4 minutes until slightly thickened.
- Pour the peach filling into the prepared pie crust and cover it with a lattice top.
- Brush the lattice with egg wash and sprinkle sugar on top.
- Bake for about 45 minutes or until golden brown.
Nutrition
- Serving Size: 1 serving
- Calories: 210
- Sugar: 18g
- Sodium: 105mg
- Fat: 7g
- Saturated Fat: 4g
- Unsaturated Fat: 2g
- Trans Fat: 0g
- Carbohydrates: 34g
- Fiber: 2g
- Protein: 2g
- Cholesterol: 20mg