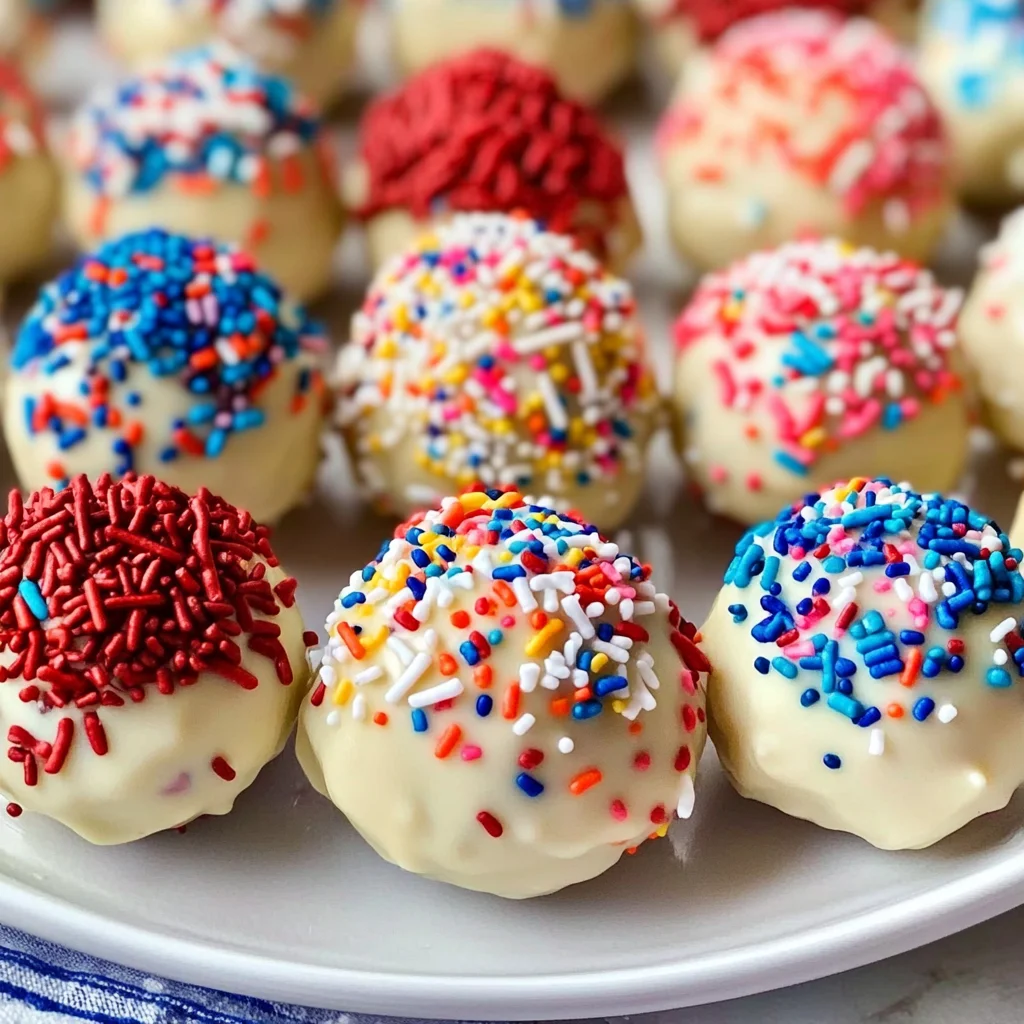
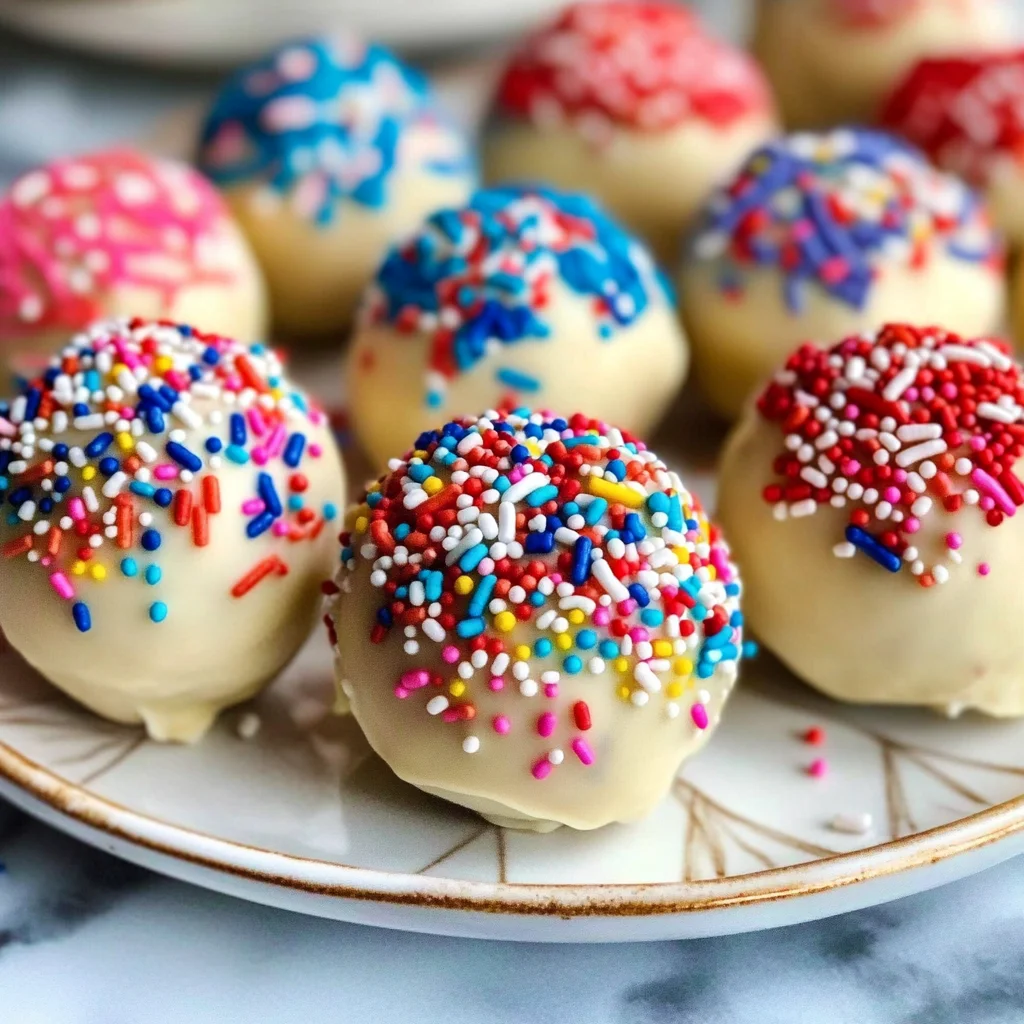
Patriotic No-Bake Cake Batter Truffles
There’s something profoundly magical about desserts that remind us of special occasions and cherished memories. The aroma wafting through the kitchen, the vibrant colors beckoning from the table, and the joy that comes with sharing a sweet treat with loved ones are all part of what makes cooking such a delightful endeavor. Today, I’m thrilled to share with you my recipe for Patriotic No-Bake Cake Batter Truffles—a delicious symphony of flavors that bursts forth in an eye-catching red, white, and blue presentation. These truffles are more than just a dessert; they’re a celebration of togetherness and joy, perfect for BBQs, parties, or any gathering where you want to bring a smile to everyone’s face.
The essence of these truffles lies in their no-bake simplicity combined with the nostalgic flavor of cake batter. I’ve always been captivated by the idea of indulging in cake batter without the wait time that baking usually entails. These treats capture that essence beautifully—creamy, sweet, and oh-so-fun to make! As we dive into this recipe together, I promise you’ll find it not only easy but also incredibly rewarding. With each bite, you’ll be reminded of warm summer nights filled with laughter and camaraderie—each truffle a small piece of joy shared among friends.
Patriotic No-Bake Cake Batter Truffles: A Sweet Celebration of Flavor
These Patriotic No-Bake Cake Batter Truffles are not just another dessert; they are little morsels of happiness! Imagine biting into a soft, cake-like center bursting with flavor and surrounded by a crunchy coating—a truly extraordinary combination that is sure to delight both kids and adults alike. The vibrant sprinkles add a festive touch that makes them perfect for any patriotic celebration, especially during summer holidays like Independence Day. So roll up your sleeves and let’s embark on this delightful culinary journey together!
Ingredients:
As we set out on our adventure to create these delightful truffles, let’s take a moment to appreciate each ingredient’s role in crafting these bites of joy. Each component brings something unique to the table—let’s explore them together.
- 1-1/2 cups cake flour: This is one of the foundational ingredients that will give our truffles that delightful cake-like texture we crave. Cake flour has a lower protein content than all-purpose flour, which means it yields a softer crumb—absolutely non-negotiable when aiming for that melt-in-your-mouth experience. When purchasing cake flour, look for brands that specify soft or cake on the packaging; this ensures you’re getting exactly what you need for optimal results.
- 1 cup strawberry cake mix: This playful addition brings both flavor and sweetness to our truffles while enhancing their vibrant color. Strawberry cake mix contains sugar and flavoring agents that will impart an authentic cake batter taste—trust me when I say it makes all the difference! If you’re feeling adventurous or prefer another flavor profile, feel free to experiment with vanilla or funfetti mixes; just remember those will alter the final taste slightly.
- 1/2 cup unsalted butter, softened: Ahh, butter—the liquid gold of baking! It contributes richness and moisture while helping bind everything together into one glorious mixture. Make sure your butter is softened (but not melted), as this is crucial for achieving that light texture when creaming it with sugar. If you’re looking for alternatives due to dietary preferences, coconut oil can work well here too!
- 1/2 cup white sugar: Sugar does more than sweeten; it plays an essential role in texture too! It helps create that perfect balance between sweetness and richness within our truffles. I always opt for granulated white sugar because it dissolves easily into the batter—ensuring every bite is evenly sweetened without any graininess.
- 1 teaspoon vanilla extract: Here’s where we elevate our flavor profile! Vanilla adds depth and warmth to the sweetness—a true must-have in any dessert recipe. Whenever possible, opt for pure vanilla extract over imitation; its complex aroma and flavor are worth every penny!
- 1/8 teaspoon salt: You might be wondering why we include salt in something sweet like this—but trust me on this one! A pinch of salt enhances all other flavors present in the dish while balancing out sweetness beautifully. It’s what takes your truffles from good to absolutely divine!
- 3-4 tablespoons milk: Milk helps adjust consistency to achieve that perfect dough-like feel we want when rolling our truffles. Start with three tablespoons; if your mixture feels too dry or crumbly, add an extra tablespoon until it’s manageable yet slightly sticky.
- 1-2 teaspoons red food coloring: This ingredient isn’t just about aesthetics—it’s about creating an inviting visual feast! A touch of food coloring gives our truffles their signature patriotic hue while making them even more appealing on party platters.
- 2 tablespoons sprinkles: What’s a festive dessert without sprinkles? They add crunch, color, and that unmistakable celebratory vibe we love! Feel free to use whichever colors suit your occasion best; after all, there’s no wrong way to sprinkle some fun into your treats!
For the Coating:
- 16 oz. (8 squares) almond bark or vanilla flavored coating: This smooth coating envelops our truffles like a hug! Almond bark melts beautifully and provides a creamy base that’s easy to work with—making it ideal for dipping our chilled balls later on. If you’re unable to find almond bark at your local store or prefer another option due to allergies or dietary restrictions, good-quality white chocolate chips can serve as an excellent substitute; just keep an eye on melting times!
- Sprinkles in red, white, and blue (for topping): Not only do these colorful sprinkles create visual appeal but they also contribute an extra crunch factor once set atop the warm coating! Choose fun shapes if available—they’ll make your dessert even more festive!
Equipment You’ll Need:
To ensure our baking adventure goes off without a hitch, having the right tools at hand is essential! Each piece becomes an invaluable partner in creating those scrumptious truffles we’re aiming for.
- Electric mixer: This tool works wonders when combining butter and sugar effortlessly—saving both time and elbow grease! The speed settings allow us precise control over mixing textures; so whether you’re creaming or whipping egg whites (not needed today!), having one makes life infinitely easier.
- Cookie sheet: A sturdy cookie sheet lined with parchment paper provides an ideal surface for rolling out those dough balls while ensuring they don’t stick during chilling time—essentially guaranteeing success right from step one!
- Parchment paper or wax paper: This simple yet effective tool keeps things tidy as we form our truffle balls—it prevents sticking while making clean-up afterward much less daunting!
Now that we’ve gathered everything we need let’s dive into preparing those irresistible Patriotic No-Bake Cake Batter Truffles!
Step 1: Creaming Butter and Sugar
Start by beating together your softened unsalted butter along with white sugar using an electric mixer until fully combined—a process known as creaming. This step is vital because it introduces air pockets into your mixture through vigorous mixing; those tiny bubbles help create lift within our truffles later on! Aim for about 3–5 minutes until you see a fluffy consistency forming—you want it lightened in color too! Be patient here; rushing this step might result in denser bites instead of airy ones.
Step 2: Incorporating Dry Ingredients
Once you’ve successfully creamed together butter and sugar—it’s time to invite our dry ingredients into the party! Gradually add in your strawberry cake mix along with cake flour & salt before mixing thoroughly until everything forms one cohesive dough-like consistency (about 2–3 minutes). The key here is ensuring no pockets remain unincorporated so take care during this step—it’ll pay off later when rolling individual balls!
Step 3: Adjusting Consistency
Next up comes milk—and depending on how dry or moist your initial mixture was earlier (thanks largely due to humidity levels!), you’ll want either three or four tablespoons here until reaching ideal texture—that’s slightly sticky but manageable enough for rolling without crumbling apart completely! Trust yourself when gauging this part because every environment differs slightly—don’t fret if things seem off initially—we can always fix them later down the line!
Step 4: Adding Color & Sprinkles
At last—the fun part begins as we introduce vibrant red food coloring along with joyous sprinkles straight into our dough mixture by hand (using spatula). Gently fold these ingredients until evenly distributed throughout—the resulting hues should evoke feelings of patriotism at first sight alone! Take pride knowing how gorgeous they’ll look once plated up later—you’ve earned every bit of satisfaction from creating such beauty here today!
Stay tuned as we continue crafting these delightful bites together; next up will be shaping them perfectly before diving into decadent coatings that truly seal their fate as showstoppers!
Step 5: Chill to Perfection – The Crucial Firming Phase
Now that we’ve rolled our delightful dough into one-inch balls, it’s time for a little patience. Place those sweet orbs onto a sheet lined with parchment or wax paper; I cannot stress enough how important this step is! The parchment prevents sticking and allows for smooth removal later on. Why chill them? This brief 15-minute rest in the refrigerator is not just a formality; it’s absolutely paramount in achieving that perfect truffle texture. Chilling the dough helps it firm up beautifully, making it easier to dip later without losing shape—nobody wants a flat truffle, right?
As you wait, take a moment to admire your handiwork. These vibrant little spheres are already looking like miniature works of art! While they chill, you might find yourself tempted to sneak one—the dough is simply irresistible—but hold off! Trust me on this: the magic happens when they’re cold. During this cooling phase, the fats in the butter will solidify slightly, which enhances the overall texture of your truffles, giving them that rich and creamy mouthfeel when you finally take a bite. So don’t rush this step; your future self will thank you!
Step 6: Melting Magic – Preparing Your Coating
With our truffles chilling away, let’s turn our attention to the coating—a critical component that elevates these treats from delicious to utterly intoxicating! Grab your almond bark or vanilla-flavored coating and break it into squares if necessary. You will want to melt this in the microwave using short bursts of heat—30 seconds at a time works wonders here. Give it a gentle stir after each interval; this will ensure even melting and prevent any nasty scorching that can happen if you’re not careful. We’re aiming for a silky-smooth consistency that glistens like liquid gold.
Why do we take such care here? The coating not only adds flavor but also provides a satisfying crunch that contrasts beautifully with the soft, sweet cake batter inside. When done right, it creates an immaculate seal around each truffle—almost like wrapping them in a cozy blanket of sweetness! Keep an eye on the bark as it melts; you want it perfectly melted but not too hot to handle. If it gets too thick while cooling, simply pop it back in the microwave for another few seconds until you achieve that luscious pourable texture.
Step 7: Dipping Delight – The Art of Coating
Once your almond bark is perfectly melted and ready for action, it’s time for the fun part—dipping our chilled truffles! Using a fork (or even two forks if you’re feeling fancy), gently lower each truffle into the warm coating. Take a moment to appreciate how lovely they look as they get enveloped in that creamy shell. It’s important to give them a little twirl around once dipped; this helps remove any excess coating and gives them that beautiful finish we all adore. Aim for an even coat but don’t stress if some have more than others—each one has its own personality!
As you place each coated truffle back onto your prepared cookie sheet, sprinkle generously with your festive red, white, and blue sprinkles while the coating is still wet. This step is crucial because once the almond bark sets, those sprinkles won’t stick as well—and believe me, we want every last bit of color and joy on these beauties! Allow yourself to take pride in this process; there’s something truly special about transforming simple ingredients into festive bites of happiness.
Step 8: Set It Straight – Final Chill Before Indulgence
Now comes one final wait before we dive into these delicious Patriotic No-Bake Cake Batter Truffles! Once all your truffles are coated and adorned with sprinkles, carefully transfer the cookie sheet back into your refrigerator to allow them to set completely—this usually takes about 30 minutes but can vary based on your fridge’s temperature settings. This chilling phase is more than just waiting; it’s where those magical flavors meld together beautifully.
What should you watch for? You’ll know they’re done setting when the coating feels firm and smooth to touch—it should have that perfect glossy finish without any sticky residue. If you’re craving them sooner than later (totally understandable!), just be sure they’ve had enough time in the fridge so they hold their shape when bitten into—nothing worse than a droopy truffle! Once they’re ready, feel free to serve them at parties or keep them all for yourself (no judgment here!).
Conclusion:
As we wrap up this delightful journey through creating your very own Patriotic No-Bake Cake Batter Truffles, I truly hope my excitement has rubbed off on you! There’s something profoundly satisfying about crafting these vibrant bites of joy—each truffle is a celebration of flavors and textures that dance together in joyous harmony. The sweet creaminess melds with delightful sprinkles that evoke memories of sunny afternoons spent with family and friends. Isn’t it exhilarating to think about how such simple ingredients can create something extraordinary?
This recipe is not just about indulgence; it’s about joy—the joy of making something fun and easy that everyone will adore. Whether you’re celebrating Independence Day or simply looking for an excuse to bring some cheer into your day-to-day life, these truffles shine brightly in any setting. Imagine pulling out these eye-catching treats during a festive gathering; the smiles on faces will be absolutely infectious as everyone dives into those colorful morsels!
For an afternoon pick-me-up, imagine savoring one with a steaming cup of coffee or tea—it’s pure bliss! Alternatively, pair these beauties with vanilla ice cream for an extra decadent experience; feel free to let your creativity flow when thinking about pairings! You could even serve them alongside fresh berries for an invigorating contrast that balances sweetness with tartness beautifully.
Feeling adventurous? This recipe is wonderfully adaptable! You could swap out the strawberry cake mix for lemon or chocolate if you’re craving something different; each variation offers its own tantalizing twist that’ll keep your taste buds guessing! Get inspired by seasonal themes—think pumpkin spice during fall or peppermint candy cane during winter celebrations! I invite you to dive into this culinary adventure and share your experiences; there’s nothing quite like connecting over food we love.
Patriotic No-Bake Cake Batter Truffles
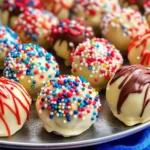
Indulge in the festive delight of Patriotic No-Bake Cake Batter Truffles, perfect for summer gatherings and celebrations. These no-bake treats are a vibrant blend of sweet cake batter flavors, wrapped in a creamy coating and adorned with colorful sprinkles that evoke a sense of togetherness and joy. Easy to make, they offer a nostalgic taste reminiscent of childhood desserts without the wait of traditional baking. With their eye-catching red, white, and blue presentation, these truffles are sure to delight both kids and adults alike at any BBQ or picnic. Roll up your sleeves and enjoy this simple yet rewarding recipe!
- Prep Time: 25 minutes
- Cook Time: 0 minutes
- Total Time: 25 minutes
- Yield: Approximately 20 servings 1x
- Category: Dessert
- Method: No-Bake
- Cuisine: American
Ingredients
- 1–1/2 cups cake flour
- 1 cup strawberry cake mix
- 1/2 cup unsalted butter (softened)
- 1/2 cup white sugar
- 1 teaspoon vanilla extract
- 3–4 tablespoons milk
- 16 oz. almond bark or vanilla flavored coating
- Red, white, and blue sprinkles
Instructions
- In a mixing bowl, cream together softened butter and sugar until fluffy.
- Gradually add cake flour, strawberry cake mix, salt, and vanilla extract; mix until combined.
- Add milk gradually until you achieve a slightly sticky dough consistency.
- Fold in red food coloring and sprinkles by hand until evenly distributed.
- Chill the dough for 15 minutes in the refrigerator.
- Roll into one-inch balls and place on parchment-lined cookie sheet.
- Melt almond bark in the microwave until smooth. Dip each truffle into the melted coating and sprinkle with additional sprinkles.
- Return dipped truffles to the refrigerator to set for about 30 minutes.
Nutrition
- Serving Size: 1 serving
- Calories: 120
- Sugar: 9g
- Sodium: 35mg
- Fat: 6g
- Saturated Fat: 3g
- Unsaturated Fat: 2g
- Trans Fat: 0g
- Carbohydrates: 15g
- Fiber: 0g
- Protein: 1g
- Cholesterol: 15mg