7 Layer Greek Hummus Dip
There’s something undeniably magical about gathering around a table with friends and family, sharing stories and laughter over a spread of delicious food. The 7 Layer Greek Hummus Dip is not just an appetizer; it’s a celebration of flavors that brings people together. Each layer tells its own story, from the creamy hummus that serves as the foundation to the vibrant, fresh toppings that dance atop it. Imagine scooping up a bit of everything with crispy pita chips—the way the tangy feta mingles with the juicy tomatoes and crunchy cucumbers creates an experience that’s utterly intoxicating. Trust me when I say this dip has the power to transform any gathering into a heartfelt feast, filling your home with warmth and joy.
This recipe holds a special place in my heart because it embodies my love for Mediterranean cuisine and its ability to make even the simplest moments feel extraordinary. It’s perfect for everything from casual get-togethers to festive celebrations, and it comes together effortlessly. You can whip this up in under 15 minutes, making it one of those go-to recipes I swear by when friends drop by unexpectedly or when I need to bring something special to potlucks. The beauty of this dish lies not only in its deliciousness but also in its versatility. You can easily customize it with your favorite toppings or even switch things up based on what you have on hand—it’s all about making it your own!
7 Layer Greek Hummus Dip: A Symphony of Fresh Flavors
This 7 Layer Greek Hummus Dip is an easy yet impressive addition to your appetizer lineup. With layers of creamy hummus, tangy yogurt, and vibrant vegetables, it’s a delightful way to enjoy wholesome ingredients while feeling like a culinary superstar! Get ready; we’re about to embark on a tasty journey together.
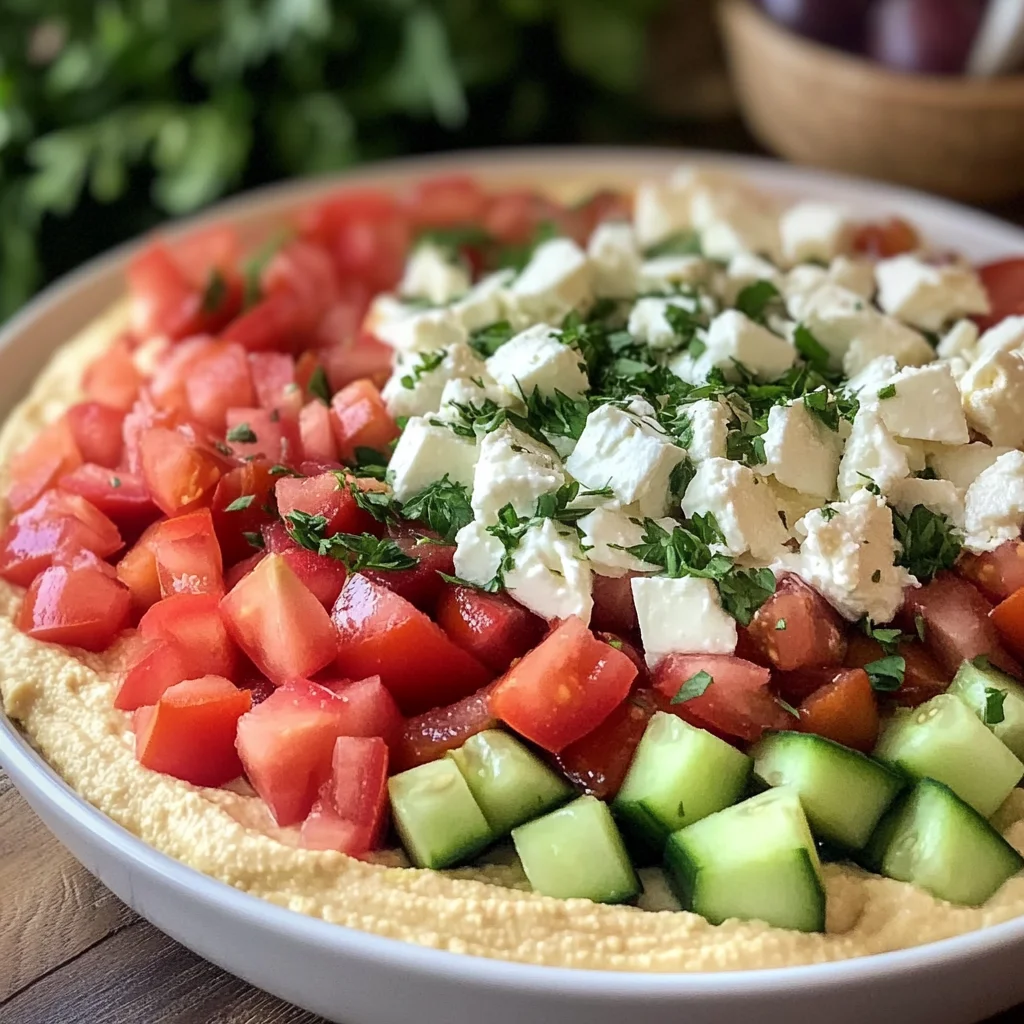
Ingredients:
As we dive into creating this masterpiece, let’s take a moment to appreciate each ingredient that makes this dip so special. They come together harmoniously to create an unforgettable experience.
- 1 (17oz) container of hummus – This creamy chickpea base is where our journey begins! Not only does hummus provide a rich texture and nutty flavor, but it’s also packed with protein and fiber, making it satisfying without being heavy. When shopping for hummus, look for brands that use high-quality olive oil and pure ingredients—this will enhance the flavor dramatically. If you’re feeling adventurous, you could even try making homemade hummus; I promise it’s incredibly rewarding!
- 3/4 cup plain Greek yogurt – This ingredient adds a luscious creaminess that elevates our dip to new heights. The tangy flavor complements the earthiness of the hummus perfectly while contributing extra protein and probiotics. When selecting your yogurt, opt for full-fat varieties if possible—they tend to be thicker and richer in taste than low-fat options. Plus, don’t skimp on spreading it evenly over the hummus; this step helps create distinct layers that are visually appealing!
- 1/3 cup crumbled feta – Ahh, feta cheese—the salty little nuggets of joy that bring character to our dip! Its crumbly texture contrasts beautifully against the smooth layers beneath, giving each bite an irresistible pop of flavor. Look for high-quality feta made from sheep’s milk for that authentic taste; it’s worth every penny! And if you have lactose sensitivities or prefer vegan options, there are some wonderful plant-based alternatives available now.
- 1 tomato (diced) – Fresh tomatoes are like little bursts of sunshine in this dip! Their juiciness adds moisture while balancing out the creaminess of the other ingredients. Choose ripe tomatoes that are firm yet slightly yielding when squeezed—this ensures maximum flavor without excess water content that might make your dip soggy. Dicing them finely allows them to blend seamlessly into our beautiful creation.
- 1/2 cucumber (diced) – Crunchy cucumbers add freshness and brightness—think summer days spent lounging by the pool! They also provide a lovely contrast in texture with their crispness against the creamy layers beneath. When selecting cucumbers at the store, look for firm ones without blemishes; English cucumbers are particularly great here as they have fewer seeds and thinner skin.
- 1/3 cup kalamata olives (diced) – These bold little gems introduce an exquisite brininess that’s simply irresistible! Their deep color and unique flavor profile will add sophistication to our dip’s overall taste experience. When purchasing olives, choose pitted ones for convenience—it saves time and effort! If you’re not keen on olives or want to switch things up, consider using sun-dried tomatoes or artichoke hearts instead.
- A few sprigs of parsley (optional) – While not essential, freshly chopped parsley adds a delightful pop of color and brightness at the end—a visual treat as well as a flavor enhancer! The key is using fresh herbs whenever possible since dried herbs simply cannot compete with their vibrant counterparts in terms of aroma and taste.
- Pita chips for serving – These golden crisps are perfect vessels for scooping up all those delicious layers! You can buy them pre-made or make your own by baking pita bread until crispy—a fun project if you’re feeling creative! Just remember: whatever option you choose should complement rather than overpower our beautiful dip.
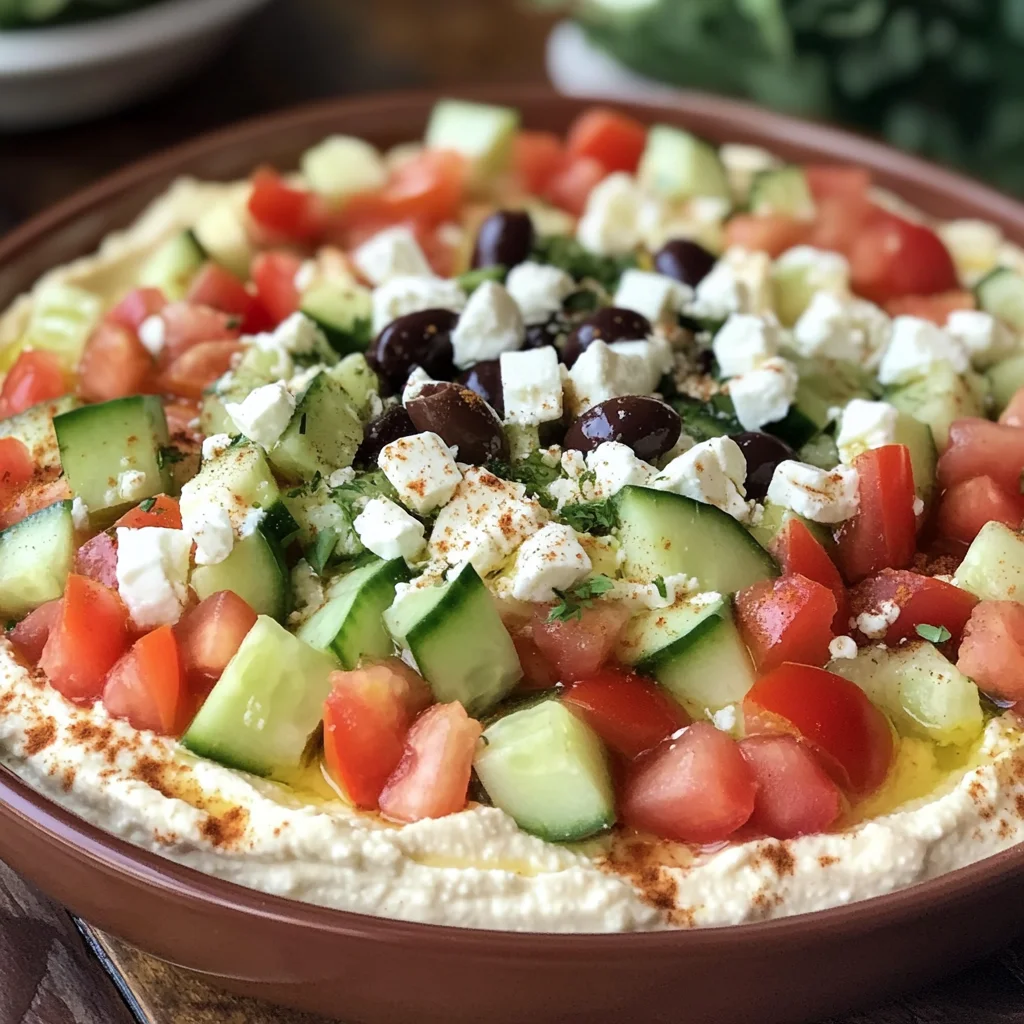
Equipment You’ll Need:
Before we jump into the fun part—making our dip—let’s ensure we have all our tools ready because having the right equipment makes any kitchen adventure smoother! While these items may not be ingredients themselves, they play crucial roles in helping us create something truly wonderful.
- Shallow serving bowl or dish – This is where all your magic happens! A shallow bowl allows everyone to see those gorgeous layers while providing ample surface area for dipping—a must-have feature when entertaining guests.
- Cutting board – A sturdy cutting board is essential for chopping up your veggies cleanly and safely. Opt for one that’s easy to clean since we’ll be working with various fresh ingredients; wooden boards are classic choices but plastic ones can be more hygienic if you’re concerned about cross-contamination.
- Sharp knife – Having a sharp knife makes slicing through tomatoes and cucumbers effortless while ensuring precise cuts for beautiful presentation! Dull knives can lead to accidents or uneven pieces—so invest in quality blades if you can!
- Spoon or spatula – You’ll need one (or both!) for dolloping yogurt onto the hummus smoothly and spreading it out evenly across the surface. Silicone spatulas work wonders here as they glide effortlessly across bowls without leaving remnants behind!
With these tools at your side, you’ll be all set to create this stunning 7 Layer Greek Hummus Dip that’s sure to impress everyone around your table!
Preparing the 7 Layer Greek Hummus Dip
Step 1: Lay Down Your Foundation
First things first—we’re going to start building our gorgeous dip by spreading that entire container of hummus onto the bottom of your shallow serving bowl or dish. This layer acts as both a base and canvas upon which all other flavors will shine brightly! It’s important not only to use every last bit but also ensure it’s spread evenly across so no one misses out on this deliciousness as they scoop into their portions later on. Take your time with this step; don’t rush through it because achieving smooth edges makes such a difference visually!
Step 2: Add Creamy Dreaminess
Next comes my favorite part—dolloping three-quarters cup of plain Greek yogurt directly over our lovely layer of hummus! Using a spoon or spatula (remember how we talked about having those handy?), gently spread out this creamy goodness until it’s evened out nicely across the surface again—as we want each bite bursting forth with flavor harmony rather than overwhelming anyone with too much at once! The tanginess from yogurt complements everything else beautifully while adding richness without heaviness—it’s truly sublime when paired together like this!
Step 3: Crumble Feta Blissfully
Now let’s sprinkle on about one-third cup crumbled feta cheese over that luscious yogurt layer we just created; oh boy—this is where things get exciting between flavors marrying each other! As you scatter those little white treasures atop like confetti celebrating good times ahead… imagine how their salty goodness mingles harmoniously throughout every mouthful later on—it’s absolutely paramount not just visually but also taste-wise too!
Step 4: Freshness Overload
Time now for some colorful vibrancy! Dice up one fresh tomato into small pieces—don’t hesitate here because every piece counts toward elevating freshness levels within our creation—and scatter them generously atop those delightful feta crumbles below us now waiting eagerly underneath all these layers…and then follow suit by dicing half a cucumber next before doing likewise again: sprinkle away evenly across everything already sitting proudly below—for who doesn’t love crunch?
With each step carefully executed thus far—it feels thrilling knowing we’re just moments away from serving something truly extraordinary as more flavors unite beautifully together within this harmonious symphony before us… Stay tuned because there’s still more magic left to unveil soon enough…
Step 5: Layering the Greek Goodness
Now, let’s get to the fun part—layering our delightful ingredients! After you’ve spread that luscious layer of hummus across the bottom of your serving dish, it’s time to dollop on that creamy Greek yogurt. Using a spatula or the back of a spoon, carefully place generous dollops of yogurt atop the hummus. You want to spread it out evenly, creating a smooth and inviting second layer. This yogurt adds not only creaminess but also a tangy flavor that beautifully balances the richness of the hummus. Trust me on this; it’s crucial for building layers of flavor that dance together in every bite. As you spread it, take a moment to appreciate how these two elements already create a harmonious foundation—a canvas of flavors just waiting to be painted upon!
Don’t rush this step; there’s an artistry to creating layers! A well-constructed dip isn’t just about throwing everything together; it’s about how each ingredient complements and enhances one another. The yogurt will provide a beautiful contrast in texture when you scoop through the layers later on. If you find that your yogurt is too thick to spread easily, simply give it a little stir before layering—it should have a smooth, silky consistency that glides effortlessly over the hummus beneath. This technique is paramount for ensuring each bite is as delightful as the last.
Step 6: The Feta Fiesta
Now it’s time to introduce our star player, crumbled feta cheese! With its crumbly texture and salty bite, feta contributes a fantastic depth to our dip—bringing forth that quintessential Mediterranean flavor that makes this 7 Layer Greek Hummus Dip so irresistible. Grab about 1/3 cup of crumbled feta and sprinkle it evenly over the yogurt layer like snow falling softly onto a winter landscape. This step isn’t just decorative; it’s foundational for your dip’s overall flavor profile!
As you sprinkle, take care to distribute the feta evenly across the surface—this ensures every scoop has that salty surprise waiting for it. The contrast of textures between the creamy yogurt and crumbly feta creates an utterly intoxicating experience as you dive in with pita chips or naan bread. If you’re feeling extra adventurous, consider using flavored feta varieties like herb-infused or spicy feta for an added kick. But remember, balance is key here; we want those flavors to sing together rather than compete.
Step 7: Fresh & Vibrant Vegetables
Next up are our vibrant diced tomatoes and cucumbers! These beauties not only add freshness but also provide beautiful pops of color that make your dip look as good as it tastes. Dice up one ripe tomato and half a cucumber into small pieces—aim for uniformity so they blend well within your layered masterpiece. When you layer them over the feta, think of this as adding little bursts of sunshine—both visually and taste-wise!
The juiciness of the tomato complements the crunchiness of the cucumber perfectly, creating an exciting textural contrast against the creamy base layers below. As you sprinkle these fresh vegetables over your dip, imagine how their bright flavors will awaken your palate with each delightful scoop. It’s absolutely paramount here to use fresh ingredients; wilted or overly ripe veggies can detract from the overall experience and muddle those crisp tastes we’re aiming for.
Step 8: Adding Mediterranean Magic with Olives
We’re diving into one of my favorite parts now—the olives! These tiny fruit gems bring an entirely new dimension to our dip with their briny goodness and distinct flavor profile. Take about 1/3 cup of pitted kalamata olives and chop them finely so they can distribute throughout your dip without overwhelming any single bite with too much saltiness. Their dark color adds yet another layer of visual appeal while contributing richness that ties all those lighter elements together.
When sprinkling them on top, remember moderation is key; their intense flavor can be quite powerful! Just enough will elevate your dish without overshadowing those delicate notes from the tomatoes and cucumbers below. And here’s an insider tip: if you’re serving this at a gathering or party (which I highly encourage!), consider placing some extra olives on top for garnish—they’re fabulous conversation starters and signal what deliciousness awaits beneath!
Next Major Phase – Final Touches
As we approach completion, let’s not forget about those beautiful finishing touches! A few sprigs of fresh parsley add not just flair but freshness too—a lovely green garnish atop all those vibrant colors brings everything together beautifully.
Step 9: Garnishing with Love
Take some fresh parsley leaves (or any other fresh herbs you prefer) and either chop them roughly or leave them whole for an elegant touch—whatever suits your style best! Scatter them across the top like confetti at a celebration; this is where aesthetics meet flavor once more! Not only will this enhance visual appeal but also infuse each bite with herbal notes that complement our Mediterranean theme perfectly.
Once you’ve finished garnishing, cover your masterpiece with plastic wrap and refrigerate it for at least an hour before serving if possible—this chill time allows all those incredible flavors to meld beautifully together into something profoundly satisfying! I promise you; patience is rewarding here—the longer it sits in the fridge, the more intoxicatingly delicious it becomes as those flavors marry into one harmonious experience.
When it’s finally time to serve, pair your stunning 7 Layer Greek Hummus Dip with crispy pita chips or warm naan bread for dipping—the perfect vessels to scoop up all those delicious layers waiting beneath! Enjoy every moment shared around this dish; it’s more than just food—it’s memories waiting to happen at your next gathering or cozy night in!
Storage and Enjoyment Tips for Your 7 Layer Greek Hummus Dip
Now that you’ve created this stunning, vibrant 7 Layer Greek Hummus Dip, it’s time to revel in the moment! The colors alone are enough to make anyone’s heart skip a beat, and the combination of flavors is nothing short of a celebration. But let’s talk about how to preserve this deliciousness for another day—or even better, share it with friends and family! Knowing how to store this crowd-pleaser not only keeps your kitchen organized but also ensures that every bite remains as fresh and delightful as when you first made it.
Storing Leftover 7 Layer Greek Hummus Dip
To keep your masterpiece at its best, transfer any leftover 7 Layer Greek Hummus Dip into an airtight container. I recommend using a glass container if you have one because it helps maintain the flavor and prevents any unwanted odors from seeping in. Store it in the refrigerator where it should stay fresh for about three to four days. Trust me on this: when you’re ready to dive back into the dip, stir it gently to reintroduce those layers; they might settle a bit during storage, but don’t worry! The flavors remain intact, and you’ll still be greeted with that delightful creamy hummus at the bottom. A little pro tip: if you’re worried about the yogurt layer separating or becoming watery, placing a slice of bread on top before sealing can help absorb excess moisture. It’s a simple trick that makes all the difference! When you pull it out for your next gathering or snack attack, you’ll find that the flavors have melded beautifully together—a truly extraordinary experience!
Freezing Components for Later
If you’re thinking ahead and want to prepare some components of your 7 Layer Greek Hummus Dip for future gatherings, consider freezing them separately. The hummus itself freezes beautifully—just scoop out what you need into a freezer-safe container (leaving some space for expansion) and pop it in! It can last up to three months frozen. When you’re ready to use it, simply thaw overnight in the fridge and give it a good stir before layering with fresh toppings like yogurt and veggies. This is such a fantastic option because not only does it save time during busy weeks or spontaneous get-togethers, but it also allows you to enjoy the flavors of summer all year round! Imagine having this vibrant dip ready at your fingertips whenever friends drop by—it’s pure convenience wrapped in deliciousness.
7 Layer Greek Hummus Dip

Enjoy a vibrant 7 Layer Greek Hummus Dip that’s easy to make ahead and perfect for any gathering—your guests will love every layer!
- Prep Time: 15 minutes
- Cook Time: 0 minutes
- Total Time: 15 minutes
- Yield: Approximately 8 servings 1x
- Category: Appetizer
- Method: Layering
- Cuisine: Mediterranean
Ingredients
- 1 (17oz) container of hummus
- 3/4 cup plain Greek yogurt
- 1/3 cup crumbled feta cheese
- 1 diced tomato
- 1/2 diced cucumber
- 1/3 cup diced kalamata olives
- Fresh parsley (optional)
- Pita chips for serving
Instructions
- In a shallow serving bowl, spread the hummus evenly as the base layer.
- Dollop Greek yogurt on top of the hummus and spread evenly.
- Sprinkle crumbled feta cheese over the yogurt layer.
- Evenly distribute diced tomatoes and cucumbers on top.
- Add diced kalamata olives for briny flavor.
- Garnish with freshly chopped parsley if desired.
- Serve immediately with pita chips or cover and refrigerate for an hour to allow flavors to meld.
Nutrition
- Serving Size: 1/2 cup (120g)
- Calories: 140
- Sugar: 3g
- Sodium: 360mg
- Fat: 7g
- Saturated Fat: 2g
- Unsaturated Fat: 4g
- Trans Fat: 0g
- Carbohydrates: 14g
- Fiber: 4g
- Protein: 5g
- Cholesterol: 10mg