Red, White, and Blue Deviled Potatoes
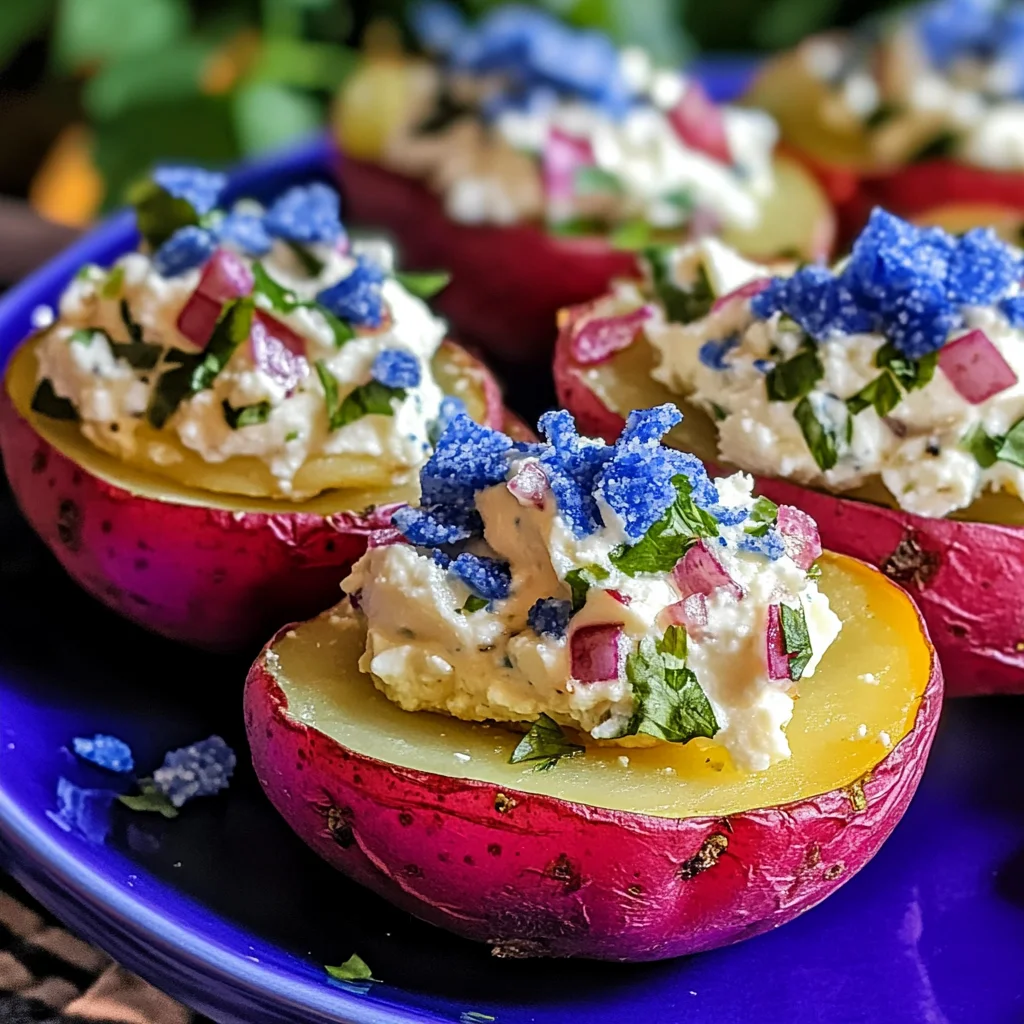
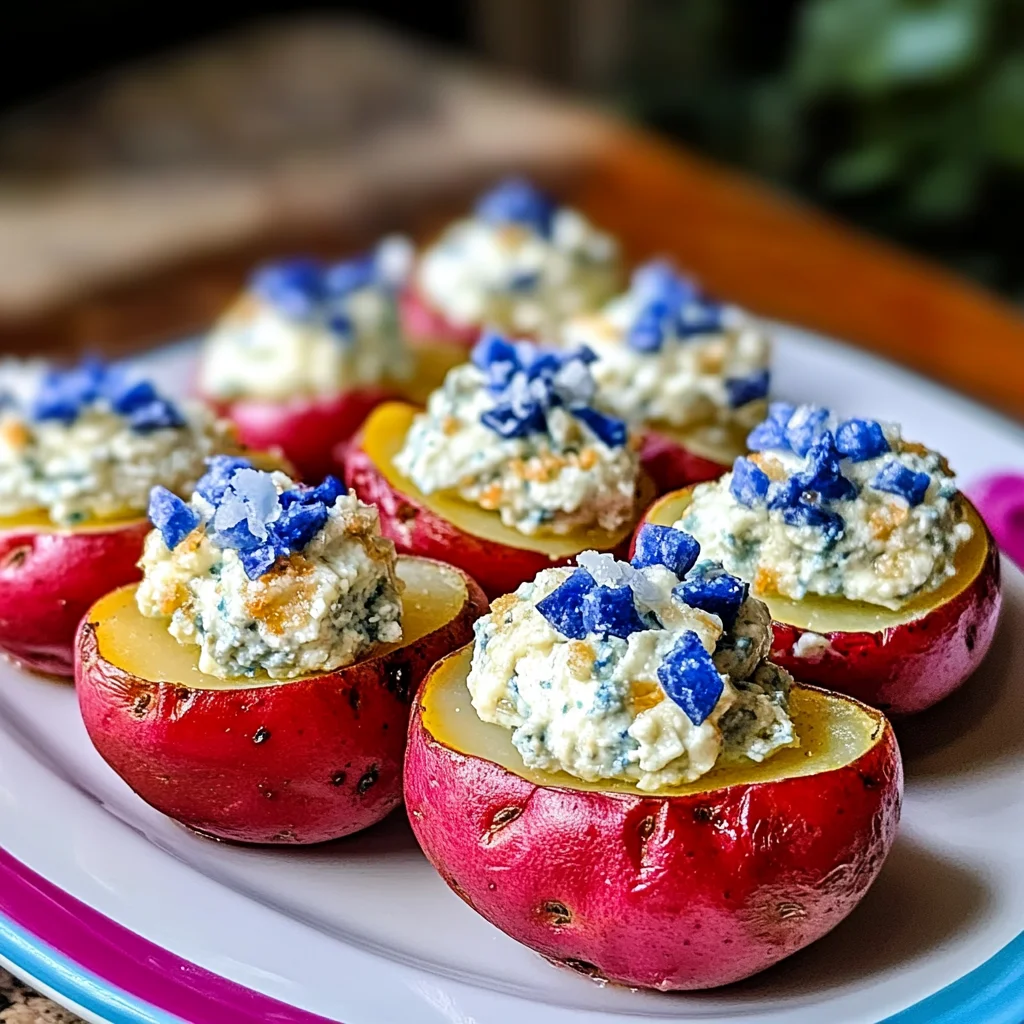
There’s something truly magical about food that transcends mere nourishment; it evokes memories, stirs emotions, and brings people together in a way that few other experiences can. As we gather around tables adorned with love and laughter, every bite tells a story. This is precisely what my Red, White, and Blue Deviled Potatoes offer—a delightful fusion of flavors that honors tradition while embracing creativity. Imagine the creamy richness of whipped feta mingling with the earthiness of baby red potatoes, each bite crunching to the sound of crushed blue corn chips, reminiscent of summer barbecues and festive celebrations. It’s not just a recipe; it’s an experience that beckons you to savor every moment.
These vibrant bites are a playful nod to the classic deviled egg but with a twist that’s perfect for any gathering—especially those sunny days when we want to celebrate our freedom and unity. The combination of creamy textures and bold flavors creates a symphony on your palate, making them utterly irresistible. I promise you, once you take that first bite, you’ll be transported to a picnic under the open sky or a backyard barbecue filled with laughter. The best part? They’re easy to prepare, making them an approachable delight for both novice cooks and seasoned chefs alike.
Red, White, and Blue Deviled Potatoes: A Festive Twist on Tradition
Let’s embark on this culinary adventure together! These Red, White, and Blue Deviled Potatoes are not only visually stunning but also incredibly satisfying to make. With each step in preparing them, you’ll find joy in creating something special that will surely dazzle your friends and family. So roll up your sleeves; it’s time to dive into this delightful recipe!
Ingredients:
As we begin our journey into creating these vibrant deviled potatoes, let’s gather our ingredients with intention. Each ingredient plays a vital role in crafting flavors that work harmoniously together.
- 12 baby red potatoes. These little gems are not just pretty; they bring a tender texture that’s perfect for scooping out their centers. When selecting your potatoes, look for firm ones without blemishes or soft spots. Their vibrant color is indicative of freshness, ensuring they hold up beautifully during baking while providing that earthy flavor we adore.
- 4 ounces cream cheese (softened). This ingredient is crucial as it serves as the creamy base of our filling. By allowing it to soften at room temperature before blending, you’ll ensure an ultra-smooth mixture that melds perfectly with other ingredients. If you’re looking for a lighter alternative, consider using low-fat cream cheese; just keep in mind that it may alter the richness slightly.
- 6 ounces feta cheese. Feta brings an irresistible tanginess that elevates our dish from ordinary to extraordinary. Opt for high-quality feta—preferably made from sheep’s milk—for its distinctive flavor profile which adds depth and complexity to our filling. Crumble it into smaller pieces before adding it to help achieve the desired creamy consistency when blended.
- 1 clove garlic (grated or finely minced). Garlic infuses our filling with aromatic warmth that’s simply addictive! Grating or finely mincing ensures even distribution throughout the mixture so every spoonful bursts with flavor. If you’re sensitive to raw garlic’s punchy taste but still want its benefits, roasting it beforehand will mellow its intensity beautifully.
- 1 tablespoon lemon juice. The bright acidity of lemon juice is non-negotiable here—it cuts through the richness of cream cheese and feta while adding freshness that brightens the overall dish. Always opt for fresh lemon juice over bottled for maximum flavor impact; give it a good squeeze right before using for peak potency.
- 1/8 teaspoon black pepper. A pinch of freshly cracked black pepper adds just enough warmth without overpowering other flavors—it’s like adding a whisper rather than shouting! Adjust this according to your preference; if you enjoy heat, feel free to experiment with spices like cayenne or smoked paprika.
- 1/3 cup finely crushed blue corn tortilla chips. These crunchy beauties serve as both garnish and an unexpected textural element within each potato half! When choosing your tortilla chips, look for those made from whole grains for added flavor and nutrition—plus they add a colorful pop against our potatoes that enhances presentation!
- Lemon wedges for garnish (optional). While optional, these zesty garnishes can elevate your serving presentation significantly! They provide an additional burst of citrus brightness when squeezed over individual servings and invite guests to customize their flavor experience even further.
Equipment You’ll Need:
Before we dive into preparation mode, let’s take a moment to gather our kitchen essentials—having the right tools makes all the difference in ensuring our cooking journey is smooth sailing.
- Baking sheet – A sturdy baking sheet is essential for roasting our baby red potatoes evenly without overcrowding them during cooking time; this promotes uniform browning and tenderness while preventing sticking. If you have parchment paper on hand, lining your baking sheet will make cleanup even easier!
- Food processor or mixing bowl with whisk – A food processor allows us to whip up our filling seamlessly into velvety perfection in no time! If you don’t have one handy (or prefer some good old-fashioned muscle!), a mixing bowl paired with whisk or electric mixer works wonders too—just be prepared for some extra elbow grease!
- Melon baller or small spoon – This handy tool helps create just the right-sized wells in each potato half without risking damage to their delicate shape—the goal is gentle scooping! If you don’t have one available at home already—no worries—a small spoon can work just as effectively!
- Serving platter – Presenting these gorgeous bites on a beautiful serving platter elevates their appeal exponentially! Choose one that contrasts nicely against their vibrant colors so they shine like stars at your gathering.
Now that we’ve gathered everything we need let’s jump into preparing these stunning Red, White, and Blue Deviled Potatoes!
Step 1: Preheat Your Oven
Preheating your oven is crucial—it sets the stage for perfectly cooked potatoes! Set your oven temperature to 400°F (200°C) so it reaches optimal heat before placing your lovely little red potatoes inside—a vital step since starting at lower temperatures can lead to uneven cooking results! While this process unfolds gracefully over approximately 10 minutes or so (which gives us ample time), feel free to wash up those baby reds under cool running water until they’re sparkling clean—we want every inch pristine because they deserve nothing less!
Step 2: Bake Those Potatoes
Once preheated blissfully awaits us within the confines of our kitchen haven—we’ll grab those washed-up potatoes and place them gently onto our prepared baking sheet like precious jewels awaiting their moment in the spotlight! They’ll need approximately 25 minutes in total until fork-tender yet retaining their shape beautifully—you want them cooked through but not falling apart—keep an eye on them around 20-minute mark by testing one with fork gently pressing downwards (it should slide easily). Once done baking heavenly aromas fill up your space inviting anticipation!
Step 3: Cool Down Time
After extracting those golden beauties from their warm haven—you’ll want patience now as they cool completely before proceeding further—it may seem tedious but trust me: rushing this step could result in melted fillings prematurely oozing out instead staying nestled lovingly within soft skins! Letting them rest allows flavors meld harmoniously without compromising integrity—the wait pays off tremendously!
Step 4: Prepare That Irresistible Filling
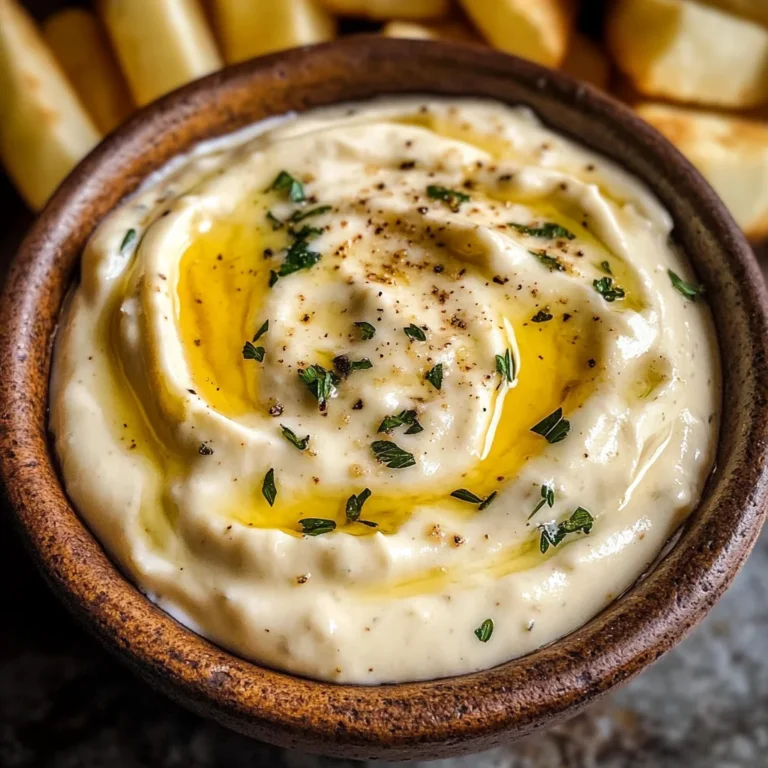
While letting potatoes chill transforms us into culinary magicians—we shift gears towards crafting luscious whipped feta filling bursting full flavor life ahead! Grab your trusty food processor if available (or mixing bowl option) where softened cream cheese joins forces alongside crumbled feta accompanied by fragrant grated garlic dancing joyfully beneath zesty lemon juice splash alongside harmonious pinches black pepper—a glorious medley waiting transformation magic! Blend until smooth yet fluffy consistency emerges like clouds forming after rain—the result? An utterly intoxicating concoction ready for stuffing those cooled potato halves later on…
Stay tuned as we continue crafting these delicious bites together—each step unveiling more delightful nuances along way leading towards ultimate satisfaction once served proudly amidst jubilant festivities ahead!
Step 5: Prepare the Filling – Whipping Up Flavor Heaven
Now that your delightful baby red potatoes have cooled completely, it’s time to create the luscious filling that will elevate these Red, White, and Blue Deviled Potatoes into a realm of sheer culinary bliss. Grab your food processor—this handy appliance will be your best friend in achieving a smooth, creamy consistency that makes each bite a heavenly experience. Start by adding the softened cream cheese and crumbled feta cheese to the bowl of the processor. The cream cheese provides a rich, velvety base, while the feta adds that signature tangy flavor which is absolutely crucial for balancing the overall taste. Trust me on this—this harmonious blend is what makes these deviled potatoes so special!
Next, add in that freshly grated or finely minced clove of garlic. The garlic not only brings aromatic depth but also enhances the overall flavor profile with its warm notes. Then pour in one tablespoon of fresh lemon juice—this aspect is non-negotiable! The acidity from the lemon juice cuts through the creaminess beautifully and brightens up all those wonderful flavors. Finish off with an eighth teaspoon of black pepper to add just a hint of warmth; it’s amazing how such a small amount can make a significant difference! Now, blend everything until it’s incredibly smooth and whipped, about 30 seconds to a minute should do the trick. You’re looking for a texture that resembles soft whipped cream; if you see any lumps, keep blending! Don’t forget to pause and taste; this is where you can adjust seasoning if needed—perhaps a pinch more salt or another squeeze of lemon if you want more brightness. This step is where your dish truly comes alive!
Step 6: Scooping Out Perfection – Hollowing Your Potatoes
With your luscious filling at the ready, it’s time to prepare our little potato halves for their glorious stuffing! Using a sharp knife, carefully cut each baked potato in half lengthwise. When you do this, take your time; aim for precision to ensure each half maintains its structure while revealing that tender potato interior waiting to be filled with deliciousness. After cutting them open, gently scoop out a small well in each half using either a small spoon or melon baller. This technique allows you to create just enough space for that creamy filling without compromising the integrity of each potato half.
As you scoop out the insides, be mindful not to dig too deep—you want enough potato flesh remaining to provide body and balance against the whipped feta mixture. As you’re working through this step, envision how beautifully these will present themselves on your serving platter when garnished with those vibrant blue corn chips! It’s like sculpting edible art! If you encounter any resistance while scooping, don’t rush this step; slow down and adjust your technique rather than forcing it. After all, we want every bite to be profoundly satisfying and bursting with flavor. Once all halves are hollowed out, give yourself a moment to appreciate how lovely they look—the vibrant red skins contrasting with their creamy centers create quite an inviting sight.
Step 7: Filling Your Potatoes – The Art of Assembly
Now comes one of my absolute favorite parts—stuffing these adorable potato halves with our whipped feta mixture! Using either a spoon or piping bag (if you’re feeling fancy), fill each well generously with that luscious filling we prepared earlier. If you’re using a spoon, take care to mound it up slightly above the edges of each potato half—think of it as creating little clouds of creamy goodness atop each red vessel! This presentation aspect is vital because it not only enhances visual appeal but also guarantees an explosion of flavor in every single bite.
If you choose to pipe the filling instead (a fun option if you’re looking to impress!), simply transfer your whipped feta mixture into a piping bag fitted with a star tip or even just a round tip will do. Pipe away until you’ve created beautiful peaks on top of each potato half—it’ll look like they’re adorned with fluffy pillows! I promise you this extra touch transforms them from simple snacks into elegant hors d’oeuvres perfect for any gathering or celebration. Just remember not to overfill them; we want balance here—the goal is for every forkful to bring together all those flavors without overwhelming anyone’s taste buds.
Step 8: Topping It Off – The Crunch Factor
At long last, it’s time for our final flourish—the crowning glory atop our deviled potatoes—a generous pinch of crushed blue corn tortilla chips! These chips add not just an irresistible crunch but also bring in that striking blue hue which ties perfectly into our festive theme. To crush them effectively without turning them into dust (we want texture!), place the chips inside a resealable plastic bag and gently use a rolling pin or even your hands to break them down until they’re finely crushed but still have some larger bits for added texture.
Sprinkle those crunchy bits over each filled potato half with reckless abandon—this is where creativity shines! The contrast between creamy and crunchy creates an utterly intoxicating experience for both your palate and guests’ eyes as they marvel at these stunning bites laid out before them on your serving platter. Don’t shy away from being generous here; after all, who doesn’t love that satisfying crunch paired with creamy goodness? Also consider arranging some lemon wedges around your platter for garnish—they add brightness both visually and in terms of flavor should anyone wish for an extra zesty kick!
Final Touches: Serving Your Red, White, and Blue Deviled Potatoes
Once you’ve arranged all those beautifully stuffed potatoes on their serving platter (and maybe snuck one or two bites along the way—it’s only fair!), you have two options ahead: serve them immediately or refrigerate them for up to four hours before serving if you’re preparing ahead of time for an event. Chilling these delightful bites allows flavors to meld even further—a transformative effect where they become more cohesive yet still retain their delicious individuality when tasted fresh out of refrigeration.
When you’re ready to serve those crowd-pleasers at your gathering, simply remove from refrigeration about 20 minutes prior so they can come slightly closer to room temperature; this helps amplify their flavors upon tasting.
Every bite promises an exciting burst of flavor complemented by crispy textures—a true symphony begging everyone at your table to reach back for just one more! I assure you—that first bite will leave everyone asking how something so simple could be so extraordinarily delicious! So go ahead and gather friends around—these Red, White, and Blue Deviled Potatoes are destined to become an unforgettable highlight at any gathering or celebration!
Storage and Enjoyment Tips for Your Red, White, and Blue Deviled Potatoes
Now that you’ve crafted these delightful Red, White, and Blue Deviled Potatoes, it’s time to enjoy the fruits of your labor! I mean, who wouldn’t be excited to dig into these vibrant, mouthwatering bites? They’re not just a feast for the eyes; they are a celebration of flavors waiting to be savored at your next gathering. But what if you have some leftovers? Not to worry, my friend! Let’s talk about how to keep these delectable treasures fresh and enjoyable.
Storing Leftover Red, White, and Blue Deviled Potatoes
When it comes to storing your precious Red, White, and Blue Deviled Potatoes, the key is in choosing the right container. I recommend using an airtight glass container to preserve their freshness while allowing you to see those tempting layers of creamy goodness peeking through. These little beauties can be stored in the refrigerator for up to four days without losing their charm. To maintain their quality even longer—trust me on this—you can place a slice of bread in the container with them; it helps absorb excess moisture and keeps them from getting soggy. As for how they taste after storage? They hold up beautifully! The flavors meld together even more profoundly after a day or two in the fridge, creating an unmistakably satisfying bite that is just as delightful as when they were freshly made. If you want a warm experience again, gently reheat them in the oven at low heat for about 10 minutes before serving; they’ll regain that lovely texture!
Freezing Red, White, and Blue Deviled Potatoes for Later
If you want to plan ahead—or simply want an easy snack on hand—freezing your Red, White, and Blue Deviled Potatoes is definitely a fantastic option! To freeze them properly, arrange the filled potato halves on a baking sheet lined with parchment paper so they don’t stick together. Once they’re frozen solid (about 2 hours), transfer them into a freezer-safe bag or container. They will stay good for up to three months in the freezer. When you’re ready to indulge again, simply take out however many you desire and allow them to thaw in the refrigerator overnight. For a quick serve-with-a-snap moment at your next party or gathering, pop them directly into a preheated oven at 350°F until warmed through—what convenience! This way, you always have an impressive appetizer at your fingertips that will wow your family and friends!
Red, White, and Blue Deviled Potatoes

Celebrate with our vibrant Red, White, and Blue Deviled Potatoes—a delicious twist that’s perfect for gatherings. Try this recipe today!
- Prep Time: 15 minutes
- Cook Time: 25 minutes
- Total Time: 40 minutes
- Yield: Approximately 24 servings (12 potato halves) 1x
- Category: Appetizer
- Method: Baking
- Cuisine: American
Ingredients
- 12 baby red potatoes
- 4 ounces cream cheese (softened)
- 6 ounces feta cheese (crumbled)
- 1 clove garlic (grated or finely minced)
- 1 tablespoon lemon juice (freshly squeezed)
- 1/8 teaspoon black pepper
- 1/3 cup finely crushed blue corn tortilla chips
- Lemon wedges for garnish (optional)
Instructions
- Preheat your oven to 400°F (200°C).
- Wash the baby red potatoes and place them on a baking sheet. Bake for about 25 minutes until fork-tender.
- Allow the potatoes to cool completely before slicing each in half lengthwise and scooping out a small well in each half.
- In a food processor, blend the softened cream cheese, crumbled feta, grated garlic, lemon juice, and black pepper until smooth.
- Fill each potato half generously with the whipped filling.
- Top with crushed blue corn tortilla chips and garnish with lemon wedges if desired.
Nutrition
- Serving Size: 1 potato half (30g)
- Calories: 74
- Sugar: 0g
- Sodium: 150mg
- Fat: 4g
- Saturated Fat: 2g
- Unsaturated Fat: 2g
- Trans Fat: 0g
- Carbohydrates: 8g
- Fiber: 1g
- Protein: 2g
- Cholesterol: 10mg