Butterbeer cheesecake
There’s something profoundly magical about food that stirs not just our appetites but also our souls. It’s more than nourishment; it’s a bridge to memories, a celebration of moments, and an expression of love. Now, when I talk about the Butterbeer cheesecake, I’m not just sharing a recipe; I’m inviting you into an experience—a delightful journey inspired by the enchanting world of wizards and wonder. Imagine sinking your fork into a velvety slice, where the rich flavors of butterscotch swirl around in harmony with the creamy cheesecake, evoking nostalgia and joy with every bite. This dessert is not merely food; it’s a revelation that can transform an ordinary day into something extraordinary.
This Butterbeer cheesecake is like a warm embrace on a chilly evening; it’s comforting yet exciting, familiar yet unique. It draws upon the beloved flavors of butterscotch and cream soda, reminiscent of those cozy scenes from our favorite stories. Perfect for gatherings with friends or as a special treat for yourself after a long day, this cheesecake is bound to create smiles and spark conversations. Trust me when I say that once you take that first bite, you’ll understand why this dessert has captured hearts—it’s truly an enchanting blend of flavors that beckons everyone to indulge.
Butterbeer Cheesecake: A Slice of Enchantment
Get ready to embark on a delightful culinary adventure with this Butterbeer cheesecake recipe! It’s simple enough for even novice bakers yet impressively delicious to wow seasoned dessert lovers. Picture yourself whipping up this dreamy dessert while laughter fills the air, creating memories that are as sweet as the treat itself.
Ingredients:
As we gather our ingredients, know that each one plays a vital role in bringing this Butterbeer cheesecake to life. Let’s dive into what makes each component so special!
- 2 cups graham cracker crumbs. These little bits of crunchy goodness form the foundation of our cheesecake crust. When mixed with melted butter and sugar, they create a base that’s both buttery and slightly sweet—perfect for balancing out the creamy richness of the filling. Look for finely crushed crumbs for a smoother texture; if you can’t find them pre-crushed, simply pulse whole graham crackers in your food processor until they resemble sand.
- 1/4 cup granulated sugar. This sweetener adds just the right amount of sweetness to our crust, enhancing its flavor while complementing the rich filling above it. Remember, sugar doesn’t just sweeten—it also contributes to moisture retention and browning during baking.
- 1/2 cup unsalted butter, melted. The unsung hero here! Using unsalted butter allows us to control the saltiness in our dish while lending richness to both crust and filling alike. Melted butter binds everything together beautifully; don’t rush this step! Make sure it cools slightly before mixing with other ingredients so we don’t risk cooking any eggs prematurely.
- 4 (8 oz.) packages cream cheese, softened. Cream cheese is essential for achieving that luxurious texture we crave in cheesecake—rich and creamy without being overly heavy. Softening it allows for easier blending and ensures no lumps remain in your final batter—a crucial element for smoothness! Look for full-fat versions for optimal flavor; trust me on this one!
- 1/2 cup sour cream. This tangy addition elevates our cheesecake by adding depth and complexity to its flavor profile while contributing to its creamy texture. The acidity in sour cream cuts through sweetness beautifully, creating balance—a non-negotiable trait in exceptional desserts!
- 3 large eggs. Eggs provide structure and stability as they bake; they help achieve that beautiful airy consistency we desire without being dense or heavy. Be sure they’re at room temperature before adding them to ensure they blend seamlessly into your mixture.
- 2 cups granulated sugar. Here comes more sweetness! This sugar not only sweetens our filling but also plays a critical role in achieving that silky smooth texture we’re aiming for—just make sure to gradually incorporate it so it dissolves perfectly during mixing.
- 1/2 tablespoon vanilla extract. A splash of vanilla adds warmth and rounds out all those flavors beautifully! Always use pure vanilla extract when possible; it’s worth every drop as it enhances both aroma and taste dramatically.
- 1/2 tablespoon butter flavoring. While we’re focusing on butterscotch here, adding a touch of butter flavoring enhances those notes further—think of it as liquid gold! It brings richness reminiscent of freshly baked goods straight from grandma’s kitchen.
- 1/2 cup butterscotch sauce. Oh yes! This is where we infuse our cheesecake with that signature butterscotch flavor—the essence of our inspiration! You can make your own or use store-bought; either way works perfectly when drizzled throughout or swirled within.
- 1/2 cup butterscotch chips. These delightful morsels add texture and bursts of flavor throughout each slice—melting smoothly into the batter creates pockets of deliciousness! If you can find them, consider using dark butterscotch chips for added depth.
- 8oz tub of Cool Whip (or similar whipped topping). Topping off your cheesecake with whipped topping not only makes it look inviting but also adds lightness against the denser filling below—creating an enticing contrast that’s hard to resist!
- 1/4 cup cream soda. Ahh… here’s another nod toward our magical beverage! This fizzy addition brings subtle sweetness along with intriguing flavor notes—don’t underestimate its impact!
Equipment You’ll Need:
Having the right tools at hand makes all the difference when creating delectable desserts like this Butterbeer cheesecake! While these items may not be ingredients per se, they are essential partners in crafting perfection in your kitchen space.
- 8-inch springform pan – This pan is crucial because it allows easy release after baking—you’ll want those pristine edges visible when serving guests! If you don’t have one handy, consider using a regular cake pan lined with parchment paper instead.
- Mixing bowls (various sizes) – A set comprising different sizes will streamline your process as you’ll need separate bowls for mixing crust ingredients versus your filling components—organization is key!
- Electric mixer or whisk – For beating cream cheese until smooth—the former definitely saves time if you’re making larger quantities or want fluffier results without too much elbow grease involved!
- Spatula – An essential tool in my kitchen arsenal; perfect for scraping down sides between mixing tasks ensuring nothing gets left behind—no lumps allowed here!
Preparing the Butterbeer Cheesecake
Step 1: Preheat Your Oven
First things first—we’re going to preheat your oven to 325°F (160°C). This step might seem trivial but trust me: starting with an adequately heated oven ensures even cooking throughout our cheesecake once it’s time to bake! While that’s warming up, let’s gather our other ingredients so we’re fully prepared when it’s showtime.
Step 2: Create Your Crust
In a mixing bowl big enough to accommodate some vigorous stirring (I always opt for larger!), combine those graham cracker crumbs with 1/4 cup granulated sugar and melted butter until everything is thoroughly mixed together—you want it resembling damp sand here! Then gently press this mixture evenly across the bottom of your springform pan using fingers or measuring cups (whatever feels good!). Make sure it’s tightly packed because this forms the backbone supporting all that glorious creamy goodness above—it’s crucial not only structurally but also texturally!
Step 3: Beat Your Cream Cheese
Now let’s get into some serious business—grab another large mixing bowl (preferably one deep enough) where we’ll beat together four packages of softened cream cheese until it’s irresistibly smooth—this process usually takes about 2 minutes at medium speed if you’re using an electric mixer—or longer if doing by hand with a whisk (just put some love into those arm muscles!). This step is absolutely paramount since ensuring there are no lumps here will lead us toward silky results later on… nobody wants bitsy cheese surprises lurking amid their luscious dessert!
Step 4: Mix In The Good Stuff
Once you’ve achieved that dreamy consistency from step three—and patience pays off here—we’ll slowly add half-cup sour cream followed by two cups granulated sugar while continuing to mix well until every ingredient shines happily together like old friends reunited after years apart… Next comes adding three large eggs one at time ensuring complete incorporation after each addition—you should see everything swirling together becoming fluffy perfection! Finally stir in vanilla extract alongside butter flavoring before folding through half-cup butterscotch sauce along with cream soda then lastly tossing in those delightful little butterscotch chips—they bring extra joy within every slice waiting ahead!
And there you have it—the foundation laid beautifully awaits its crown atop graham cracker crust below… Stay tuned as we continue crafting this masterpiece together because trust me—it gets even better from here on out!
Step 5: Creaming Together the Ingredients
Now that your crust is beautifully pressed into the springform pan, it’s time to turn our attention to the magic of the cheesecake filling itself. Begin by placing your softened cream cheese into a large mixing bowl. This is where all of those delightful flavors will come together in a creamy symphony of perfection. Using an electric mixer, beat the cream cheese on medium speed until it’s incredibly smooth and free from any lumps—this should take about 2-3 minutes. Why is this step so crucial? Well, achieving that silky texture in your cheesecake base is absolutely paramount; it ensures that every slice is rich and indulgent without any unpleasant graininess.
Next up, add in the sour cream. It might seem like a small addition, but trust me, it makes a world of difference! The sour cream adds a subtle tanginess that perfectly balances the sweetness of the butterscotch and cream soda we’ll be incorporating later. Continue to beat this mixture until fully combined—don’t rush this step! You want everything to meld together seamlessly into a luxurious filling that you’ll be proud to serve. Once smooth, carefully scrape down the sides of your bowl to ensure no rogue bits of cream cheese escape this delicious concoction.
Step 6: Sweetening the Deal
Now comes the moment when we bring some sweetness into our lives—literally! Gradually add in 2 cups of granulated sugar while continuing to mix on low speed. It’s essential to do this gradually because you want each grain of sugar to dissolve thoroughly before moving on; this not only enhances texture but also helps prevent that gritty sensation that can ruin an otherwise perfect cheesecake. As you mix, you’ll notice how the consistency begins to change, becoming even more velvety as air gets incorporated into your filling.
Once you’ve added all the sugar, increase your mixer’s speed slightly and let it whip for another minute or two until everything is well-combined and fluffy. Here’s a little tip: if you find yourself getting impatient during this process, just remember that taking your time now will lead to a profoundly satisfying cheesecake later on. Once you’ve achieved an irresistibly creamy mixture, it’s time for the next step—the addition of our eggs!
Step 7: The Egg-cellent Addition
This part may seem simple, but don’t underestimate its importance—add three large eggs one at a time into your luscious filling. Make sure each egg is fully mixed in before adding the next; this gradual approach allows for better incorporation and prevents overmixing, which can lead to cracks during baking (and nobody wants that!). As you beat in each egg, pay close attention to the transformation occurring in your bowl; the mixture will become lighter in color and fluffier with each addition.
What makes this step so special is not just about binding the ingredients together—it’s about creating structure. Eggs act as both a binder and a leavener here, providing stability while also allowing your cheesecake to rise slightly during baking. Once all three eggs are smoothly incorporated, take a moment to admire how beautifully creamy and consistent your filling has become—it’s truly extraordinary!
Step 8: Infusing Flavor with Care
Now we’re entering what I like to call “the flavor explosion” phase! Gently stir in half a tablespoon each of vanilla extract and butter flavoring. These ingredients are non-negotiable for achieving that signature butterbeer taste; they bring warm, comforting notes that will elevate every bite of your cheesecake beyond ordinary dessert status. As you stir them in using a spatula or wooden spoon (no need for electric mixers here), allow yourself to inhale deeply—the aroma wafting from your bowl should be utterly intoxicating!
Next up is where we really start channeling our inner wizard: pour in half a cup of butterscotch sauce and a quarter cup of cream soda along with those delightful butterscotch chips! I promise you; these additions create an enchanting blend reminiscent of warm tavern evenings filled with laughter and good cheer. Stir gently until everything is fully combined and visually appealing—a beautiful swirl of colors indicating all those flavors are ready to mingle together beautifully.
Final Touches
Step 12: Decorating Your Masterpiece
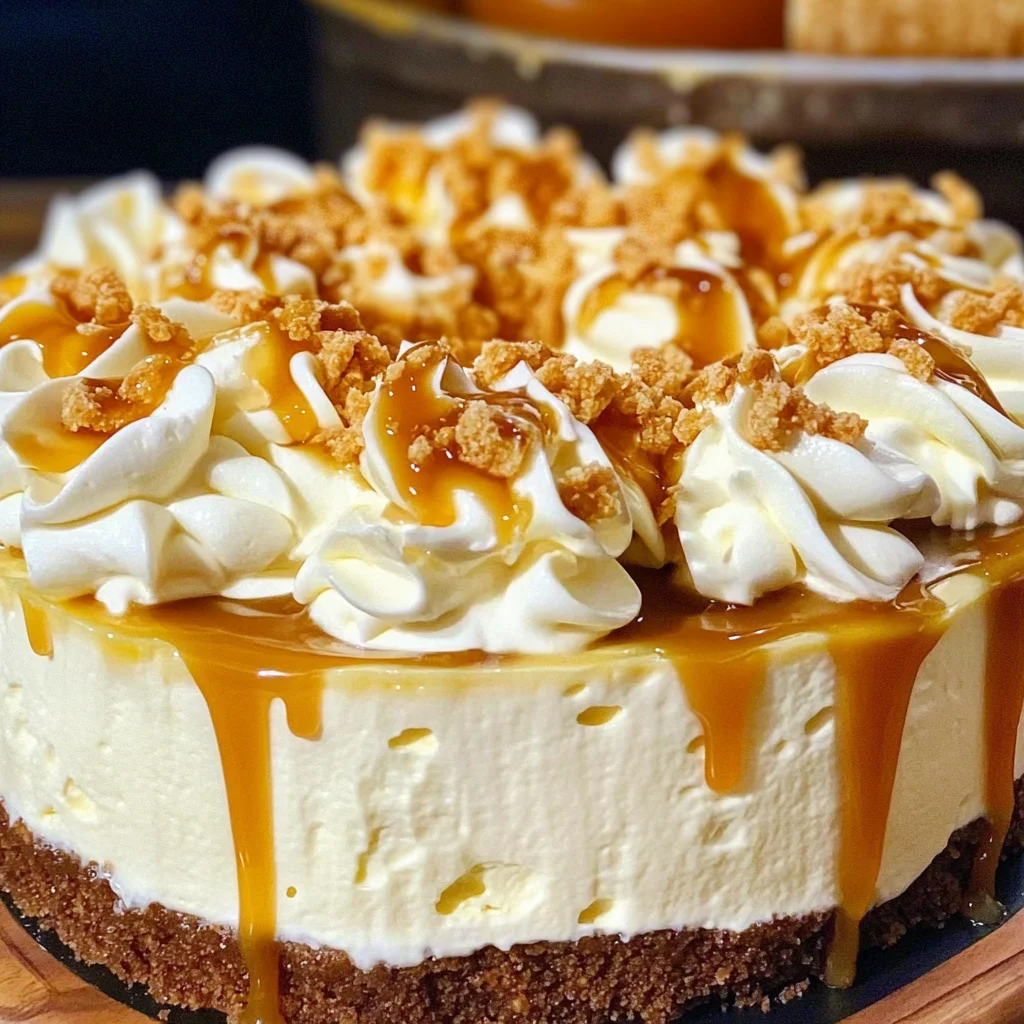
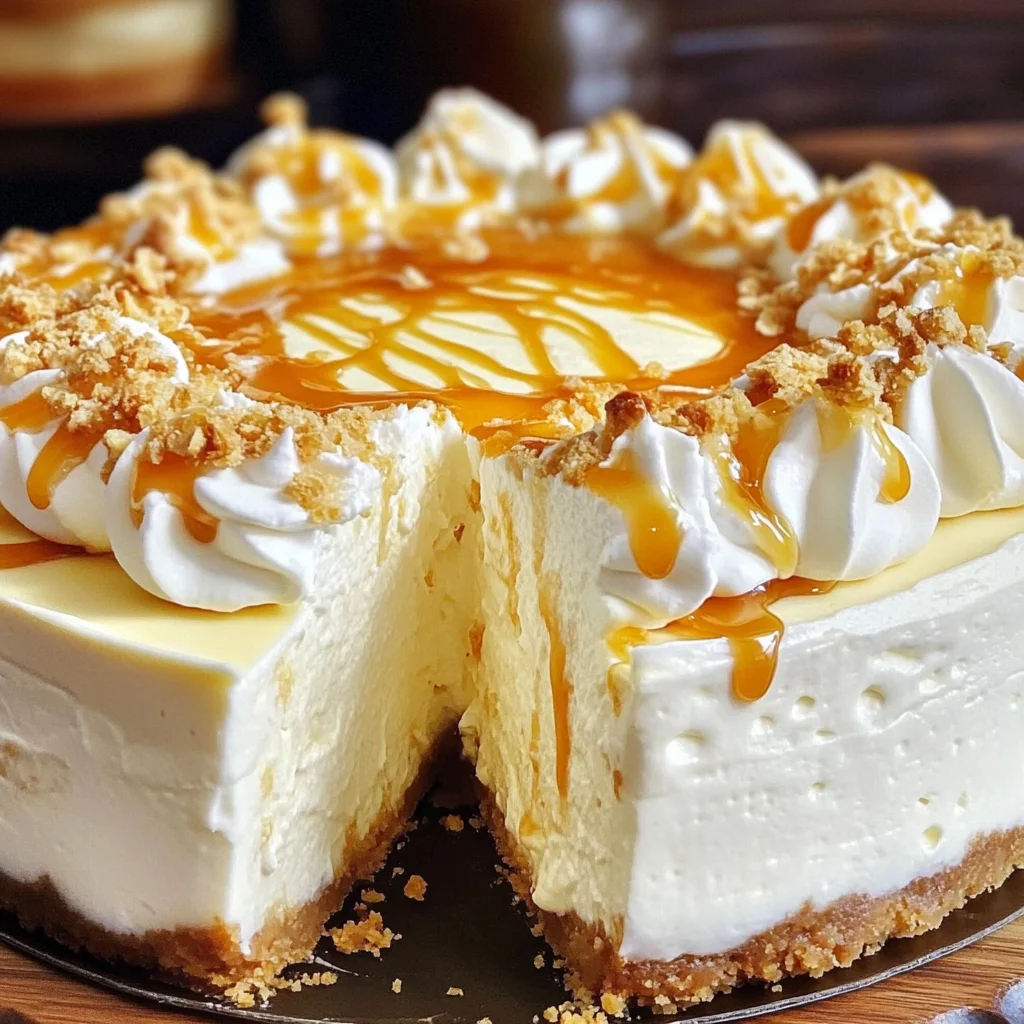
Finally! After all that anticipation—and oh-so-long waiting—it’s time for perhaps one of my favorite parts: adorning our beautiful Butterbeer cheesecake with Cool Whip! When you’re ready to serve up slices of happiness, grab an 8-ounce tub of Cool Whip from its chilly resting place in the freezer; allow it just enough time outside its frosty abode so it’s pliable yet still holds its shape nicely as you pipe away.
Using either a piping bag fitted with decorative tips or simply dolloping generous amounts around edges works wonders here—as does creating swirls filled generously inside while topping off with additional drizzles of butterscotch sauce over top! Just think about how utterly delightful each bite will be amidst all these textures mingling together; I can’t help but get giddy merely imagining my friends’ reactions when they dive into their first slice.
So there you have it—your very own Butterbeer Cheesecake masterpiece ready to be devoured by those who are lucky enough around you! Each bite promises warmth wrapped up in nostalgia akin to sharing tales around flickering hearths after long days spent adventuring through magical lands… Enjoy every decadent morsel—you’ve earned it!
Storage and Enjoyment Tips for Your Butterbeer cheesecake
Now that your Butterbeer cheesecake has transformed from a simple collection of ingredients into a heavenly dessert, it’s time to indulge! But what happens if you have leftovers? That’s the best part—this delightful creation keeps beautifully, allowing you to enjoy its magic even after the initial excitement fades. Let’s dive into how to preserve this creamy treasure so you can savor every enchanting bite, even days later.
Storing Leftover Butterbeer cheesecake
To keep your Butterbeer cheesecake fresh and delicious, I recommend transferring any leftovers into an airtight container or wrapping it tightly in plastic wrap. It can be stored in the refrigerator for up to one week; however, I promise you, it rarely lasts that long in my house! The flavors meld together beautifully as it sits, making each slice a little more sumptuous than the last. One of my favorite pro tips is to place a slice of bread alongside the cheesecake in the container—this helps maintain moisture and prevents any unwanted drying out. When you finally take a slice out after a few days, you’ll notice how the luscious layers still retain their rich creaminess and that intoxicating butterscotch flavor shines through. For serving, simply let it warm slightly at room temperature before indulging again; trust me on this—it enhances the texture and brings those flavors back to life!
Freezing Butterbeer cheesecake for Later
If you find yourself with more than enough Butterbeer cheesecake to enjoy right away (though I know this is a challenge!), freezing is a fantastic option. To freeze your cheesecake properly, first ensure it’s cooled completely—then wrap individual slices in plastic wrap tightly before placing them in a freezer bag or airtight container. This way, they’re protected from freezer burn and can be kept frozen for up to three months! When you’re ready to enjoy another slice of this magical dessert, simply transfer it from the freezer to the refrigerator overnight to defrost gently. The convenience of having these decadent slices at your fingertips makes this method truly appealing—you’ll have an enchanting treat ready for surprise guests or those late-night cravings that strike when you least expect them!
Butterbeer Cheesecake
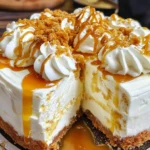
Indulge in our creamy Butterbeer cheesecake—a delightful dessert that captures the essence of nostalgia while enchanting your taste buds. This cheesecake blends rich butterscotch flavors with a velvety cream cheese base, creating an extraordinary treat perfect for gatherings or to enjoy all by yourself. The comforting graham cracker crust provides a crunchy foundation, balancing the creamy filling beautifully. With each slice, you’ll experience a magical journey reminiscent of cozy moments shared with friends and family. Easy to make and oh-so-impressive, this Butterbeer cheesecake is bound to become a favorite at celebrations or any day you crave a touch of sweetness.
- Prep Time: 30 minutes
- Cook Time: 60 minutes
- Total Time: 1 hour 30 minutes
- Yield: Serves approximately 12 slices 1x
- Category: Dessert
- Method: Baking
- Cuisine: American
Ingredients
- 2 cups graham cracker crumbs
- 1/4 cup granulated sugar
- 1/2 cup unsalted butter, melted
- 4 (8 oz.) packages cream cheese, softened
- 1/2 cup sour cream
- 3 large eggs
- 2 cups granulated sugar
- 1/2 tablespoon vanilla extract
- 1/2 tablespoon butter flavoring
- 1/2 cup butterscotch sauce
- 1/2 cup butterscotch chips
- 8 oz. tub of Cool Whip (or similar whipped topping)
- 1/4 cup cream soda
Instructions
- Preheat oven to 325°F (160°C).
- In a mixing bowl, combine graham cracker crumbs, sugar, and melted butter. Press mixture into the bottom of a springform pan.
- Beat cream cheese until smooth in another bowl. Gradually mix in sour cream and sugar until well combined.
- Add eggs one at a time, mixing well after each addition, followed by vanilla extract and butter flavoring.
- Fold in butterscotch sauce, cream soda, and butterscotch chips until incorporated.
- Pour filling over the crust and smooth the top.
- Bake for about 60 minutes or until edges are set with a slight jiggle in the center.
- Allow cooling in the oven for an hour before refrigerating for at least four hours or overnight.
- Top with whipped topping before serving.
Nutrition
- Serving Size: 1 slice (120g)
- Calories: 380
- Sugar: 30g
- Sodium: 300mg
- Fat: 25g
- Saturated Fat: 15g
- Unsaturated Fat: 10g
- Trans Fat: 0g
- Carbohydrates: 35g
- Fiber: 1g
- Protein: 5g
- Cholesterol: 90mg