Lime Sugar Cookies
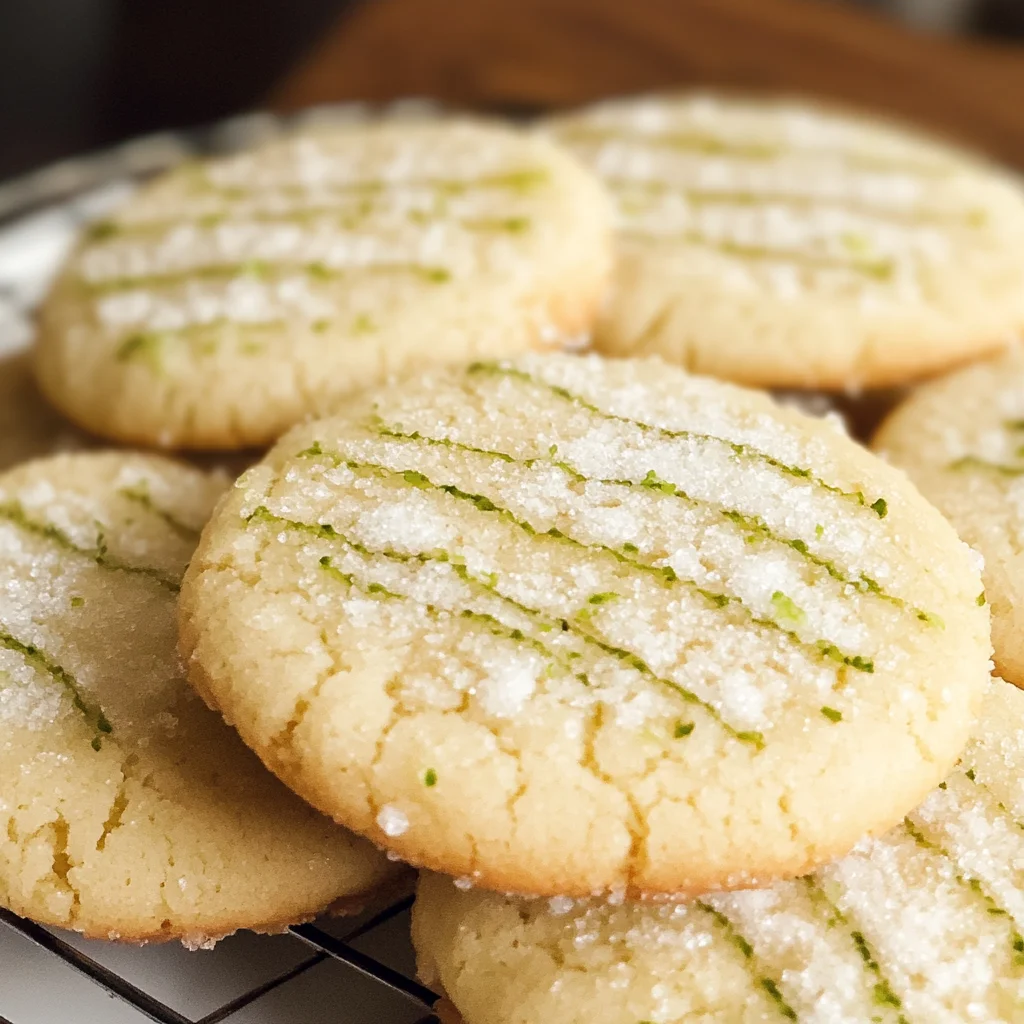
When it comes to baking, there are truly few things more uplifting than the aroma of freshly baked cookies wafting through the air. These Lime Sugar Cookies are not just your average treat; they are a symphony of flavors that dance on your palate, blending the sweetness of sugar with the tart brightness of lime. Picture this: vibrant green cookie dough rolled in sparkling sugar, each bite delivering a delightful chewiness that melts in your mouth. The inclusion of fresh lime juice and zest makes these cookies not only irresistibly tasty but also refreshingly unique. I promise you, once you experience these little bursts of sunshine, they’ll become a cherished favorite in your baking repertoire.
The joy of baking is often about sharing moments with loved ones, isn’t it? This recipe for Lime Sugar Cookies has a special place in my heart because it embodies those warm gatherings filled with laughter and love. Each cookie captures the essence of summer days spent outdoors, where laughter mingles with the zesty aroma of citrus. These cookies are perfect for any occasion—be it a casual family gathering or an elegant afternoon tea—making them wonderfully versatile. So let’s roll up our sleeves and embark on this culinary journey together, one that promises not just delicious cookies but also cherished memories.
Lime Sugar Cookies: A Bright Twist on a Classic
Let’s dive into this delightful recipe! These Lime Sugar Cookies are soft and chewy with an exhilarating lime flavor that will have you coming back for seconds (and thirds!). They are incredibly easy to make and come together quickly, making them perfect for both novice bakers and seasoned pros alike. Plus, who can resist rolling cookie dough in sugar until it sparkles like little gems? Trust me; this is going to be fun!
Ingredients:
As we gather our ingredients, think of each element as an essential note in our sweet symphony. Each one plays a pivotal role in creating the ultimate Lime Sugar Cookie experience.
- ½ cup (1 stick or 113g) unsalted butter, softened. This is crucial for creaming properly and creating that light, airy texture we’re aiming for in our Lime Sugar Cookies. If your butter is too cold, it won’t cream effectively; if it’s melted, your cookies will spread too much instead of holding their beautiful shape. For the richest flavor and best results, opt for high-quality butter—European-style butter with higher fat content will elevate your cookies to another level!
- 1 cup (200g) granulated sugar. This ingredient does more than just sweeten; it helps achieve that lovely crispiness on the outside while maintaining a tender interior. The granulated sugar also contributes to the beautiful caramelization during baking, giving those edges a delightful crunch that contrasts wonderfully with the chewy center.
- ¼ tsp baking soda. As a leavening agent, baking soda works its magic by helping our cookies rise slightly during baking. This process creates that signature soft texture we adore in sugar cookies. It’s important not to skip this step because without it, you might end up with flat cookies rather than fluffy ones!
- ¼ tsp cream of tartar. This ingredient plays a vital role by stabilizing our dough and enhancing its texture. It reacts with the baking soda to create carbon dioxide bubbles that contribute to that lovely lift we want from our cookies while also adding subtle tanginess which complements the lime beautifully.
- ¼ tsp salt. Just like music needs harmony, every dessert needs a pinch of salt to balance out sweetness and enhance flavors. Salt elevates all other ingredients; without it, your cookies may taste flat or one-dimensional.
- 1 large egg. Eggs provide moisture and richness while binding everything together perfectly. The proteins in eggs help structure our cookies as they bake and give them that delightful chewiness we’re after.
- ½ tsp vanilla extract. Ahh… vanilla is like a warm hug for your taste buds! Its aromatic quality rounds out the flavors beautifully without overpowering the vibrant lime notes present in these cookies. Always use pure vanilla extract when possible—it makes all the difference!
- 1 lime (all juice and zest). Here comes the star of our show! Fresh lime juice adds brightness and acidity that cuts through sweetness while zest gives us those essential oils packed with flavor—this duo creates an utterly intoxicating balance we can’t resist! Make sure to choose firm limes for maximum juiciness.
- 1 ½ cups (190g) all-purpose flour. This is essential for providing structure to our cookies without making them too dense or dry. When measuring flour, be gentle—use a spoon to fluff it up before scooping into your measuring cup so you get just the right amount without packing too tightly.
- 1-2 drops green food coloring (optional). While completely optional, adding green food coloring can enhance visual appeal by emphasizing that fresh lime vibe! Just remember—less is more here; you want a subtle hint rather than neon green!
- 1 tbsp butter (melted) & 1 lime (juice only) combined with ¼ – ⅓ cup powdered sugar create a simple glaze if you’d like to dress up your cookies further after baking! It adds an extra layer of sweetness while keeping things bright thanks to fresh lime juice—you won’t regret trying it!

Equipment You’ll Need:
Now that we’ve gathered our ingredients let’s talk tools! Having the right equipment makes this entire process smoother and more enjoyable—a well-equipped kitchen can turn even novice cooks into confident bakers.
- Mixing bowl – A large mixing bowl is essential for combining ingredients without fear of spills! Opt for glass or stainless steel since they’re easy to clean—and trust me; you’ll want enough room so you don’t feel cramped while mixing.
- Electric mixer or whisk – An electric mixer saves time and effort when creaming butter and sugar together, ensuring everything blends evenly—if you’re feeling adventurous or nostalgic though, using a whisk works just as well! Just be prepared for some arm workout action!
- Measuring cups & spoons – Accurate measurements are paramount in baking success—investing in good quality measuring cups ensures you’re always ready to tackle any recipe accurately!
- Zester/grater – A microplane zester makes zesting lemons or limes effortless—the finer grating releases more oils which means brighter flavors packed into every cookie bite!
- Baking sheets lined with parchment paper – Lining your sheets helps prevent sticking while also allowing even heat distribution during baking—it’s non-negotiable if you want perfectly shaped cookies!
With these tools at hand and enthusiasm brewing within us, let’s dive into preparing those glorious Lime Sugar Cookies!
Preparing the Lime Sugar Cookies
Step 1: Creaming Butter and Sugar Together
First things first: let’s create that gorgeous base by creaming together our softened butter and granulated sugar! In your mixing bowl (whether using an electric mixer or whisk), combine these two ingredients until they’re light and fluffy—aim for about 2–3 minutes on medium speed if using an electric mixer. This process is known as creaming; it helps incorporate air into the mixture which results in lighter cookies once baked! You’ll know you’ve reached perfection when it’s pale yellow in color with a slightly whipped texture resembling clouds—trust me on this step; don’t rush through it because this airiness contributes immensely to achieving those dreamy chewy centers!
Step 2: Adding Leaveners & Egg
Now it’s time to elevate everything further by adding our baking soda along with cream of tartar plus salt—all essential components working together harmoniously here! Mix thoroughly until combined before cracking in one large egg followed by half teaspoon vanilla extract—this particular combination enriches both flavor profile AND texture even more as egg proteins bind all deliciousness tightly during baking magic! Once added continue mixing until fully incorporated—you want no visible streaks left behind before moving onto showcasing refreshing limes next!
Step 3: Zesting & Juicing Limes
It’s time now for what makes these cookies truly special—the luscious zests & juices from fresh limes! Grab one firm lime first—using either zester or microplane carefully grate off its outer green peel until you reach white pith underneath (that part’s bitter so avoid!). Add this fragrant zest right into dough mixture before squeezing out all juicy goodness from same fruit directly afterward—you’ll be amazed at how such vibrant flavors elevate everything around them instantaneously… Remember though: zest before juicing as getting juice everywhere might make zesting difficult later on!
Step 4: Incorporating Flour
Next up: we need some structure around these heavenly delights! Gradually add flour into mixture whilst stirring gently using spatula until fully combined—I recommend doing this bit-by-bit rather than dumping entire amount at once as overmixing could yield tough results instead of soft chews we desire here within Lime Sugar Cookies realm… And don’t forget: scraping down sides regularly ensures no hidden pockets remain undetected either which might lead towards uneven textures come bake time later down road ahead!!
By now you’ve made significant strides towards crafting those delightful treats already—and we haven’t even started chilling yet… Stay tuned friends—we’re almost there!!
Step 5: Rolling and Coating for Sweet Success
Now, this next step is where the magic truly begins to unfold! After your dough has had its well-deserved chill time of about two hours, it will have firmed up nicely. This chilling process is absolutely crucial because it allows the butter to solidify, which helps the cookies maintain their shape while baking. Trust me on this—when you skip chilling, you can end up with flat, sad cookies instead of the soft, chewy delights we crave. So, let’s get rolling!
Using a tablespoon or a cookie scoop (my personal favorite for uniformity), take a generous scoop of dough and roll it into a perfect ball in your hands. You’ll want to feel that slight stickiness from the dough; it’s a sign that all those wonderful ingredients are coming together beautifully. Once you’ve shaped your dough balls, it’s time for the fun part: rolling each ball in sugar! Grab a bowl filled with granulated sugar and gently roll each dough ball until it’s completely coated. This not only adds an extra layer of sweetness but also creates that delightful crunch on the outside when baked—an utterly intoxicating textural contrast to the soft interior. Don’t rush this step; take your time to ensure each cookie is well-coated, as this is what gives them that sparkling look and enhances their flavor profile.
Step 6: Arranging for Optimal Baking
With your deliciously sweetened dough balls ready to go, now we need to arrange them on a lined baking sheet. Preheat your oven to a robust 375°F (190°C) while you prepare your cookie sheet. I recommend using parchment paper or a silicone baking mat because they provide an excellent non-stick surface and help prevent any over-baking. Place your sugar-coated dough balls on the baking sheet, leaving about two inches of space between each one—this is important! As they bake, they will spread out beautifully, and if they’re too close together, you’ll end up with one giant cookie instead of individual delights.
At this stage, take a moment to admire how lovely these little spheres look on your baking sheet. It’s like preparing little treasures for the oven! Once you’ve arranged them carefully, slide that sheet into the preheated oven and set a timer for 8-10 minutes. This part can be nerve-wracking because you’re so close to tasting these Lime Sugar Cookies! Keep an eye on them towards the end; you want them to be lightly golden around the edges but still soft in the center. If they start browning too much in the middle, pull them out immediately—remember that residual heat will continue cooking them even after they’ve left the oven.
Step 7: The Art of Glazing
As those beautiful cookies emerge from the oven, I promise you’ll be tempted to dive right in! But wait just a moment longer; we’ll add an unforgettable glaze that elevates these cookies from delightful to extraordinary! To prepare your glaze while those cookies cool slightly (about 5 minutes), combine freshly squeezed lime juice with powdered sugar in a small bowl. You want it thick enough to cling beautifully to the cookies but still pourable—think of it as liquid sunshine! If it’s too thick, add just a drop more lime juice until you reach that perfect consistency.
Once your cookies have cooled for just long enough to handle without burning fingers (but still warm enough so that they can absorb some glaze), drizzle or brush this luscious mixture over each cookie generously but delicately. The warmth from the cookies will cause the glaze to melt slightly and create an enchanting glossy finish that adds both sweetness and tanginess—a symphony of flavors dancing together in every bite. Remember not to skimp on this step; it transforms ordinary cookies into showstoppers!
Step 8: Cooling and Enjoying Your Masterpieces
Now comes one of my favorite parts—the waiting game (I know, I know!). Allowing your glazed Lime Sugar Cookies to cool completely on a wire rack might feel like torture if you’re eager for that first bite, but trust me—it’s utterly worth it! Cooling helps solidify that glorious glaze and ensures that each cookie retains its delightful chewy texture rather than becoming soggy from steam trapped underneath.
As they cool, take a moment to appreciate their captivating aroma wafting through your kitchen; there’s nothing quite like it! When they’re finally ready—and I mean truly ready—grab one (or two!) and take that first bite. You’ll experience an explosion of zesty lime flavor balanced perfectly with sweetness—a truly extraordinary treat that’s ideal for any occasion or simply as an indulgent pick-me-up during your day. These Lime Sugar Cookies are not just desserts; they’re memories waiting to happen with every batch shared among friends and family alike!
Final Touches: Savor Each Bite
And there you have it—your very own batch of Lime Sugar Cookies! From preparation through baking and glazing, each step is infused with love and passion for crafting something special. Remember, baking is as much about sharing joy as it is about following recipes closely; don’t hesitate to sprinkle in your personality along the way! Whether you’re savoring these sweet treats alone with a cup of tea or sharing them at gatherings where laughter abounds, I promise these cookies will leave everyone enchanted by their flavor and charm.
So go on—bake these beauties again and again because once you do, you’ll be hooked on their bright flavor profile and irresistible texture. Happy baking!
Storage and Enjoyment Tips for Your Lime Sugar Cookies
Now that you’ve created these delightful Lime Sugar Cookies, the real fun begins! While I could easily devour them all in one sitting (and trust me, they’re that good!), let’s talk about how to store your precious cookies so they remain as soft and flavorful as the moment they came out of the oven. You’ll want to keep that fresh lime essence alive, and with just a few simple steps, your cookies can stay delectable for days to come.
Storing Leftover Lime Sugar Cookies
To keep your Lime Sugar Cookies in peak condition, I recommend using an airtight container. This is crucial because it prevents moisture from seeping in and turning your delightful cookies into something less than spectacular. If you store them at room temperature, they can last about a week—though I doubt they’ll last that long if you have friends or family around! For an extra tip that has always worked wonders for me, toss in a slice of bread into the container; this little trick helps maintain moisture levels and keeps those cookies soft and chewy. After storage, the flavors meld together beautifully, creating a truly satisfying cookie experience with every bite. If you prefer your cookies warm (and who wouldn’t?), simply pop them in the microwave for about 10 seconds before indulging.
Freezing Lime Sugar Cookies for Later
If you’ve baked a batch and are wondering how to save some delightful treats for later on, freezing is an absolutely fantastic option! To freeze your Lime Sugar Cookies properly, allow them to cool completely first—this prevents condensation from forming inside the bag or container. Then simply place them in a freezer-safe bag or container (remember to remove as much air as possible) and they will remain delicious for up to three months! When you’re ready to enjoy these citrusy delights again, just take out a couple of cookies and let them thaw at room temperature for about 15 minutes—or if you’re feeling impatient like I often do, 30 seconds in the microwave will revive their glorious softness perfectly. Freezing cookies not only gives you instant access to sweet treats anytime but also allows you to share homemade goodness with friends whenever the mood strikes!
Lime Sugar Cookies
Lime Sugar Cookies are a delightful twist on a classic treat, bursting with refreshing citrus flavor. Imagine sinking your teeth into a soft, chewy cookie that combines the sweetness of sugar with the zesty brightness of fresh lime. Each cookie is rolled in sparkling sugar, creating an irresistible crunch on the outside while remaining tender and moist inside. Perfect for any occasion, these cookies are not only easy to make but also serve as a wonderful reminder of sunny days spent with loved ones. Whether you’re hosting an afternoon tea or simply enjoying a quiet moment at home, these Lime Sugar Cookies will surely bring joy to your day.
- Prep Time: 20 minutes
- Cook Time: 10 minutes
- Total Time: 30 minutes
- Yield: Approximately 24 cookies 1x
- Category: Dessert
- Method: Baking
- Cuisine: American
Ingredients
- ½ cup unsalted butter, softened
- 1 cup granulated sugar
- 1 large egg
- Zest and juice of 1 lime
- 1 ½ cups all-purpose flour
- ¼ tsp baking soda
- ¼ tsp cream of tartar
- ¼ tsp salt
Instructions
- Preheat your oven to 375°F (190°C) and line baking sheets with parchment paper.
- In a large mixing bowl, cream together softened butter and granulated sugar until light and fluffy.
- Mix in the egg, lime zest, and lime juice until well combined.
- Gradually add flour, baking soda, cream of tartar, and salt; mix until just incorporated.
- Chill the dough in the refrigerator for about two hours.
- Roll chilled dough into balls and coat each in granulated sugar.
- Place dough balls on prepared baking sheets, leaving space between each cookie.
- Bake for 8–10 minutes until edges are lightly golden but centers remain soft.
- Allow cookies to cool briefly before transferring to wire racks.
Nutrition
- Serving Size: 1 cookie (30g)
- Calories: 120
- Sugar: 10g
- Sodium: 30mg
- Fat: 5g
- Saturated Fat: 3g
- Unsaturated Fat: 2g
- Trans Fat: 0g
- Carbohydrates: 17g
- Fiber: <1g
- Protein: <1g
- Cholesterol: 15mg