Peach Crisp
There’s something profoundly enchanting about a warm dessert that fills the air with sweet aromas, don’t you think? When I think of cozy evenings spent with loved ones, my mind drifts to an Old-Fashioned Peach Crisp. This delightful recipe is not just about satisfying a sweet tooth; it’s a celebration of summer’s bounty, a testament to the beauty of ripe peaches, and an invitation to indulge in life’s simple pleasures. As the peaches bubble away in the oven, mingling with sugar and cinnamon, their essence transforms into a fragrant syrup that hugs each bite. The moment you take your first spoonful, you’ll feel that perfect balance of juicy fruit and crunchy topping—it’s like a warm hug for your taste buds. Truly, this Peach Crisp is more than just a dessert; it’s an experience that draws us closer together.
This crisp has a storied history in American kitchens, often evoking memories of family gatherings or lazy Sunday afternoons. It resonates with nostalgia while allowing for personal touches and variations—each bite can tell a different story. Imagine sitting around the dining table with friends and family, sharing laughter and stories as you dig into this comforting dish topped off with a scoop of creamy vanilla ice cream. The contrast between the warm, spiced peaches and the cool ice cream is simply divine! So grab your apron, and let’s dive into this delicious journey together.
Peach Crisp: A Sweet Summer Symphony
Welcome to the delightful world of Peach Crisp! This recipe is incredibly simple yet utterly indulgent—a true crowd-pleaser that will have everyone coming back for seconds (and maybe even thirds!). With fresh peaches baked to juicy perfection under a buttery oat topping, every bite is an echo of summer sunshine. I promise you; once you get this crisp out of the oven and serve it warm with vanilla ice cream melting on top, you’ll understand why I adore this recipe so much.
Ingredients:
Before we embark on our culinary adventure, let’s gather our ingredients! Each one plays a vital role in creating that symphony of flavors we’re aiming for in our Peach Crisp.
- 8 cups peeled and thinly sliced fresh peaches. This is where the magic begins! Fresh peaches are the star of our show—juicy, sweet, and bursting with flavor. When selecting peaches, look for those that are slightly soft to the touch but still firm enough to hold their shape during baking. Avoid any overly soft or bruised fruit; they won’t provide that delightful texture we crave. If fresh peaches aren’t available, feel free to use frozen slices—just be sure they’re thoroughly thawed beforehand.
- ½ cup granulated sugar. Granulated sugar not only sweetens our peach filling but also helps create that wonderful syrupy goodness as it bakes alongside the fruit. This sugar dissolves easily and works its magic by drawing out moisture from the peaches while balancing their natural tartness. You can adjust this amount slightly based on how ripe or sweet your peaches are!
- ½ cup + 2 tablespoons all-purpose flour (divided). Flour serves two crucial purposes here: thickening our peach mixture and providing structure to our crispy topping. The first portion combines with the peaches to help absorb some juice during baking while preventing them from becoming too runny. The second part joins forces with brown sugar in our topping—trust me when I say that measuring accurately here makes all the difference!
- 1 tablespoon cornstarch. Cornstarch is an absolute hero in this recipe! It thickens up any excess juices released by our beautiful peaches during baking without altering the flavor or texture too much. This step is crucial because no one wants a soggy bottom on their crisp!
- 2 teaspoons ground cinnamon (divided). Ahh, cinnamon—the spice that invokes feelings of warmth and comfort! We’ll use this aromatic delight both in our peach filling and topping to create depth of flavor that perfectly complements those luscious fruits. It adds warmth without overpowering other elements—just trust me when I say there’s nothing quite like it wafting through your kitchen!
- ¼ teaspoon salt. Just a pinch! Salt enhances all flavors while balancing sweetness; it’s essential for elevating our dish from good to extraordinary.
- ¾ cup packed light brown sugar. Brown sugar brings richness and moisture thanks to its molasses content—a non-negotiable ingredient in creating that decadent topping we all crave! Make sure to pack it well into your measuring cup so every bit contributes its lovely caramel notes.
- 1/2 cup (1 stick) salted butter (room temperature). Butter is absolutely paramount here for achieving that coveted crumble texture on top of our crisp! Room temperature butter creams beautifully with sugars, creating air pockets within which will help give us that ideal crunch as everything bakes together.
- 1 ¾ cup old-fashioned oats. These oats add heartiness to our topping while contributing another layer of texture that’s simply irresistible! Old-fashioned oats are preferred over instant varieties because they hold up better during cooking, resulting in a delightful chewiness amidst all those lovely fruity layers.
Equipment You’ll Need:
Let’s not forget about having the right tools at hand—they truly make all the difference! Cooking should be an enjoyable experience rather than a frustrating one; having these essential pieces will ensure you feel confident as you create your Peach Crisp masterpiece.
- 9×9 baking pan – A sturdy baking dish helps retain heat evenly throughout cooking while providing ample space for bubbling juices without overflowing—the last thing we want is a messy oven!
- Mixing bowls – Opt for large bowls so there’s plenty of room to mix ingredients without any spills or messes along the way; glass or stainless steel options work best here since they hold up well against heat when needed later on.
- Measuring cups & spoons – Precision matters when baking—accurate measurements guarantee consistent results every time! Invest in quality sets that allow easy readability so there’s no guesswork involved.
- Rubber spatula – A trusty spatula makes mixing ingredients together effortless while scraping down sides efficiently ensures nothing goes wasted—plus it helps bring everything together harmoniously!
Now that we’ve gathered everything together—ingredients ready and tools at hand—we’re poised to create something truly extraordinary: your very own Peach Crisp awaits!
Preparing the Peach Crisp
Step 1: Preheat Your Oven & Prepare Your Baking Dish
First things first—let’s preheat that oven to 400°F (200°C) because we want it nice and hot when it’s time for our crisp to bake! This step is crucial as it allows even cooking throughout the dish while ensuring all those lovely flavors meld beautifully together quickly once inside. While waiting for it to reach temperature, generously butter your 9×9 baking pan—it creates a non-stick surface allowing everything else we’re about to assemble not only tastes amazing but also comes out effortlessly after baking!
Step 2: Create Our Juicy Peach Filling
In a large mixing bowl, combine those freshly sliced peaches along with granulated sugar, two tablespoons of flour, cornstarch, one teaspoon cinnamon (saving some for later!), and salt until everything is well-coated—you’ll notice how vibrant colors pop as juices begin mingling among other ingredients already! The goal here isn’t just uniformity; it’s about coaxing forth maximum flavor from these beauties before heading into action inside your hot oven later on! Pour this fragrant mixture into prepared pan—the visual appeal alone will make mouths water as soon as they catch sight!
Step 3: Make That Irresistible Oat Topping
Now let’s tackle what truly elevates our crisp—the crunchy oat topping! In the same bowl used earlier (because why dirty another one?), cream together packed brown sugar along with remaining half-cup flour plus room-temperature butter along with last teaspoon cinnamon until forming wet clumps resembling cookie dough consistency—it should feel rich yet crumbly between fingers when pinched together lovingly! Don’t rush this step; taking time ensures even distribution throughout achieves optimal texture once baked—a crumbly affair awaits us ahead!
Step 4: Assemble & Bake
Once your oat mixture reaches perfection resembling coarse crumbs between fingers like little bits of heaven themselves—go ahead sprinkle evenly atop peach layer already nestled cozily below them inside pan without leaving gaps behind between clumps either—they need each other desperately at this point after all!! Place carefully onto middle rack preheated oven set aside earlier letting bake approximately 20–25 minutes until edges turn beautifully golden brown while filling bubbles joyfully beneath surface promising scrumptious rewards await soon after removal from heat source thereafter…
As we wait patiently through these moments filled excitement building anticipation simmering aromas wafting through kitchen air tantalizing senses around us don’t forget allow rest period afterward cooling down ten minutes before diving straight into serving warm alongside scoops creamy vanilla ice cream adding another dimension altogether ensuring ultimate comfort food experience achieved successfully!
Are you feeling as excited as I am? Let’s continue cooking this beautiful Peach Crisp together—it truly is worth every moment spent crafting such delicious memories along way ahead…
Step 5: Crumbling the Topping – The Joy of Texture
Now, let’s talk about that delightful crumbly topping that’s going to crown our luscious peaches. In the same large bowl, you’ll want to cream together the packed light brown sugar, the remaining half cup of all-purpose flour, your room-temperature salted butter, and the last teaspoon of ground cinnamon. This step is essential because it creates a base that will provide both sweetness and an aromatic warmth to our Peach Crisp. As you mix these ingredients together—perhaps using your hands for that extra tactile connection—you’re looking for a wet, clumpy mixture that feels like a soft dough. Don’t rush this step! Take your time to really incorporate those ingredients; you want them to meld into each other beautifully.
Once you reach that perfect consistency, it’s time to introduce the star ingredient: the old-fashioned oats. Fold them into your buttery mixture gently but thoroughly until they’re evenly distributed. This is where the magic begins; those oats will toast up in the oven, adding a wonderful crunch and hearty texture to contrast with the tender peaches below. As you crumble this oat-and-sugar mixture over the peaches, think about how each piece will absorb those sweet, juicy peach juices while still retaining its shape and crunch after baking. It’s an utterly intoxicating thought! You’ll want to be generous here—an even layer is non-negotiable because every forkful deserves a bit of this glorious topping.
Step 6: The Art of Layering – Even Distribution is Key
With your oat topping ready and eager, it’s time to spread it evenly atop those beautiful peach slices in your baking pan. This might seem straightforward, but trust me on this—how you layer matters immensely! Start by breaking apart clumps of the topping slightly as you sprinkle it over the peaches. The goal is not just coverage but also ensuring that every bite has a little crunch intertwined with those succulent peach slices beneath. You should aim for an even distribution; if some areas are too sparse or too heavy, it can lead to uneven cooking and texture.
This step is crucial because when everything bakes together, the juices from the peaches will bubble up through those oats, creating a caramelized crust that’s simply divine. Keep an eye on how it looks—if it seems overly dense in spots or very loose in others, gently adjust as needed before placing it in the oven. Remember, patience pays off in baking; taking just a moment more to ensure evenness now will yield profound results later.
Step 7: Baking Bliss – The Transformation Begins
Now comes one of my favorite moments—the transformation process in the oven! Preheat your oven to 400°F (200°C), which is absolutely paramount for achieving that golden-brown crispiness we adore in desserts like this Peach Crisp. Once heated, slide your masterpiece into the oven and set a timer for about 20 to 25 minutes. During this time, something magical happens: as heat envelops your dish, those sliced peaches begin releasing their sweet juices while simultaneously infusing their flavor throughout every craggy bit of topping.
Keep an eye on it during baking; you’re looking for that tell-tale sign of doneness when the oats start turning a light golden color around their edges—a beautiful contrast against the warm hues of bubbling peach underneath. Every minute counts here; if left too long without supervision, those delicate oats could burn while waiting for the peaches to soften completely. When you pull it out of the oven after approximately 25 minutes (or when you see that perfect golden hue), allow yourself a moment to bask in its warm aroma—it’s intoxicating!
Step 8: The Resting Game – Letting It Set
Once you’ve removed your Peach Crisp from the oven, resist any urge to dive right in—even though I know how tempting that warm aroma can be! Allowing it to rest for about 10 minutes serves multiple purposes and is absolutely vital for achieving dessert perfection. During this resting period, you’ll find that everything begins to set up nicely—the peach juices reabsorb slightly into both themselves and those crispy bits above rather than running all over your plate when served.
Trust me on this; patience at this stage rewards you tenfold later when it’s time for serving! As it cools slightly, use this opportunity to prepare any accompaniments—maybe scoop some vanilla ice cream or whip up some coconut whipped cream? Watching how they melt together with each spoonful of warm Peach Crisp creates a symphony of flavors that’s utterly extraordinary! So take a deep breath, soak in those scents wafting through your kitchen, and get excited because soon you’ll indulge in what feels like summer captured in dessert form.
Final Touches – Serving Your Peach Crisp
Step 9: The Grand Reveal – Plating Up Your Creation
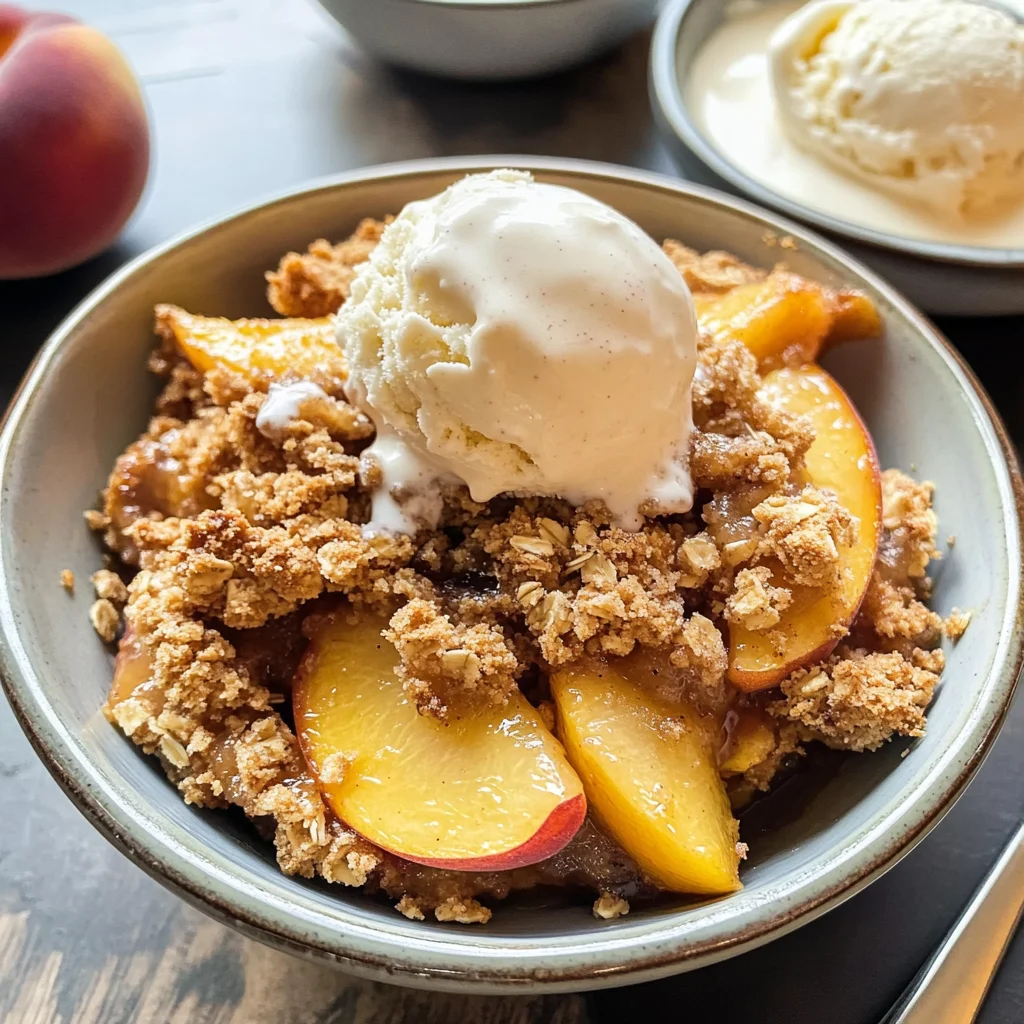
Now comes perhaps my favorite part—the moment we finally serve up our beautiful Peach Crisp! With your dish having cooled just enough without losing its warmth entirely (a little bit of steam still escaping is perfect), grab yourself a generous spoon or spatula and prepare for plating. As you scoop out portions onto plates or bowls—or whatever vessel you’re using—you’ll notice how beautifully thickened everything has become thanks to our careful resting period earlier.
Don’t skimp on toppings here—this dessert begs for indulgence! A scoop of creamy vanilla ice cream melting slowly over warm fruit creates blissful contrasts between temperatures and textures—a truly heavenly experience! If you’re feeling adventurous (and I always encourage creativity!), consider drizzling some honey or maple syrup over top or sprinkling with chopped nuts for added crunch.
Take a moment here before diving into bites; appreciate what you’ve created not just as food but as an experience shared among loved ones or simply enjoyed alone as self-care at its finest—and isn’t that what cooking is all about? Each bite promises warmth from memories made while savoring each others’ company over delicious food—and trust me when I say each spoonful will disappear faster than you’d think possible!
As you gather around with friends or family—perhaps discussing summer memories connected by homemade treats—I assure you they’ll be asking for seconds (and maybe thirds)! This is more than just dessert; it’s truly comfort food at its best—satisfying both body and soul alike through every sweet crumbly mouthful. Now go forth and enjoy every luscious morsel of your Peach Crisp creation—you’ve earned it!
Storage and Enjoyment Tips for Your Peach Crisp
Ah, the moment has finally arrived! Your Peach Crisp is out of the oven, filling your kitchen with that utterly intoxicating aroma of warm peaches and cinnamon. I can hardly contain my excitement as I watch the golden topping glisten with buttery goodness. It’s time to dig in, but what if you have leftovers? Fear not, my friend! I’m here to guide you on how to savor every last bite of this delightful dessert.
Storing Leftover Peach Crisp
To keep your Peach Crisp as luscious as when it first came out of the oven, store any leftovers in an airtight container. Ideally, you want to place it in the refrigerator where it will stay fresh for about 3-4 days. If you find yourself with a particularly large batch (because who can resist making a bit more?), consider placing a slice of bread in the container alongside your crisp; this little trick helps maintain moisture and prevents your crispy topping from turning soggy. Trust me, there’s nothing worse than losing that satisfying crunch! Even after a few days in the fridge, the flavor profile remains vibrant—those juicy peaches meld beautifully with the sweet notes of cinnamon and brown sugar. When you’re ready to enjoy another helping, simply pop it in the oven at 350°F for about 10-15 minutes to revive that warm, comforting aura, or microwave it for a quick fix if you’re feeling impatient!
Freezing Peach Crisp for Later
If you want to take your Peach Crisp love to another level, consider freezing portions for those moments when a craving strikes unexpectedly. To freeze your delicious dessert properly, let it cool completely before transferring it into a freezer-safe container or tightly wrap it in plastic wrap. Make sure you squeeze out as much air as possible; we don’t want any unwanted freezer burn ruining our masterpiece! You can keep your Peach Crisp frozen for up to three months—yes, three glorious months where this treasure waits patiently for you. When you’re ready for some sweet comfort food, simply thaw it overnight in the refrigerator and reheat as mentioned earlier or bake straight from frozen at 350°F until heated through. This is such a wonderful option for busy weeknights or spontaneous gatherings; imagine pulling out a homemade dessert that tastes like sunshine on a plate without any fuss at all!
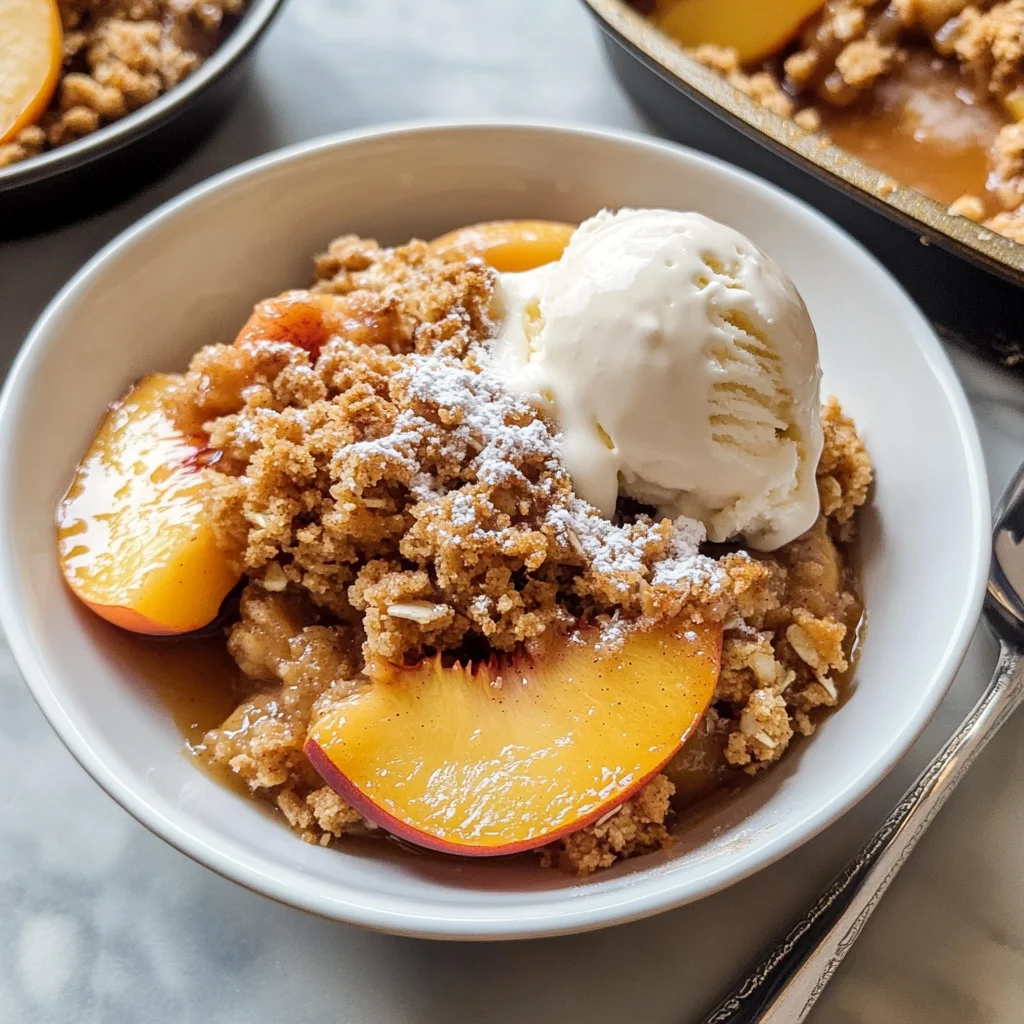
Peach Crisp
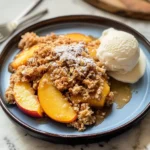
Indulge in the warmth of summer with our delightful Peach Crisp! This easy-to-make dessert features juicy, ripe peaches enveloped in a rich, syrupy filling and crowned with a crunchy oat topping. The combination of sweet peaches, aromatic cinnamon, and wholesome oats creates an irresistible treat that’s perfect for sharing with family and friends. Whether enjoyed warm from the oven with a scoop of vanilla ice cream or chilled for a refreshing snack, this Peach Crisp brings comfort to any occasion. Gather your ingredients and let’s embark on this delicious journey together!
- Prep Time: 15 minutes
- Cook Time: 25 minutes
- Total Time: 40 minutes
- Yield: Serves approximately 8 people 1x
- Category: Dessert
- Method: Baking
- Cuisine: American
Ingredients
- 8 cups peeled and thinly sliced fresh peaches
- ½ cup granulated sugar
- ½ cup + 2 tablespoons all-purpose flour (divided)
- 1 tablespoon cornstarch
- 2 teaspoons ground cinnamon (divided)
- ¼ teaspoon salt
- ¾ cup packed light brown sugar
- ½ cup salted butter (room temperature)
- 1¾ cup old-fashioned oats
Instructions
- Preheat your oven to 400°F (200°C) and butter a 9×9 baking pan.
- In a large mixing bowl, combine sliced peaches, granulated sugar, 2 tablespoons of flour, cornstarch, 1 teaspoon of cinnamon, and salt. Toss until well-coated and pour into the prepared pan.
- In the same bowl, cream together brown sugar, remaining flour, room-temperature butter, and the last teaspoon of cinnamon until crumbly. Fold in oats gently until evenly mixed.
- Sprinkle the oat mixture over the peaches evenly and bake for about 20–25 minutes until golden brown.
- Allow to cool for 10 minutes before serving warm with ice cream.
Nutrition
- Serving Size: 1 slice (about 150g)
- Calories: 290
- Sugar: 20g
- Sodium: 200mg
- Fat: 12g
- Saturated Fat: 7g
- Unsaturated Fat: 4g
- Trans Fat: 0g
- Carbohydrates: 44g
- Fiber: 4g
- Protein: 3g
- Cholesterol: 30mg