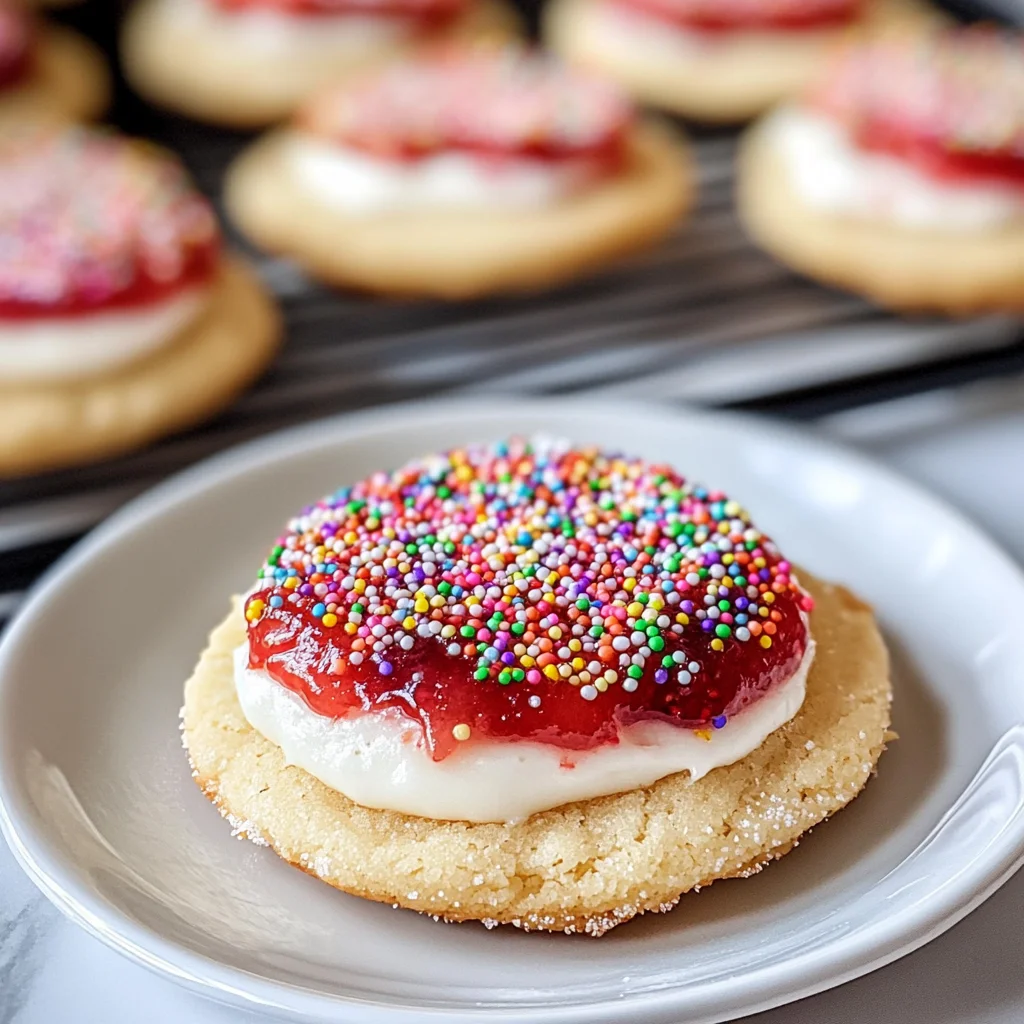
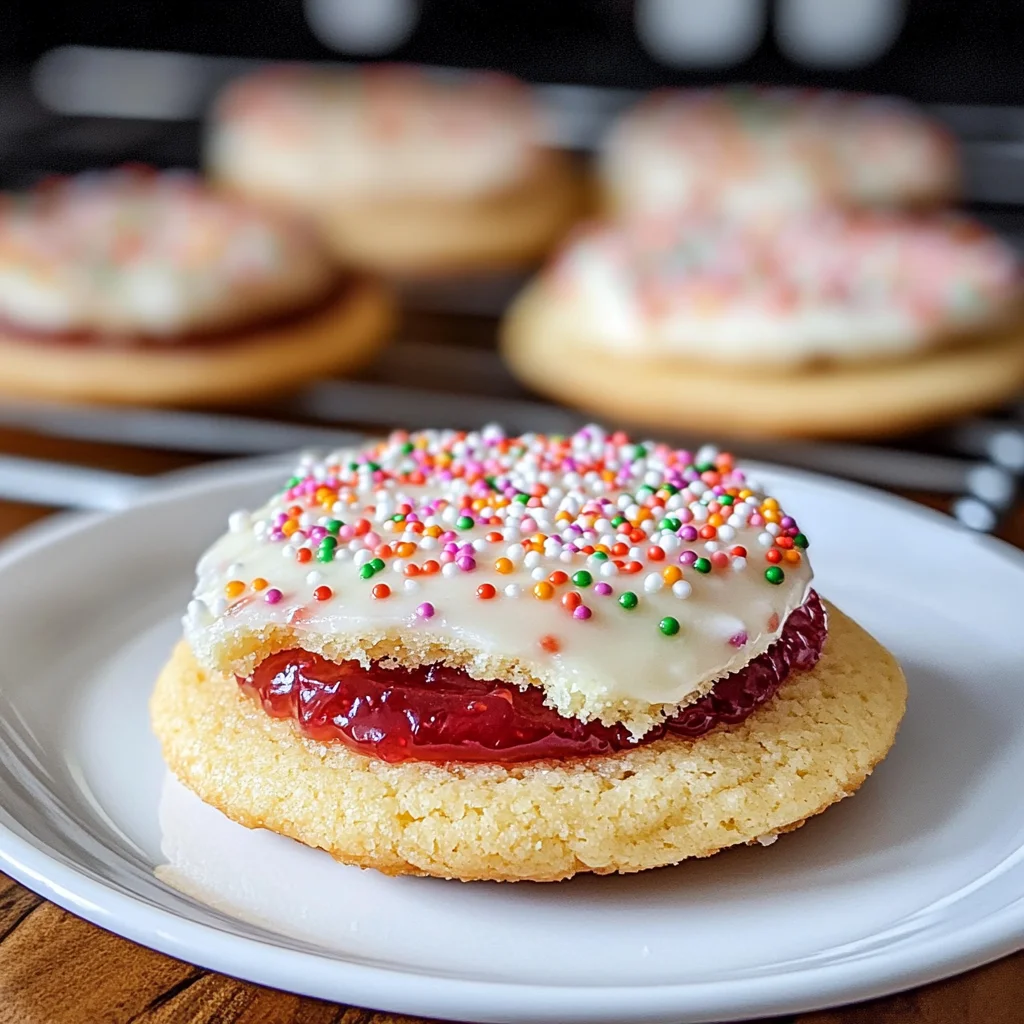
Strawberry Pop Tart Sugar Cookies – Deliciously Nostalgic Treats
There’s something magical about baking, isn’t there? It’s more than just whipping up a batch of cookies; it’s a journey through memories, flavors, and the warmth of home. Today, I’m beyond excited to share with you my beloved recipe for Strawberry Pop Tart Sugar Cookies – Deliciously Nostalgic Treats. These delightful cookies capture the essence of our childhood—those sweet, flaky pastries filled with luscious strawberry jam and topped with vibrant frosting. But here’s the twist: we’re crafting them into sugar cookies that are soft, chewy, and bursting with nostalgia. Imagine biting into one and being transported back to simpler times when life was sweeter and joys were wrapped in colorful sprinkles.
As you embark on this culinary adventure, prepare to be enveloped in a cozy aroma of baking that fills your kitchen with love. The buttery scent mingling with juicy strawberries is utterly intoxicating and will beckon everyone to gather around. Each bite offers a symphony of flavors; the tender cookie envelops the rich strawberry filling like a warm hug. I promise you, these cookies are not just treats—they’re an experience that invites you to savor every moment with family and friends.
Strawberry Pop Tart Sugar Cookies – Deliciously Nostalgic Treats: A Sweet Journey Back in Time
Let’s dive into this delightful recipe together! With each step, I’ll guide you through the process so you can create these extraordinary cookies that are perfect for any occasion—be it a casual gathering or a festive celebration. So roll up your sleeves, grab your mixing bowl, and let’s make some magic happen!
Ingredients:
As we gather our ingredients, think of this as assembling pieces of a cherished memory; each component plays a significant role in creating those Strawberry Pop Tart Sugar Cookies that will transport you right back to your childhood joy.
- 2 cups All-Purpose Flour. This foundational ingredient forms the structure of our cookies, providing the right balance between softness and sturdiness. If you’re looking for a gluten-free alternative, feel free to swap it out for your favorite gluten-free blend—just ensure it’s designed for baking so your cookies have that perfect texture.
- 1 teaspoon Baking Soda. This ingredient is essential for fluffiness! Baking soda reacts with acid (in our case, those lovely eggs!) to create carbon dioxide bubbles that lift our dough. It’s crucial for achieving that lightness we’re after in our cookies—trust me on this!
- 1 teaspoon Baking Powder. Another key player in our cookie team! Unlike baking soda, baking powder contains both an acid and base; it helps provide extra lift during baking. I wouldn’t recommend substituting this as its specific chemical makeup is non-negotiable for success.
- 1/2 teaspoon Salt. While it might seem minor, salt is absolutely paramount in enhancing sweetness and balancing flavors in baked goods. It brings depth to our cookies and elevates each bite into something truly extraordinary.
- 1 cup Unsalted Butter, softened to room temperature. This is where we get that rich flavor and tender texture! Creaming softened butter with sugar creates air pockets essential for fluffy cookies. If you’re following a vegan diet or prefer a dairy-free option, vegan butter works beautifully here too!
- 1 cup Granulated Sugar. This sweetener not only adds sweetness but also contributes to the cookie’s structure by creating tenderness when combined with butter. If you’re watching your sugar intake, low-calorie alternatives can still yield fabulous results without sacrificing flavor.
- 1 cup Powdered Sugar. Used primarily for frosting later on but also directly affects how creamy our dough becomes—it’s all about balance here! You can opt for alternatives if desired; just keep in mind that texture may vary slightly.
- 2 large Eggs. Eggs bind everything together while providing moisture and richness—essential elements for our cookies’ success! For those wanting a vegan twist, flaxseed meal mixed with water serves as an excellent substitute (1 tablespoon flaxseed meal + 3 tablespoons water = 1 egg).
- 1 teaspoon Vanilla Extract. This liquid gold brings warmth and depth of flavor that complements strawberries beautifully—don’t skip on quality here! Pure vanilla extract makes all the difference compared to imitation varieties.
- 1/2 teaspoon Almond Extract (optional). If you’re feeling adventurous and don’t have nut allergies at play, almond extract can add an extra layer of complexity that elevates these cookies even further; however, if nuts are off the table for you or your loved ones, feel free to omit it altogether.
- 1 cup Strawberry Jam or Preserves. Here’s where we capture that nostalgic essence! Choose a high-quality jam made from real strawberries—the brighter flavor will shine through in every bite! And if strawberries aren’t your thing today? Feel free to experiment with other fruit preserves!
- 1 cup Sprinkles (optional). Because what’s nostalgia without color? Sprinkles add fun visuals and an extra crunch factor but remember: they’re totally optional based on your personal preference!
Equipment You’ll Need:
Having the right tools at hand is like having trusted companions on this baking journey; they help pave the way toward delicious success while making each moment enjoyable. Let’s explore some essential equipment needed for crafting these delightful Strawberry Pop Tart Sugar Cookies together:
- Mixing Bowls – A set of various-sized mixing bowls is key here! Your main mixing bowl should be large enough to accommodate all our ingredients comfortably while allowing room for whisking without splattering flour everywhere—a total win in my book!
- Electric Mixer – While you could mix by hand (and trust me; I’ve done it many times), using an electric mixer speeds things up considerably when creaming butter and sugars together—creating perfectly airy dough faster than you can say “cookie time!”
- Measuring Cups & Spoons – Precision is everything when it comes to baking! Invest in dry measuring cups alongside liquid ones because accurate measurements ensure consistent results every single time.
- Baking Sheets – A good-quality non-stick or parchment-lined baking sheet ensures even baking without sticking chaos—it means fewer worries during cleanup too!
- Parchment Paper – Lining your baking sheets with parchment paper prevents sticking while also helping distribute heat evenly across cookie bottoms—making sure they bake perfectly golden without burning!
Now that we’ve gathered our ingredients and equipment let’s roll up those sleeves because it’s time to create some Strawberry Pop Tart Sugar Cookies – Deliciously Nostalgic Treats together!
Step 1: Creaming Together Butter & Sugars
Begin by placing your softened unsalted butter into the mixing bowl along with granulated sugar and powdered sugar—this process known as creaming is essential for achieving that light texture we crave in cookies! As you mix them together at medium speed using an electric mixer until it’s fluffy (about 2–3 minutes), you’ll notice how pale and airy the mixture becomes—that’s air being whipped into it! This step is crucial because those tiny air bubbles expand during baking to create height and prevent dense cookies from forming.
Step 2: Incorporate Eggs & Extracts
Next up are adding eggs one at a time along with vanilla extract—and if you’re using almond extract too—mixing until fully incorporated after each addition helps emulsify everything together smoothly without any lumps remaining behind! At this stage, you’ll begin smelling those warm aromas wafting through your kitchen which hints at all the lovely flavors combining harmoniously within this dough—we’re building layers of flavor here!
Step 3: Combine Dry Ingredients
In another bowl combine all-purpose flour along with baking powder, baking soda, and salt before gradually adding this dry mixture into wet ingredients while mixing slowly until just combined—it’s important not to overmix at this point as doing so could lead us down the path towards toughened cookie dough instead of soft chewy delights! Aim for visible streaks of flour remaining as we want everything integrated gently so let those ingredients meld beautifully without losing their integrity!
Step 4: Chill Your Dough
Now comes an essential yet often overlooked step: chilling our cookie dough before baking makes such a difference! Wrap it tightly in plastic wrap allowing it rest inside refrigerator anywhere from 30 minutes up until overnight if possible—the chilling process firms up fats which prevents spreading too much during bake time resulting in perfectly shaped cookies instead of puddles on parchment paper which nobody wants! Plus waiting allows flavors to meld further enriching overall taste profile giving us every reason possible why patience truly pays off here.
I can’t wait to guide you through each subsequent step until we’re pulling warm trays out from ovens filled with aromatic Strawberry Pop Tart Sugar Cookies – Deliciously Nostalgic Treats ready for sharing (or indulging)! Together let’s make memories baked fresh from love one cookie at a time…
The Magic of Making Strawberry Pop Tart Sugar Cookies – Deliciously Nostalgic Treats
Step 5: The Art of Shaping the Dough
Once your dough has come together into a beautifully soft consistency, it’s time for the fun part—shaping those cookies! Begin by dividing the dough into two equal halves. This not only makes it easier to handle but also ensures that you’re working with a manageable amount at any one time. Now, take one half and gently flatten it into a disc shape; this will help it chill more evenly in the refrigerator later. You see, chilling is crucial here—it allows the butter to firm up again after being mixed, which means your cookies will hold their shape beautifully while baking instead of spreading into sad puddles on your tray.
Wrap your disc in plastic wrap and pop it into the fridge for at least 30 minutes. I know it’s tempting to skip this step, but trust me, this patience pays off in cookies that are both delightfully thick and tender. While your dough is chilling, you might want to take a moment to clean up your workspace or even daydream about how wonderful these treats will be once they’re baked and decorated. Just think about that first bite—the crisp edges giving way to a soft, chewy center filled with that luscious strawberry jam!
Step 6: Rolling Out the Dough
After your dough has chilled and firmed up nicely, it’s time to roll it out! Dust your clean work surface with a light sprinkling of flour to prevent sticking—this step is non-negotiable if you want to keep your beautiful shapes intact. Using a rolling pin, gently roll out the dough to about 1/4 inch thick. You want it thin enough so that the cookies bake evenly but thick enough so they don’t become too crunchy. As you roll, keep an eye on those edges! If they start curling or cracking, simply use your hands to smooth them back into shape.
As you cut out shapes using your favorite cookie cutter—be it squares for that classic Pop Tart look or something fun and whimsical—make sure to place the cutouts onto a parchment-lined baking sheet. Space them about an inch apart; they’ll puff up slightly while baking, so give them some room! If at any point you feel like the dough is getting too warm and sticky, don’t hesitate to pop it back into the refrigerator for a few minutes before continuing. This little trick is key in maintaining that perfect shape during baking!
Step 7: Filling with Strawberry Jam
Now comes one of my favorite parts—the filling! Take out that gorgeous strawberry jam or preserves you’ve prepared (or purchased) and get ready for some excitement! For each cookie base you’ve cut out, place about a teaspoon of jam right in the center. Be careful not to overfill; too much jam can lead to delightful yet messy results when they bake! This step transforms our sugar cookies from merely sweet treats into something transcendent; it’s where nostalgia meets creativity as we channel our inner pastry chef.
Once you’ve filled all your bases, take another rolled-out piece of dough (the second half you set aside earlier), and cut out matching shapes for each filled cookie base. Place these tops gently over the filled bases and press down around the edges with your fingers or a fork to seal them securely. This sealing process is vital because it keeps all that delicious strawberry goodness from oozing out while baking—it’s like wrapping little presents of joy just waiting to be devoured!
Step 8: Baking Your Perfect Cookies
Now we arrive at perhaps the most exciting moment—baking those beauties! Preheat your oven to 350°F (175°C); this temperature works wonders for achieving both crispness on the outside and tenderness on the inside without drying them out too quickly. Once preheated, slide those trays into the oven and allow them to bake for about 10-12 minutes. Keep an eye on them; you’re looking for slightly golden edges while still keeping that soft center intact.
As they bake, you’ll be enveloped in an utterly intoxicating aroma—a sweet symphony wafting through your kitchen that will make anyone nearby drool with anticipation! When they’re done baking, remember: patience is essential again here! Allow them to cool on the baking sheet for about 5 minutes before transferring them over to wire racks. Why? Because moving them too soon can result in broken cookies—a heartbreaking sight after all that love you’ve put in!
Conclusion:
As we wrap up this delightful culinary journey through making Strawberry Pop Tart Sugar Cookies – Deliciously Nostalgic Treats, I hope you feel as excited as I do about crafting these sweet little gems in your own kitchen. Every step of this process—from combining the ingredients to watching them bake—is steeped in nostalgia and warmth that makes each bite truly extraordinary. The symphony of flavors created by the buttery cookie dough paired with luscious strawberry jam captures childhood memories while inviting new ones into our lives.
This recipe is an absolute must-try not only for its mouthwatering taste but also for the sheer joy it brings while making it. Picture yourself surrounded by loved ones, laughter echoing as you pull these vibrant cookies from the oven—golden edges kissed by warmth and colorfully sprinkled with joy! Whether it’s for a birthday party, an afternoon snack, or just because you deserve something sweet today, these cookies shine bright on any occasion. They are versatile enough to fit into any dessert table yet comforting enough for a quiet moment alone.
Imagine savoring one alongside a steaming cup of herbal tea or coffee; the combination creates an utterly soothing experience that just feels like home. For an afternoon pick-me-up while reading your favorite book or sharing with friends over casual conversations—these cookies are perfect companions! And if you’re feeling particularly indulgent, consider pairing one with a scoop of vanilla non-dairy ice cream—what could be more heavenly?
Feeling adventurous? This recipe is wonderfully adaptable! Try swapping out strawberry jam for raspberry or even apricot preserves if you’re looking to explore different flavor dimensions; each variation brings its unique charm while retaining that nostalgic essence we love so much. You could also experiment with adding citrus zest into the dough for an unexpected zing that brightens every bite! I invite you to dive into this delightful world of baking and share your experiences with me—let’s connect over our love for delicious treats!
Strawberry Pop Tart Sugar Cookies – Deliciously Nostalgic Treats
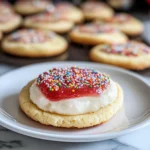
Experience the joy of childhood with these Strawberry Pop Tart Sugar Cookies – Deliciously Nostalgic Treats. These delightful cookies blend the soft, chewy texture of classic sugar cookies with a luscious strawberry filling, capturing the essence of those beloved pastries we all remember. Each bite is a sweet journey back to simpler times, filled with nostalgic flavors and colorful sprinkles that bring smiles to both kids and adults alike. Perfect for gatherings or a cozy afternoon treat, these cookies are not just desserts; they’re warm memories waiting to be shared.
- Prep Time: 20 minutes
- Cook Time: 12 minutes
- Total Time: 32 minutes
- Yield: Approximately 24 cookies 1x
- Category: Dessert
- Method: Baking
- Cuisine: American
Ingredients
- 2 cups All-Purpose Flour
- 1 teaspoon Baking Soda
- 1 teaspoon Baking Powder
- 1/2 teaspoon Salt
- 1 cup Unsalted Butter, softened
- 1 cup Granulated Sugar
- 1 cup Powdered Sugar
- 2 large Eggs
- 1 teaspoon Vanilla Extract
- 1 cup Strawberry Jam or Preserves
- Sprinkles (optional)
Instructions
- Preheat your oven to 350°F (175°C).
- In a mixing bowl, cream together softened butter, granulated sugar, and powdered sugar until fluffy. Add eggs one at a time followed by vanilla extract.
- In another bowl, whisk together flour, baking soda, baking powder, and salt. Gradually add this dry mixture to the wet ingredients until combined.
- Chill the dough for at least 30 minutes.
- Roll out chilled dough to about 1/4 inch thick and cut into shapes. Place half on a parchment-lined baking sheet.
- Spoon strawberry jam onto the center of each cookie base and cover with another cookie shape; seal edges.
- Bake for 10-12 minutes until golden around the edges. Cool on wire racks.
- Decorate with glaze made from powdered sugar and water; sprinkle with colorful toppings.
Nutrition
- Serving Size: 1 cookie
- Calories: 150
- Sugar: 10g
- Sodium: 90mg
- Fat: 7g
- Saturated Fat: 4g
- Unsaturated Fat: 2g
- Trans Fat: 0g
- Carbohydrates: 19g
- Fiber: <1g
- Protein: <1g
- Cholesterol: 25mg