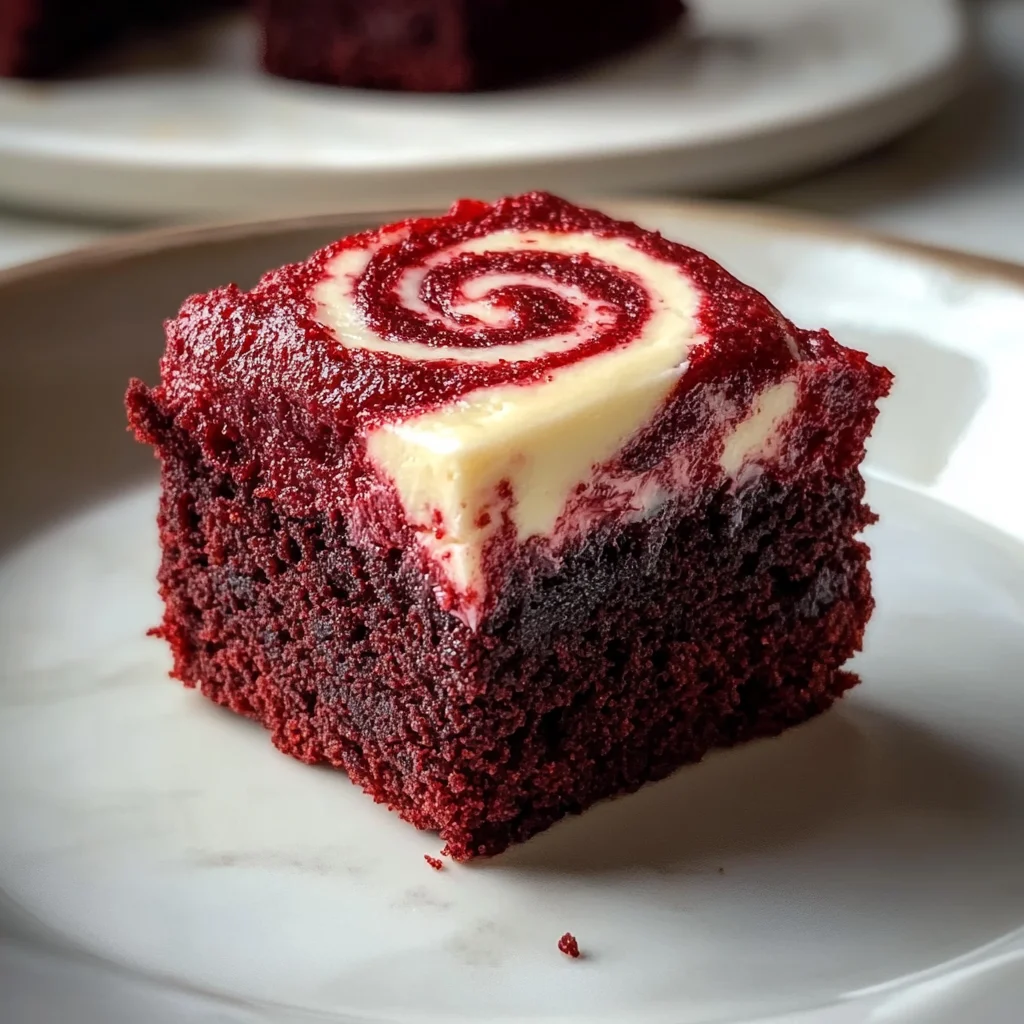
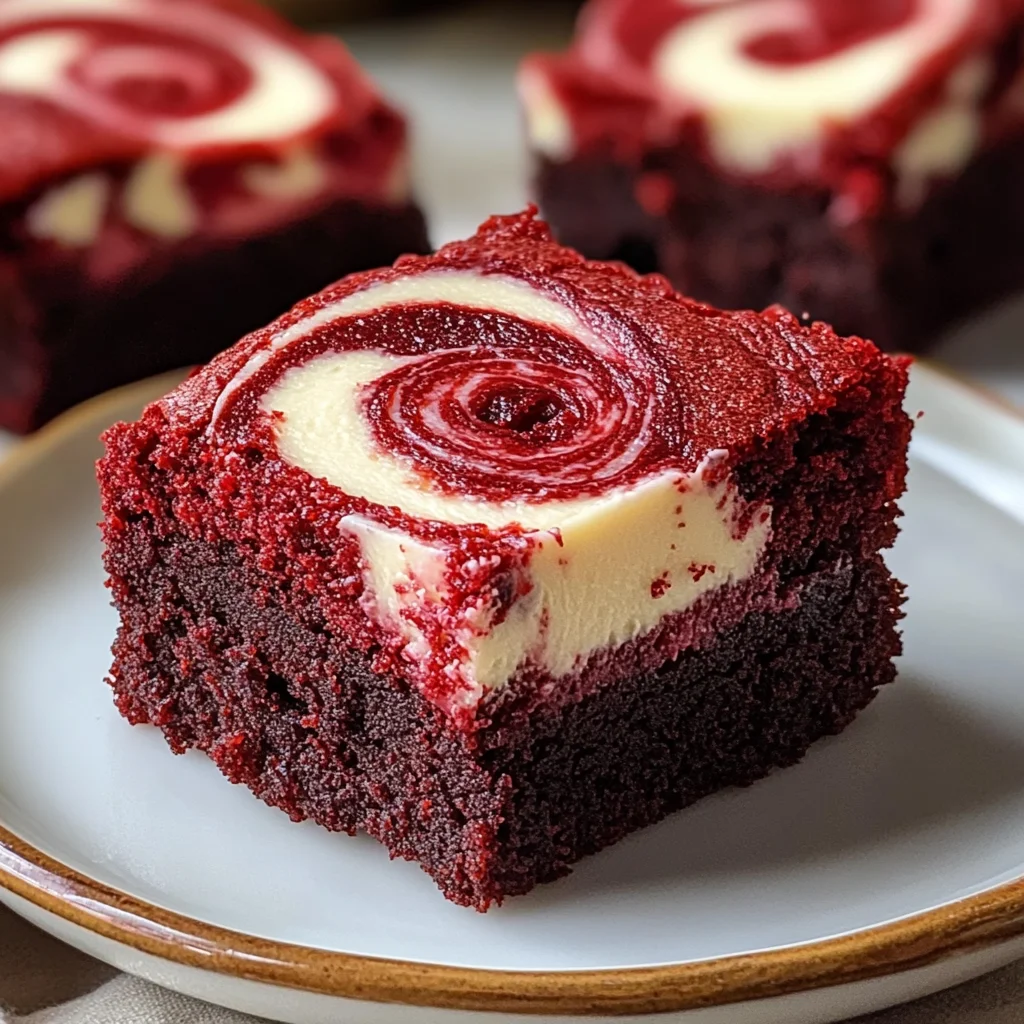
Homemade Red Velvet Brownie Bites
There’s something truly magical about baking, isn’t there? The way the kitchen fills with warm aromas, the gentle hum of ingredients coming together in harmony; it all feels like a love letter to the senses. When I first stumbled upon the idea of Homemade Red Velvet Brownie Bites, I was skeptical. I mean, how could you possibly improve upon brownies? But then I took one bite—just one—and everything changed. These little gems are not just about satisfying a sweet tooth; they embody a blend of tradition and innovation that creates an utterly intoxicating experience. With a rich cocoa base kissed by a vibrant hue and swirls of cream cheese that offer a delightful tang, they are not merely dessert; they are an invitation to indulge in a moment of pure joy.
As I set out to create these brownie bites, I realized this recipe is more than just another treat; it’s an expression of love and creativity. It reminds me of those cozy evenings spent with friends, laughter echoing through the air as we each reached for just one more bite (or two). This recipe has become a staple for gatherings and quiet nights alike—perfect for surprising loved ones or simply treating yourself after a long day. Trust me when I say that once you taste these Homemade Red Velvet Brownie Bites, you’ll find yourself sharing them with everyone you know, eager to pass on this delightful experience.
Ingredients:
Embarking on this culinary journey begins with gathering the right ingredients. Each component plays an essential role in crafting these luscious brownie bites that promise to melt in your mouth and leave you craving more. Let’s dive into what makes each ingredient special!
- 9 tbsp unsalted butter. Butter is our secret weapon here, especially when it’s from Kerrygold! This high-quality butter brings richness and depth to our brownie bites, creating that beautifully moist texture we crave. Make sure it’s at room temperature for optimal creaming—a crucial step that helps incorporate air into the batter, giving us those perfectly light yet fudgy bites. If you can’t find Kerrygold, any unsalted butter will do; just ensure it’s fresh and soft enough to work with.
- 1 1/4 cups sugar. Sugar isn’t just for sweetness; it also contributes to the overall texture and structure of our brownie bites. As it dissolves during mixing, sugar helps create that lovely glossy surface we all adore on baked goods. For this recipe, granulated sugar works best because it allows for effortless incorporation into the batter without leaving any gritty bits behind.
- 1/4 cup cocoa powder (sifted). This is where our brownies get their rich chocolate flavor! Using high-quality cocoa powder ensures deep, robust notes in every bite. Sifting is non-negotiable here—it removes lumps that could otherwise disrupt the smoothness of our batter. Plus, sifting incorporates air into the cocoa powder which helps in achieving that perfectly blended consistency.
- 1/2 tsp vanilla extract. Vanilla is often called the soul of baking for good reason! It enhances all other flavors present in our brownie bites while adding its own warm undertones. I always opt for pure vanilla extract over artificial flavoring because its complexity can elevate even simple recipes into something extraordinary.
- 1 tbsp red food coloring. Now here’s where we add some fun! While red velvet typically gets its hue from cocoa and buttermilk reactions, this recipe adds food coloring to give us that signature vibrance without altering flavor or texture drastically. Don’t skimp on this; a bright color not only enhances visual appeal but also signifies the joyous experience these bites promise!
- 1/8 tsp salt. Salty-sweet combinations have always been my favorite! A pinch of salt intensifies flavors and balances sweetness beautifully in desserts like our brownie bites. Always opt for fine sea salt or kosher salt as they dissolve better into batters compared to table salt.
- 1/4 tsp espresso powder. Here’s another secret: espresso powder amplifies chocolate flavor without making your brownies taste like coffee! It’s an incredible addition that enhances the richness while remaining subtle in presence—trust me on this addition!
- 1/2 tsp vinegar. Adding vinegar may sound strange at first but it reacts with baking soda (if used) or enhances moisture retention when combined with eggs—leading to an incredibly fudgy brownie bite! In fact, it also helps balance out sweetness by introducing a delicate tanginess.
- 2 large eggs. Eggs encourage structure and act as binders within our batter—a must-have for any good brownie recipe! They contribute moisture too, ensuring our treats remain soft and chewy inside while forming a slight crust on top.
- 3/4 cup all-purpose flour (I always use King Arthur!). Flour provides stability to our brownies—but beware: over-mixing can lead to tough textures due to gluten development so handle it gently! King Arthur flour is my go-to because its consistent quality guarantees perfect results every time.
- 9 oz cream cheese (room temperature). Ahh, cream cheese—the heart of our swirls! Its creamy texture contrasts beautifully against the dense brownie base while adding that signature tanginess characteristic of red velvet desserts. Ensure it’s softened properly so we can whip it up smoothly without lumps later on.
- 3 tbsp sugar (for cream cheese filling). Just like before with regular sugar—the sweetness balances out cream cheese’s natural tanginess while enhancing its flavor profile overall—this balance is absolutely paramount!
- 1/2 tsp vanilla (for cream cheese filling) again adds depth here too; using pure extract brings out aromatic notes which further elevate your final product.
- 1 egg yolk rounds out our cream cheese mixture beautifully by adding richness—this little addition makes such a difference when striving for lusciousness!
Equipment You’ll Need:
Before diving into preparation mode, let’s gather our trusty tools! Having the right equipment isn’t just about convenience; it transforms your time in the kitchen from daunting to delightful by making every step smoother and more enjoyable.
- Mixing bowls – A good set of mixing bowls will serve as your canvas throughout this culinary adventure! Opt for glass or stainless steel rather than plastic as they hold temperature better—especially important when creaming butter which requires some elbow grease!
- Electric mixer (handheld or stand) – This little powerhouse saves you energy during mixing sessions by effortlessly blending ingredients together until light and fluffy—a vital step if we want those airy textures!
- Rubber spatula – You’ll want one handy for scraping down sides of bowls ensuring nothing goes unnoticed during mixing sessions—every ounce counts here so don’t leave anything behind!
- Measuring cups & spoons – Precision is key in baking—trust me on this! Invest in good-quality measuring tools so everything remains accurate within recipes allowing flavors shine through harmoniously without surprises later down line…
Preparing the Homemade Red Velvet Brownie Bites
Step 1: Creaming Butter & Sugar
Let’s start by preheating your oven to 350°F (175°C) while we prepare ourselves mentally for what lies ahead—the joy of creating something divine! Begin by grabbing your mixing bowl along with softened unsalted butter and granulated sugar—we’re going to cream these two together until pale yellow and fluffy—a process known as creaming which introduces air into our mixture creating lightness throughout every bite later on! This should take about 3–5 minutes at medium speed if using an electric mixer—it feels like magic watching ingredients transform right before your eyes! Remember not rush this step; patience pays off big time here as properly creamed mixtures yield fluffier results down line…
Step 2: Incorporating Eggs & Flavorings
Now comes another exciting phase where we’ll add eggs one at a time followed closely by vanilla extract—to keep things interesting—instead mix until fully incorporated between each egg addition—you’ll notice everything coming together beautifully as colors deepen further thanks largely due incorporation flavorful elements like vanilla too… Afterward allow mixture rest briefly whilst we sift dry ingredients together separately—that includes cocoa powder alongside flour—this ensures no lumps remain which would compromise texture later down road…
Step 3: Combining Dry Ingredients
Once your dry ingredients are sifted neatly over top creamy mixture introduce them slowly while folding gently using rubber spatula—we don’t want deflate those precious air pockets created earlier remember? Gently fold until combined reaching glorious consistency resembling thick cake batter—it should feel luxurious under spoon’s weight almost begging you dive right in…but resist temptation just yet ‘cause we need finish off final touches first before indulging ourselves fully…
Step 4: Preparing Cream Cheese Swirl
For next act grab another bowl where softened cream cheese awaits patiently along side additional sugar alongside vanilla—not forgetting egg yolk either—whisk everything vigorously until smooth glossy finish emerges akin silk fabric beneath fingertips… Don’t be alarmed if slightly thicker than expected—you’ll soon see why once incorporated within main mix creating heavenly contrast between rich fudgy base against bright creamy accents twirling through each bite…
Stay tuned as we continue crafting these delightful Homemade Red Velvet Brownie Bites together—I promise you won’t regret spending quality time working through each stage leading up gratifying end result showcasing beautiful balance between flavors & textures awaiting discovery right inside oven shortly!
Step 5: Creaming the Butter and Sugar
Now, let’s dive into the heart of our brownie bites—creaming the butter and sugar. In a large mixing bowl, combine your nine tablespoons of unsalted Kerrygold butter with the one and a quarter cups of sugar. At this stage, I want you to feel that excitement bubbling inside you because this step is crucial—it’s where our brownies will begin to develop that rich structure and delightful sweetness. Using either a hand mixer or stand mixer fitted with a paddle attachment (trust me, it’s worth the investment), beat these two ingredients together on medium speed for about three to five minutes until they become light and fluffy. You’ll notice that the mixture will lighten in color as air gets incorporated; this is exactly what we want!
Why is this process so important? Well, creaming butter and sugar creates tiny air pockets that help your brownies rise slightly while baking, giving them that perfect soft texture. If you skip this step or rush through it, you might end up with dense, sad brownie bites instead of the luxuriously fluffy treats we’re aiming for. So take your time here—don’t rush! Once everything looks beautifully blended and airy, it’s time to add in our cocoa powder, vanilla extract, red food coloring, salt, espresso powder, vinegar, and eggs.
Step 6: Adding Cocoa Powder and Eggs
With your fluffy butter-sugar mixture ready to go, it’s time to introduce the cocoa powder and eggs into this enchanting mix. First things first—sift your quarter cup of cocoa powder into the bowl to avoid any lumps that could disrupt the silky texture we’re aiming for. Gently fold in the cocoa using a spatula or wooden spoon; this will keep your mixture aerated while blending flavors together seamlessly. As you do this, take a moment to inhale deeply—the aroma is simply intoxicating!
Next comes the pièce de résistance: add in one tablespoon of red food coloring along with half a teaspoon of vanilla extract. The vibrant hue is what makes red velvet so captivating; I promise you’ll be amazed at how stunning these brownie bites will look once baked! After incorporating these ingredients well, it’s time to crack in two large eggs. Beat them lightly before adding them to ensure they mix uniformly without overworking the batter—overmixing can lead to tough brownies! Stir until just combined; small streaks of flour are okay because we’ll address those shortly.
Step 7: The Flour Power
Now comes the moment when we bring it all together with flour! Gradually sift in three-quarters of a cup of King Arthur all-purpose flour into your wet mixture. This step requires a gentle touch—using a spatula or wooden spoon again—fold in the flour until just combined. You want to see no dry flour left in sight but don’t overdo it; overmixing here can lead to chewy rather than fudgy brownie bites. Imagine folding in those luscious red hues as they meld with cocoa—the anticipation builds as you start thinking about that first bite!
Trust me on this: when making brownies, keeping some lumps in your batter is perfectly normal; they’re not meant to be perfectly smooth like cake batter. This little bit of texture will result in an absolutely scrumptious outcome once baked! And oh boy, just think about how delectable those brownie bites are going to be with that cream cheese swirl on top—you’re already halfway there!
Step 8: Preparing the Cream Cheese Swirl
While our brownie batter rests for just a moment (yes, patience is key here!), let’s prepare our cream cheese swirl because every great dessert deserves its show-stopping element! In another mixing bowl, beat together nine ounces of room-temperature cream cheese with three tablespoons of sugar until creamy and well-blended. The softness of the cream cheese combined with sugar creates an utterly intoxicating filling that contrasts beautifully with our rich brownie base. Take care not to overbeat here; we want a smooth consistency but not too airy since we need it to hold its shape when swirled.
Incorporate half a teaspoon of vanilla extract along with one egg yolk into the cream cheese mixture; these additions not only enhance flavor but also contribute moisture and richness which will elevate each bite into something profoundly satisfying. Continue mixing until everything is perfectly combined—you should have a luscious cream cheese filling that’s calling out for incorporation! Don’t skip tasting at this point—I guarantee you’ll find it hard not to sneak a spoonful!
And there you have it—a full journey from mixing bowls filled with simple ingredients turning into something extraordinary: Homemade Red Velvet Brownie Bites that will leave everyone awestruck at how deliciously indulgent yet simple they are! I promise you’ll cherish sharing these delights with friends or family—or maybe just saving some all for yourself because hey…you deserve it too! Enjoy every single luscious morsel as they melt away blissfully within your mouth—happy baking!
Storage and Enjoyment Tips for Your Homemade Red Velvet Brownie Bites
Now that you’ve whipped up these delightful Homemade Red Velvet Brownie Bites, it’s time to revel in their lusciousness! But wait—before you dive in, let’s chat about how to store these little gems to ensure they remain as fresh and delicious as the moment they left your oven. It’s almost like a little secret—just think of it as giving your brownies a cozy place to relax when you’re not indulging in their creamy, chocolatey goodness.
Storing Leftover Homemade Red Velvet Brownie Bites
To keep your brownie bites fresh and fabulous, I recommend storing them in an airtight container. This is absolutely paramount because it locks in moisture and flavor while keeping them from drying out. If you’re feeling particularly adventurous, you can even add a slice of bread into the container; this little trick helps maintain that wonderful softness. These delicious bites will stay good for about 3 to 5 days at room temperature, but trust me—you’ll want to enjoy them long before then! The flavors will meld beautifully over time, making each bite a profound experience of rich cocoa mingling with that tangy cream cheese swirl. When you’re ready to indulge again, just pop one in the microwave for about 10 seconds to bring back that freshly-baked warmth, or enjoy them cold for a delightful contrast.
Freezing Homemade Red Velvet Brownie Bites for Later
If you’ve made a batch (or two!) of these brownie bites and want to save some for later—which I totally understand—freezing is an excellent option! Simply allow the brownie bites to cool completely before placing them in a single layer on a baking sheet. Once frozen solid, transfer them to a freezer-safe bag or container. I promise you, they’ll keep wonderfully for up to three months! When you’re ready to enjoy them again, there’s no need to thaw; just pop them straight into the oven at 350°F for about 10 minutes. This convenient method ensures that whenever a craving strikes—whether it’s an afternoon slump or a late-night treat—you have these sweet morsels waiting for you like little treasures tucked away in the freezer.
Homemade Red Velvet Brownie Bites
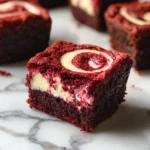
Indulge in the delightful world of Homemade Red Velvet Brownie Bites, where the classic brownie meets a twist of vibrant flavor! These bite-sized treats are perfect for any occasion, boasting a rich cocoa base swirled with tangy cream cheese that elevates them to dessert perfection. The warm, inviting aroma fills your kitchen as they bake, promising a taste sensation that’s both comforting and exciting. Whether you’re celebrating with friends or treating yourself after a long day, these brownie bites are sure to impress. With their striking red color and fudgy texture, they’re not just desserts; they’re an experience to share!
- Prep Time: 15 minutes
- Cook Time: 20 minutes
- Total Time: 35 minutes
- Yield: Approximately 16 servings 1x
- Category: Dessert
- Method: Baking
- Cuisine: American
Ingredients
- 9 tbsp unsalted butter
- 1 1/4 cups sugar
- 1/4 cup cocoa powder (sifted)
- 1/2 tsp vanilla extract
- 1 tbsp red food coloring
- 1/8 tsp salt
- 1/4 tsp espresso powder
- 1/2 tsp vinegar
- 2 large eggs
- 3/4 cup all-purpose flour
- 9 oz cream cheese (room temperature)
- 3 tbsp sugar (for cream cheese filling)
- 1/2 tsp vanilla (for cream cheese filling)
- 1 egg yolk
Instructions
- Preheat the oven to 350°F (175°C) and grease an 8×8 inch baking pan.
- In a mixing bowl, cream together unsalted butter and sugar until light and fluffy.
- Add cocoa powder, vanilla extract, red food coloring, salt, espresso powder, vinegar, and eggs. Mix until combined.
- Gradually fold in all-purpose flour until just incorporated.
- In another bowl, mix cream cheese with sugar, vanilla extract, and egg yolk until smooth.
- Pour half of the brownie batter into the prepared pan. Add dollops of the cream cheese mixture on top. Cover with remaining brownie batter and swirl gently.
- Bake for about 20 minutes or until a toothpick comes out mostly clean.
- Allow cooling before cutting into squares.
Nutrition
- Serving Size: 1 serving
- Calories: 150
- Sugar: 15g
- Sodium: 60mg
- Fat: 8g
- Saturated Fat: 5g
- Unsaturated Fat: 3g
- Trans Fat: 0g
- Carbohydrates: 18g
- Fiber: <1g
- Protein: 2g
- Cholesterol: 35mg